What can we help you with?
How to change the picture of a project?
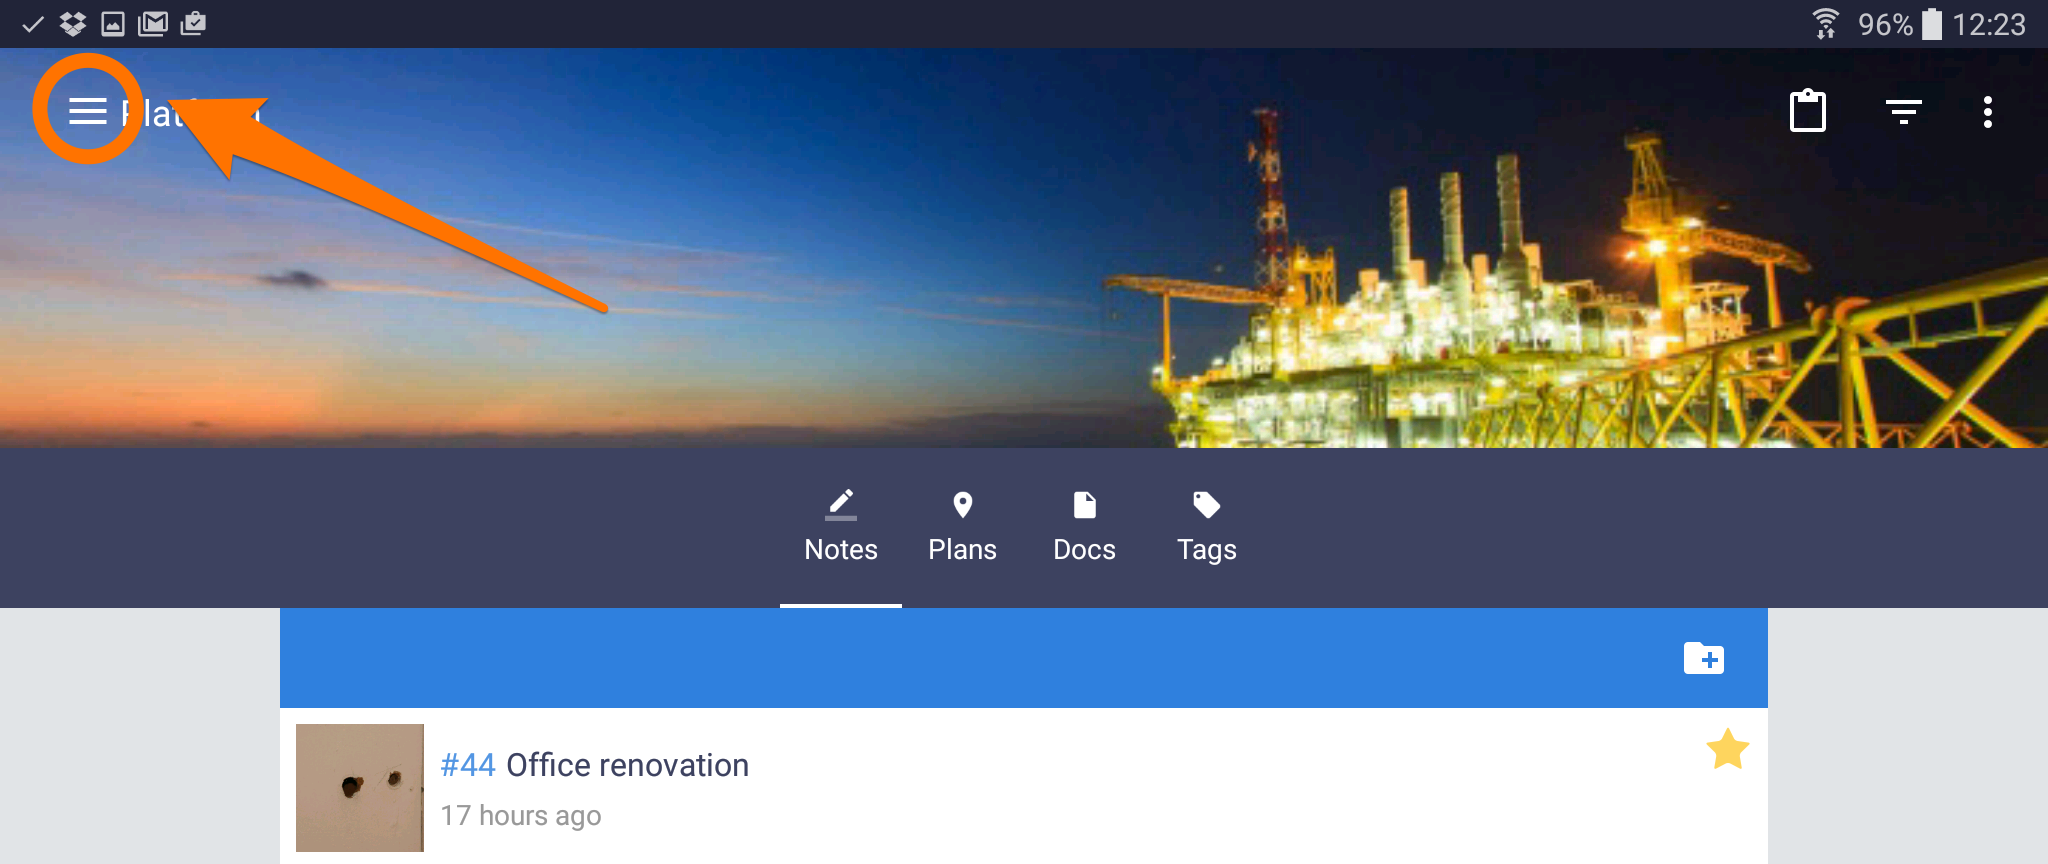
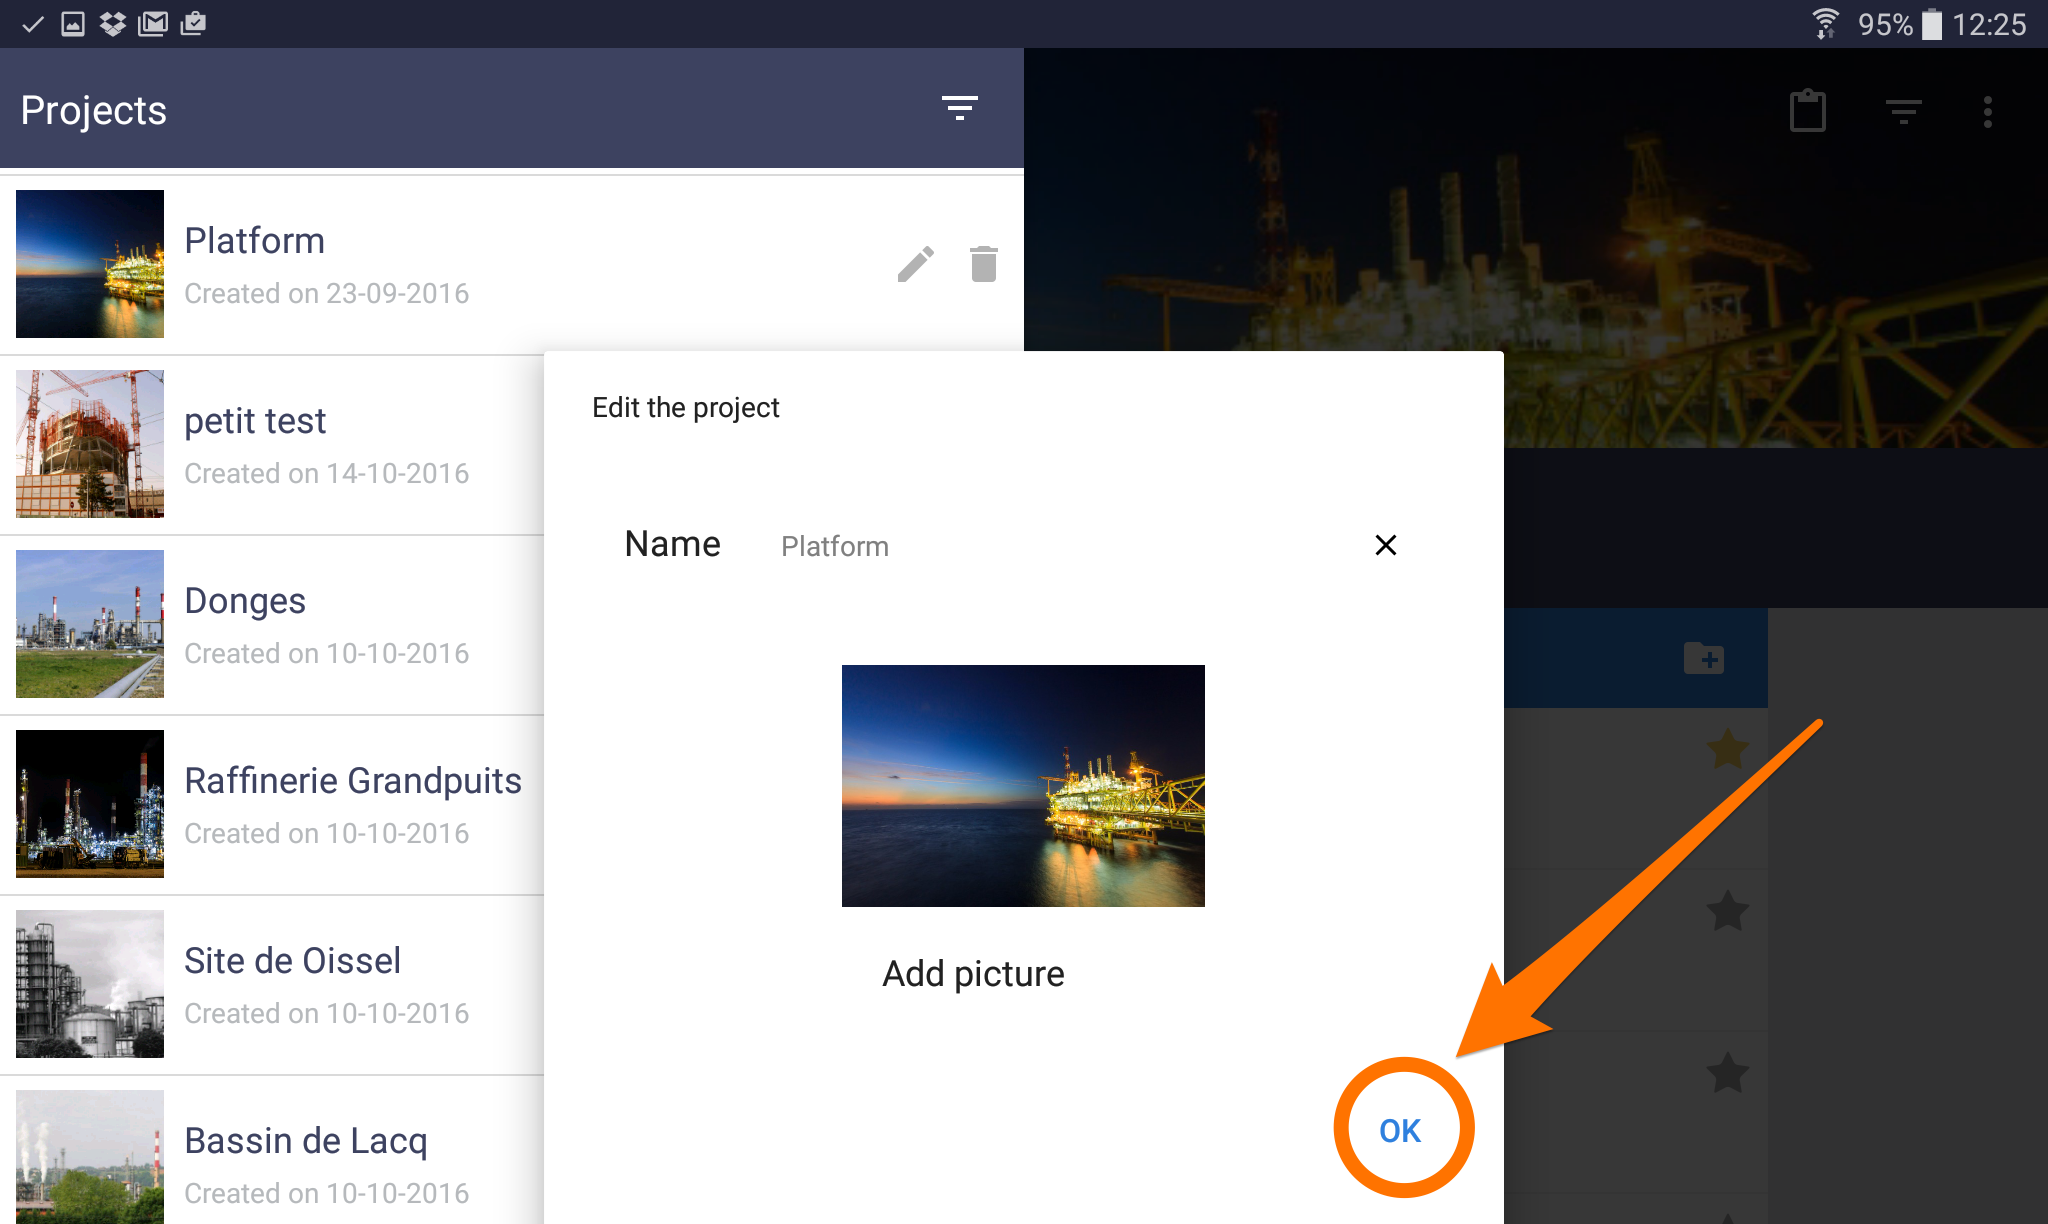
- Tap the “☰” icon on the top left corner of the window
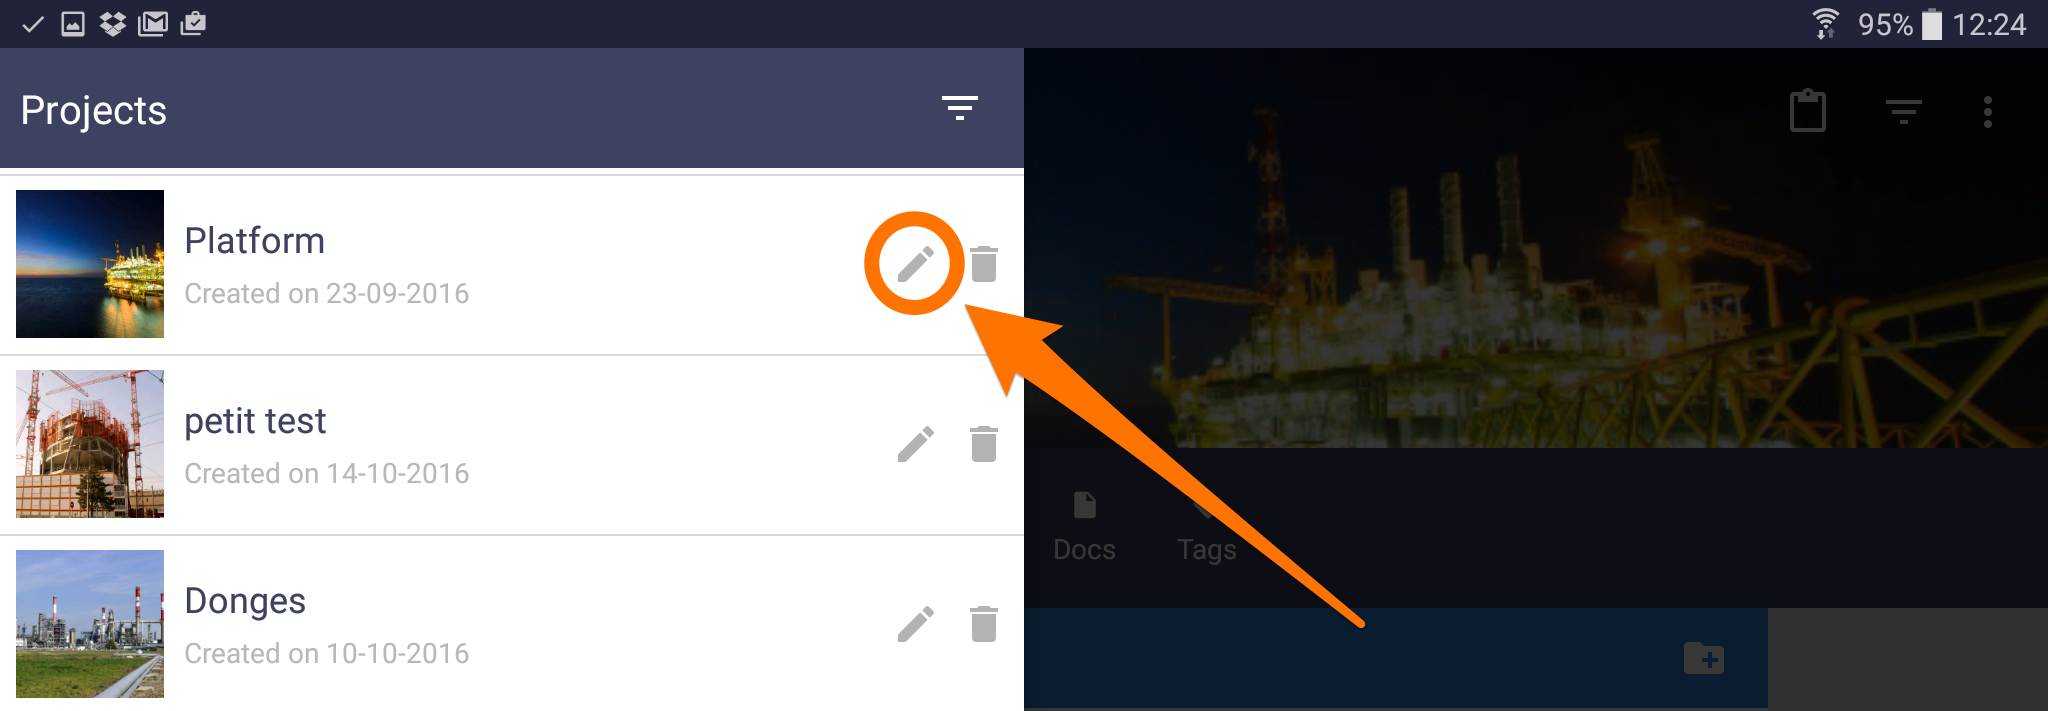
- Select the pencil icon next to the project you want to modify
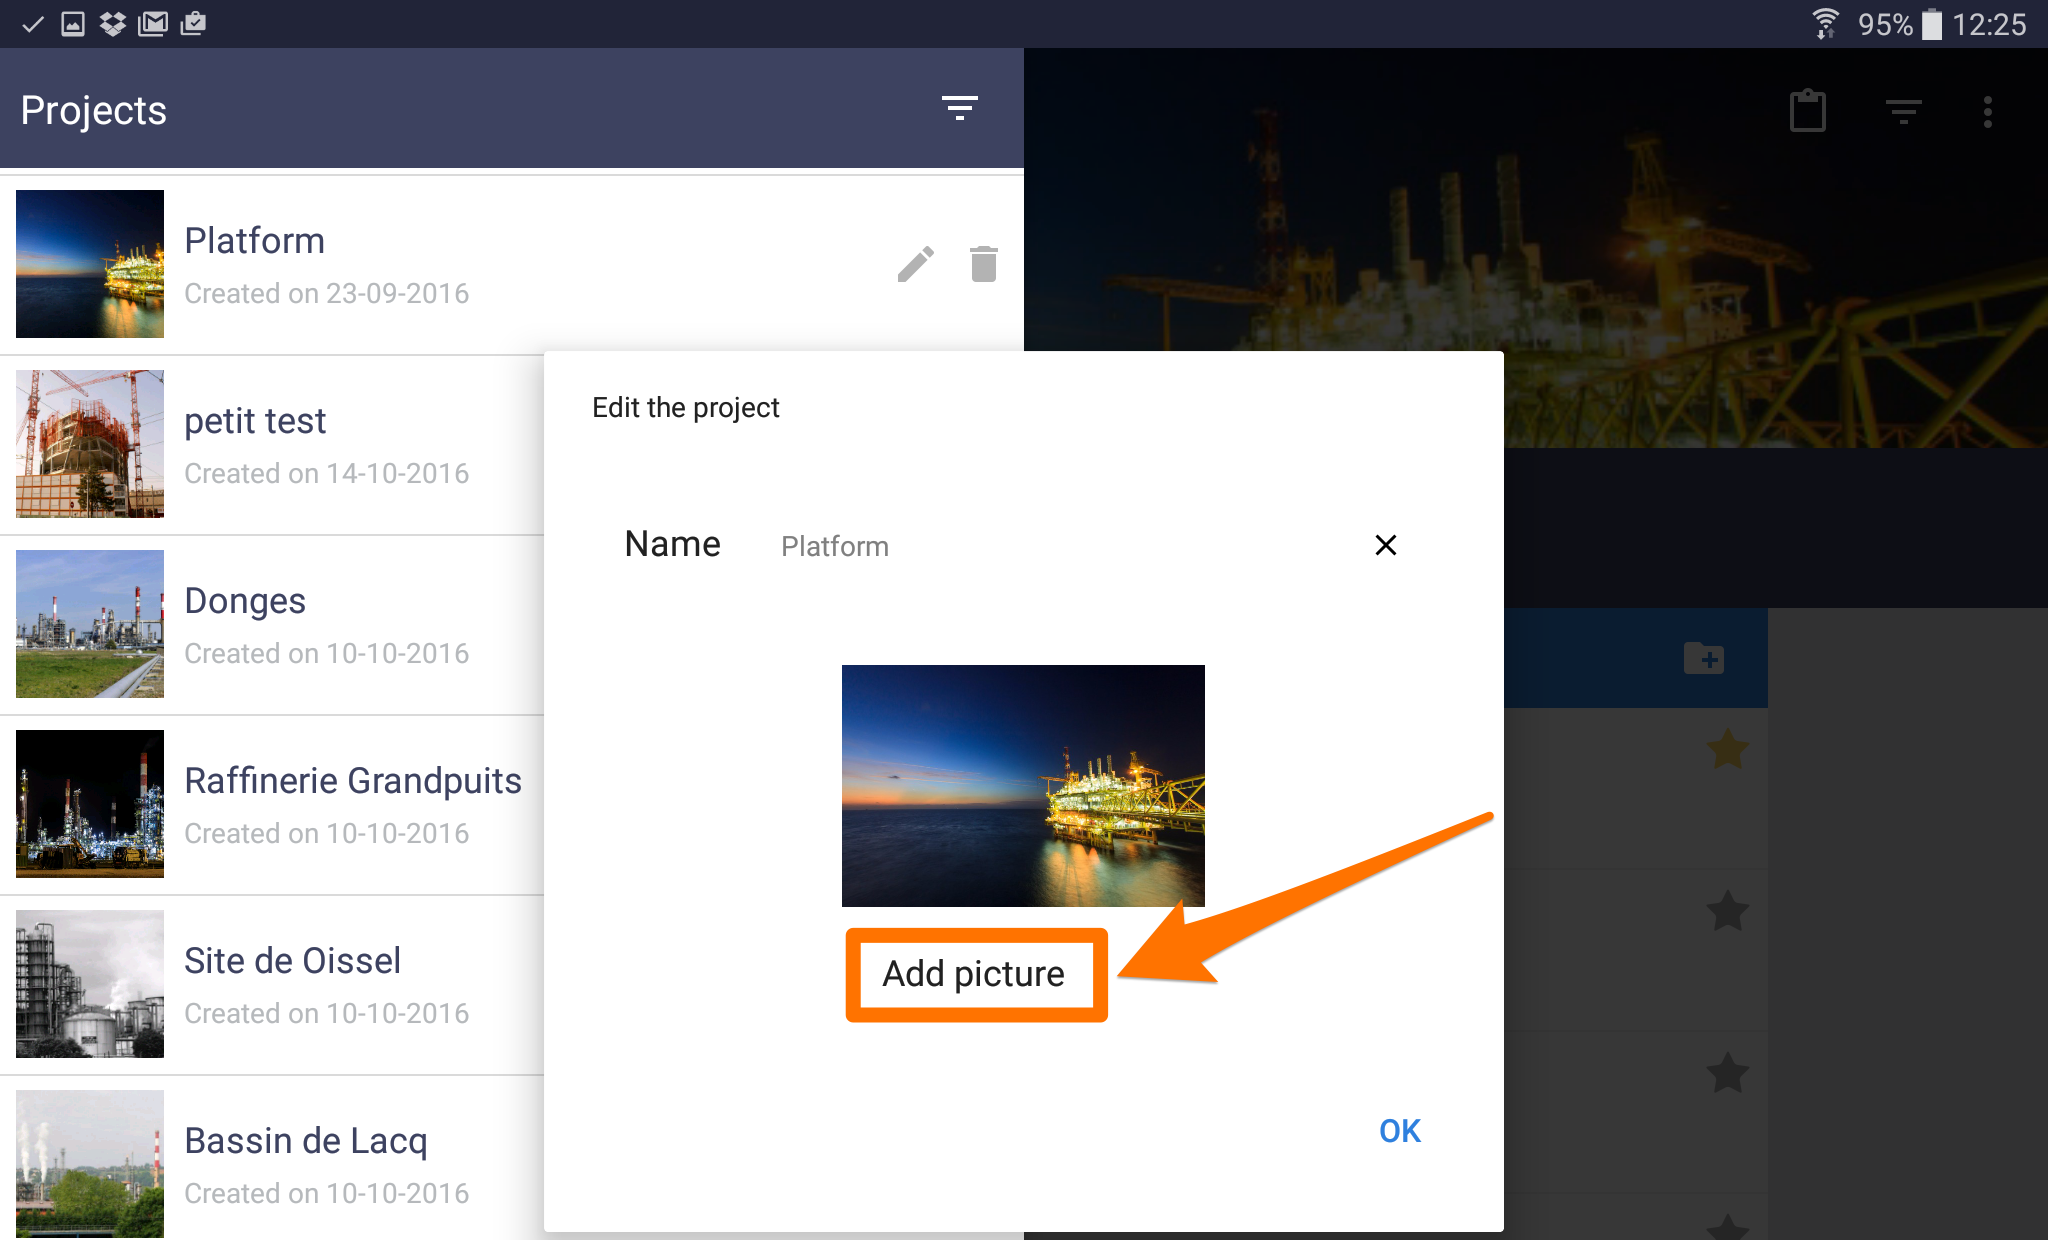
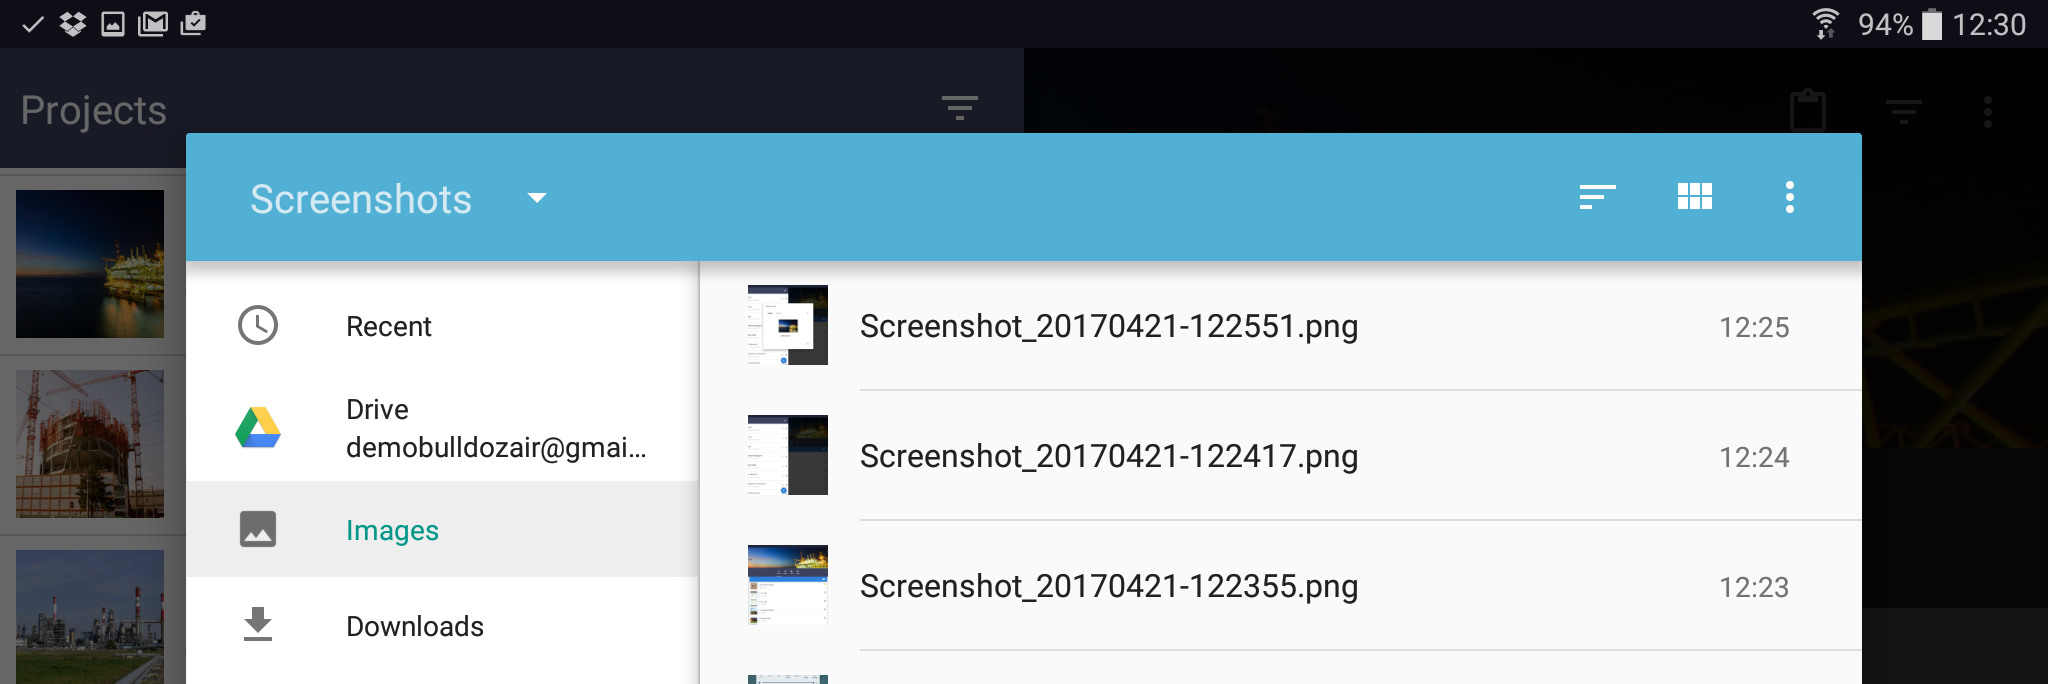
- Tap “Add picture” to change the picture
- Select your picture from the options
- Tap “OK” to finalize
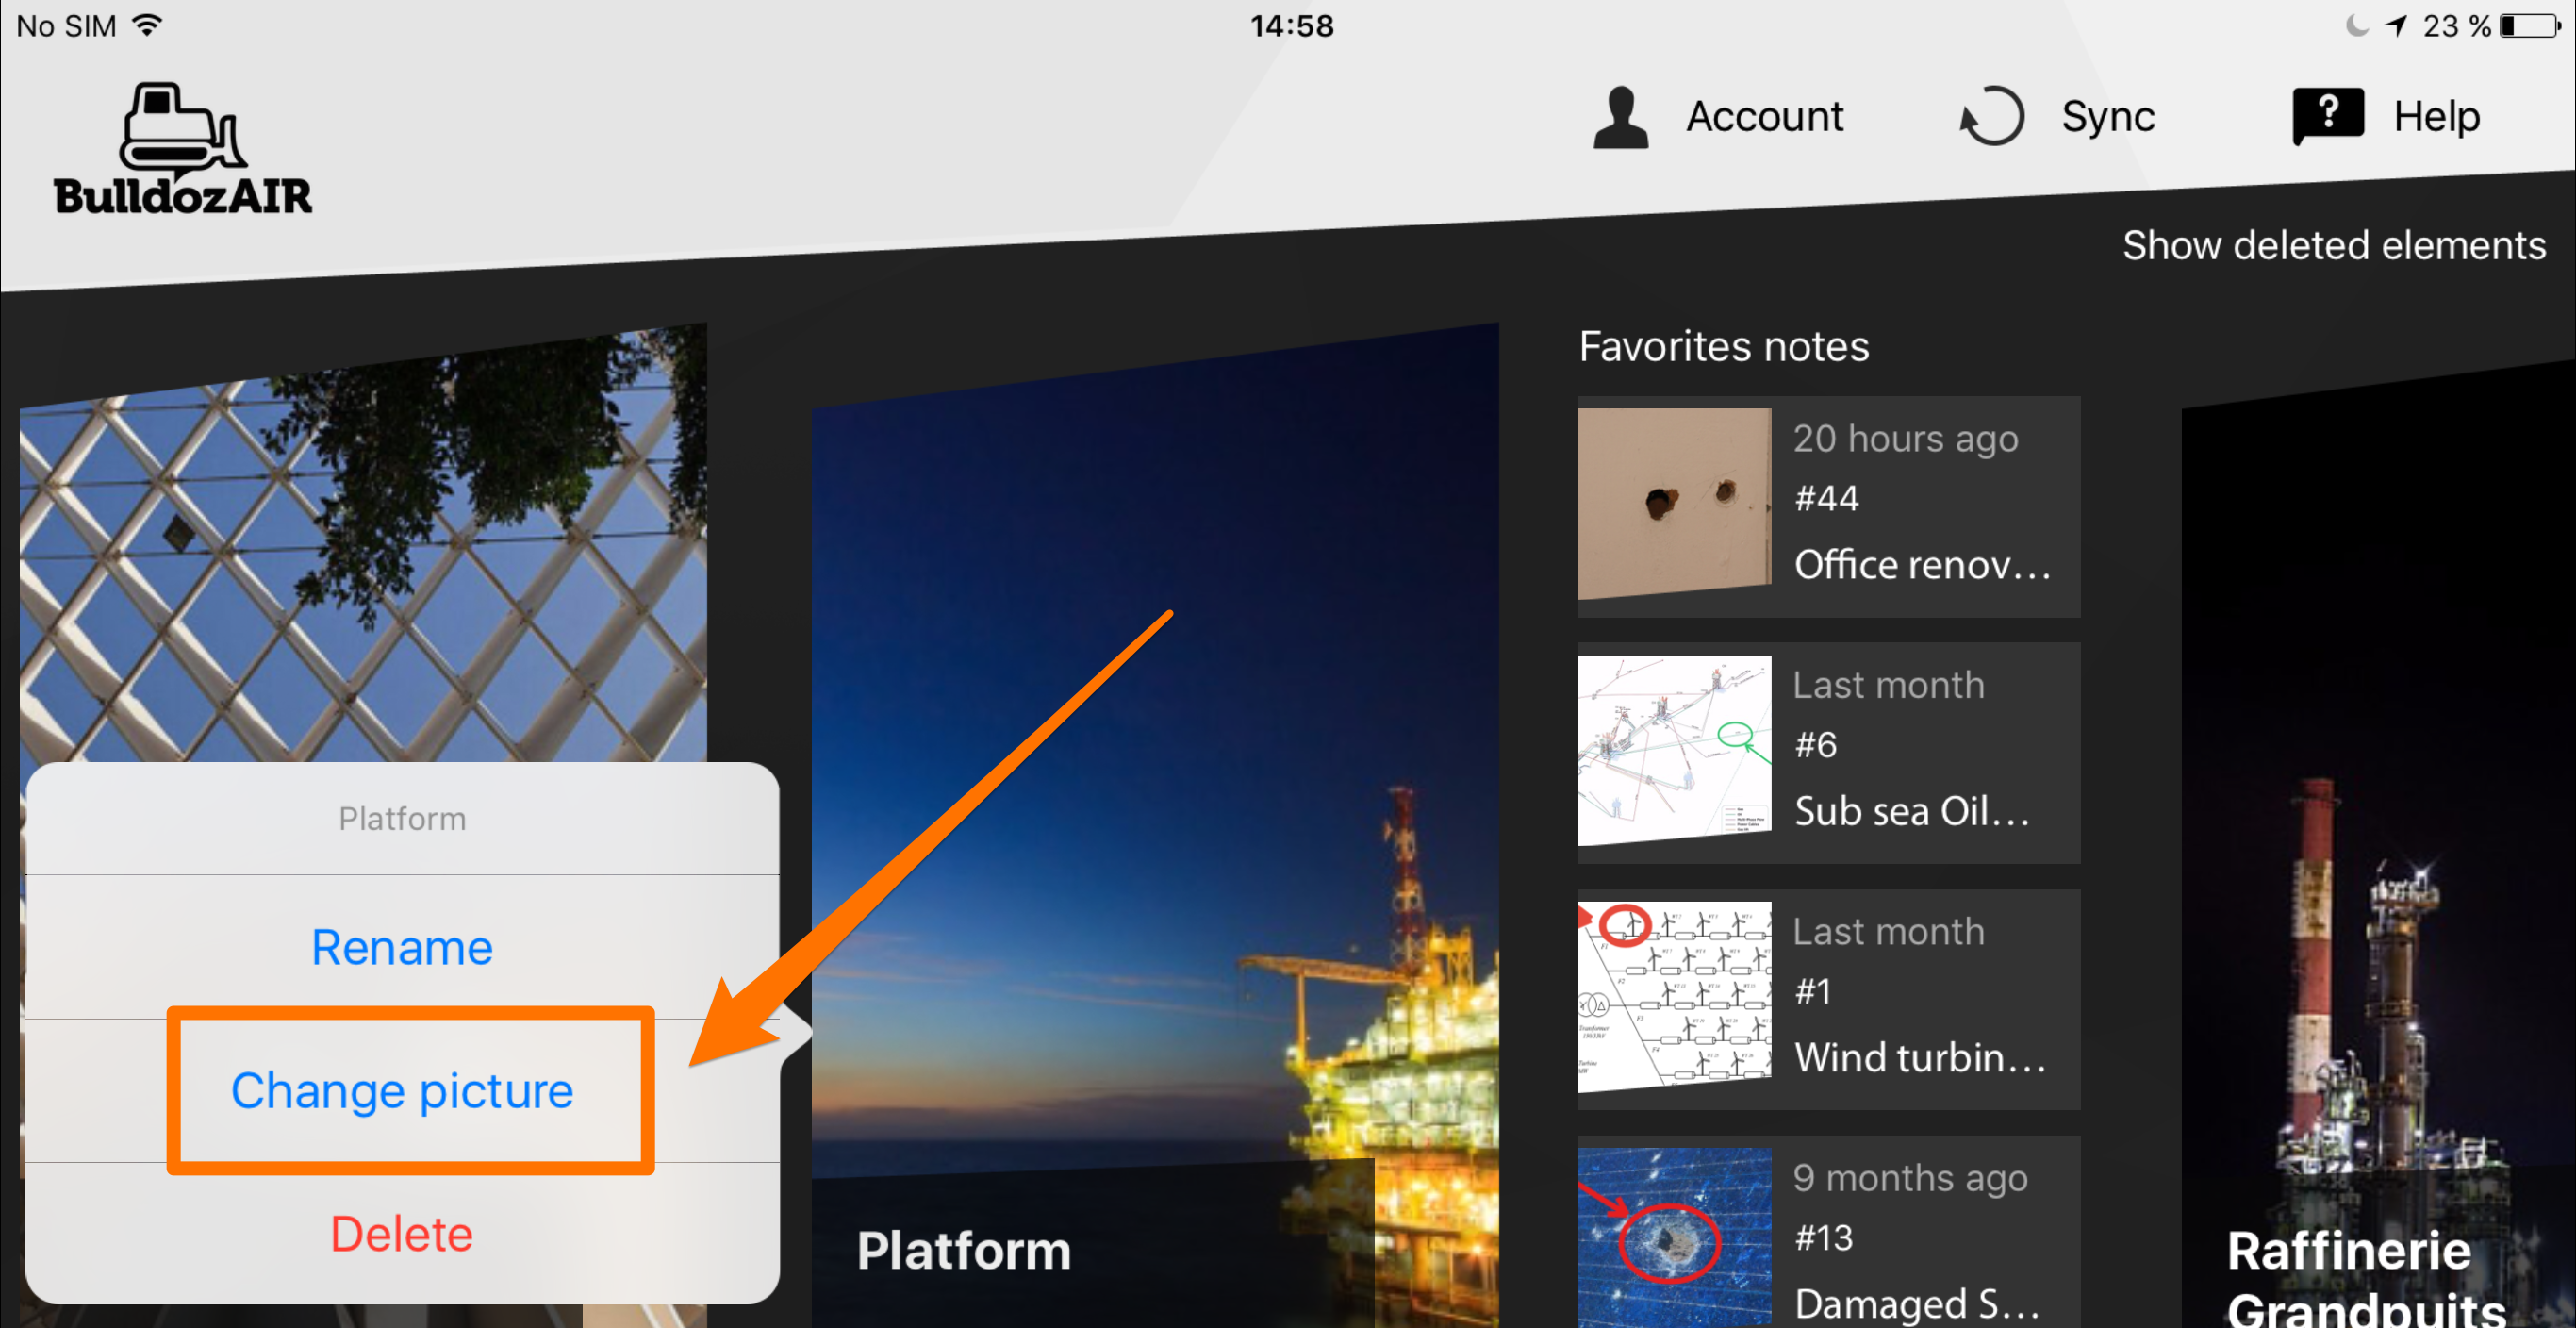
- Go to the main menu
- Press and hold the project you want to modify
- A pop-up menu will appear, select “Change picture”
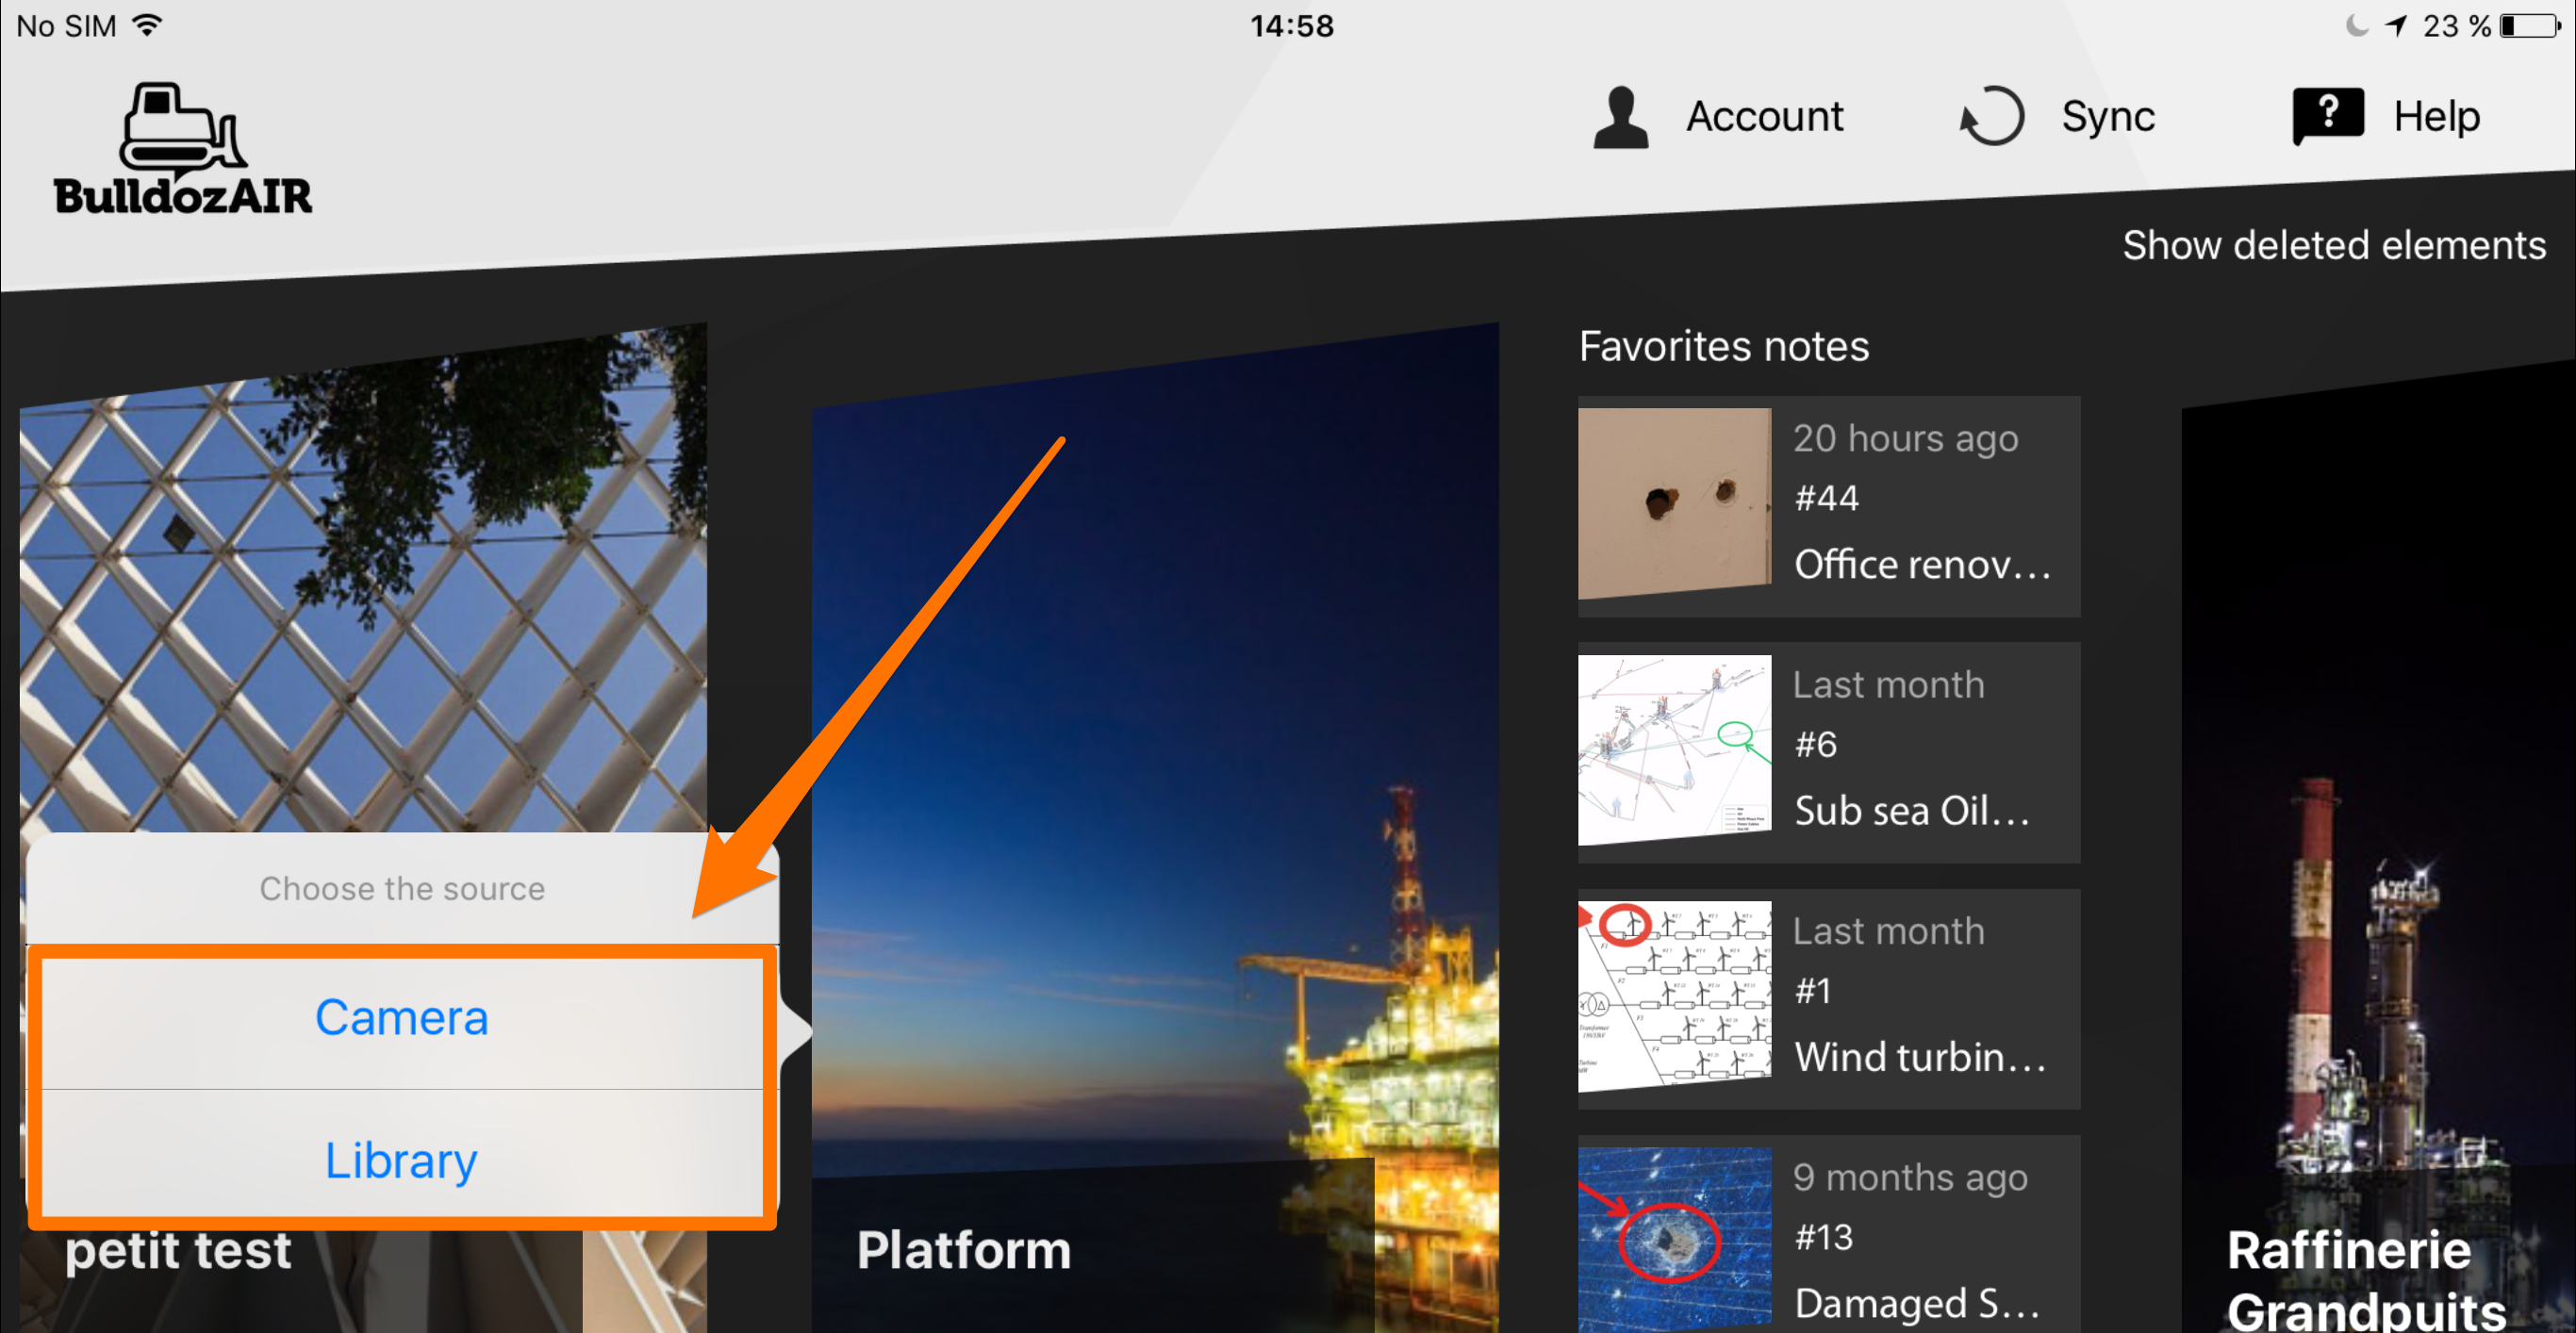
- Select between “Camera” to take a picture or “Library” to add an image from your device
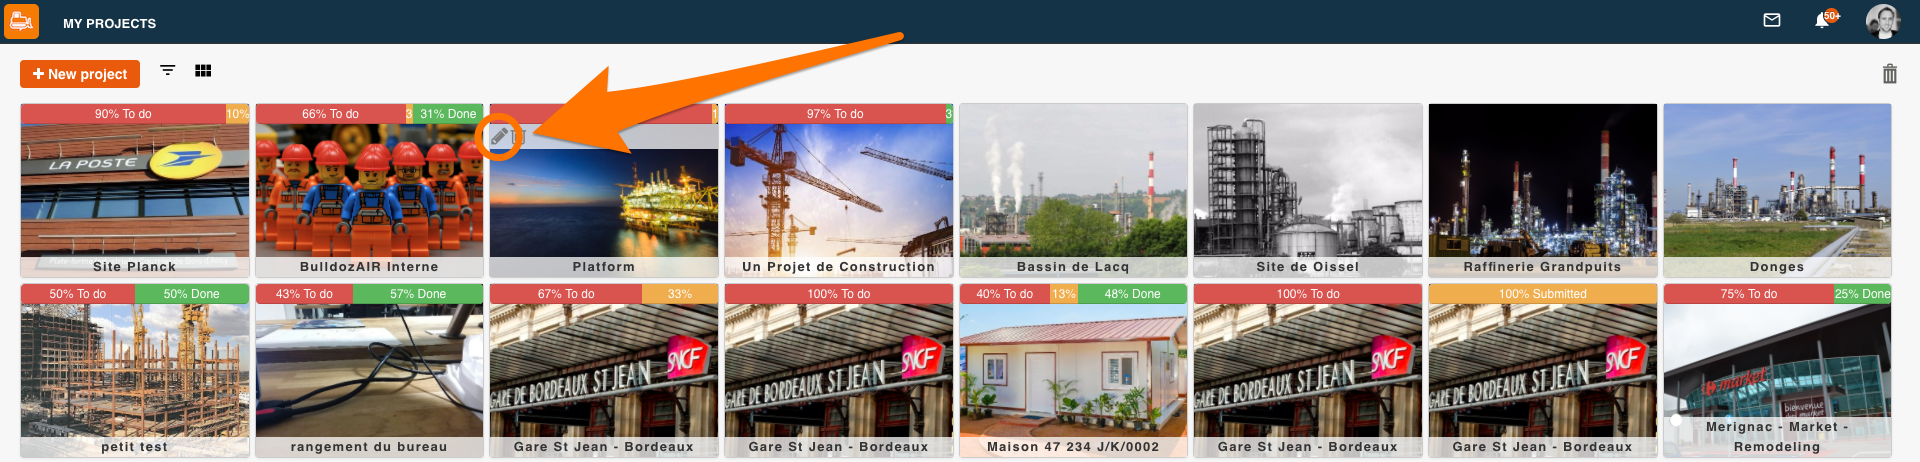
- Go to the main menu
- Go over the project you want to modify
- Click on the pencil icon on the top left corner of the project’s thumbnail
- Select “Choose a file” next to “Project picture”
- Select your new image, then click on “Open”
- Click on “OK” to finalize