What can we help you with?
Create folders in Plans
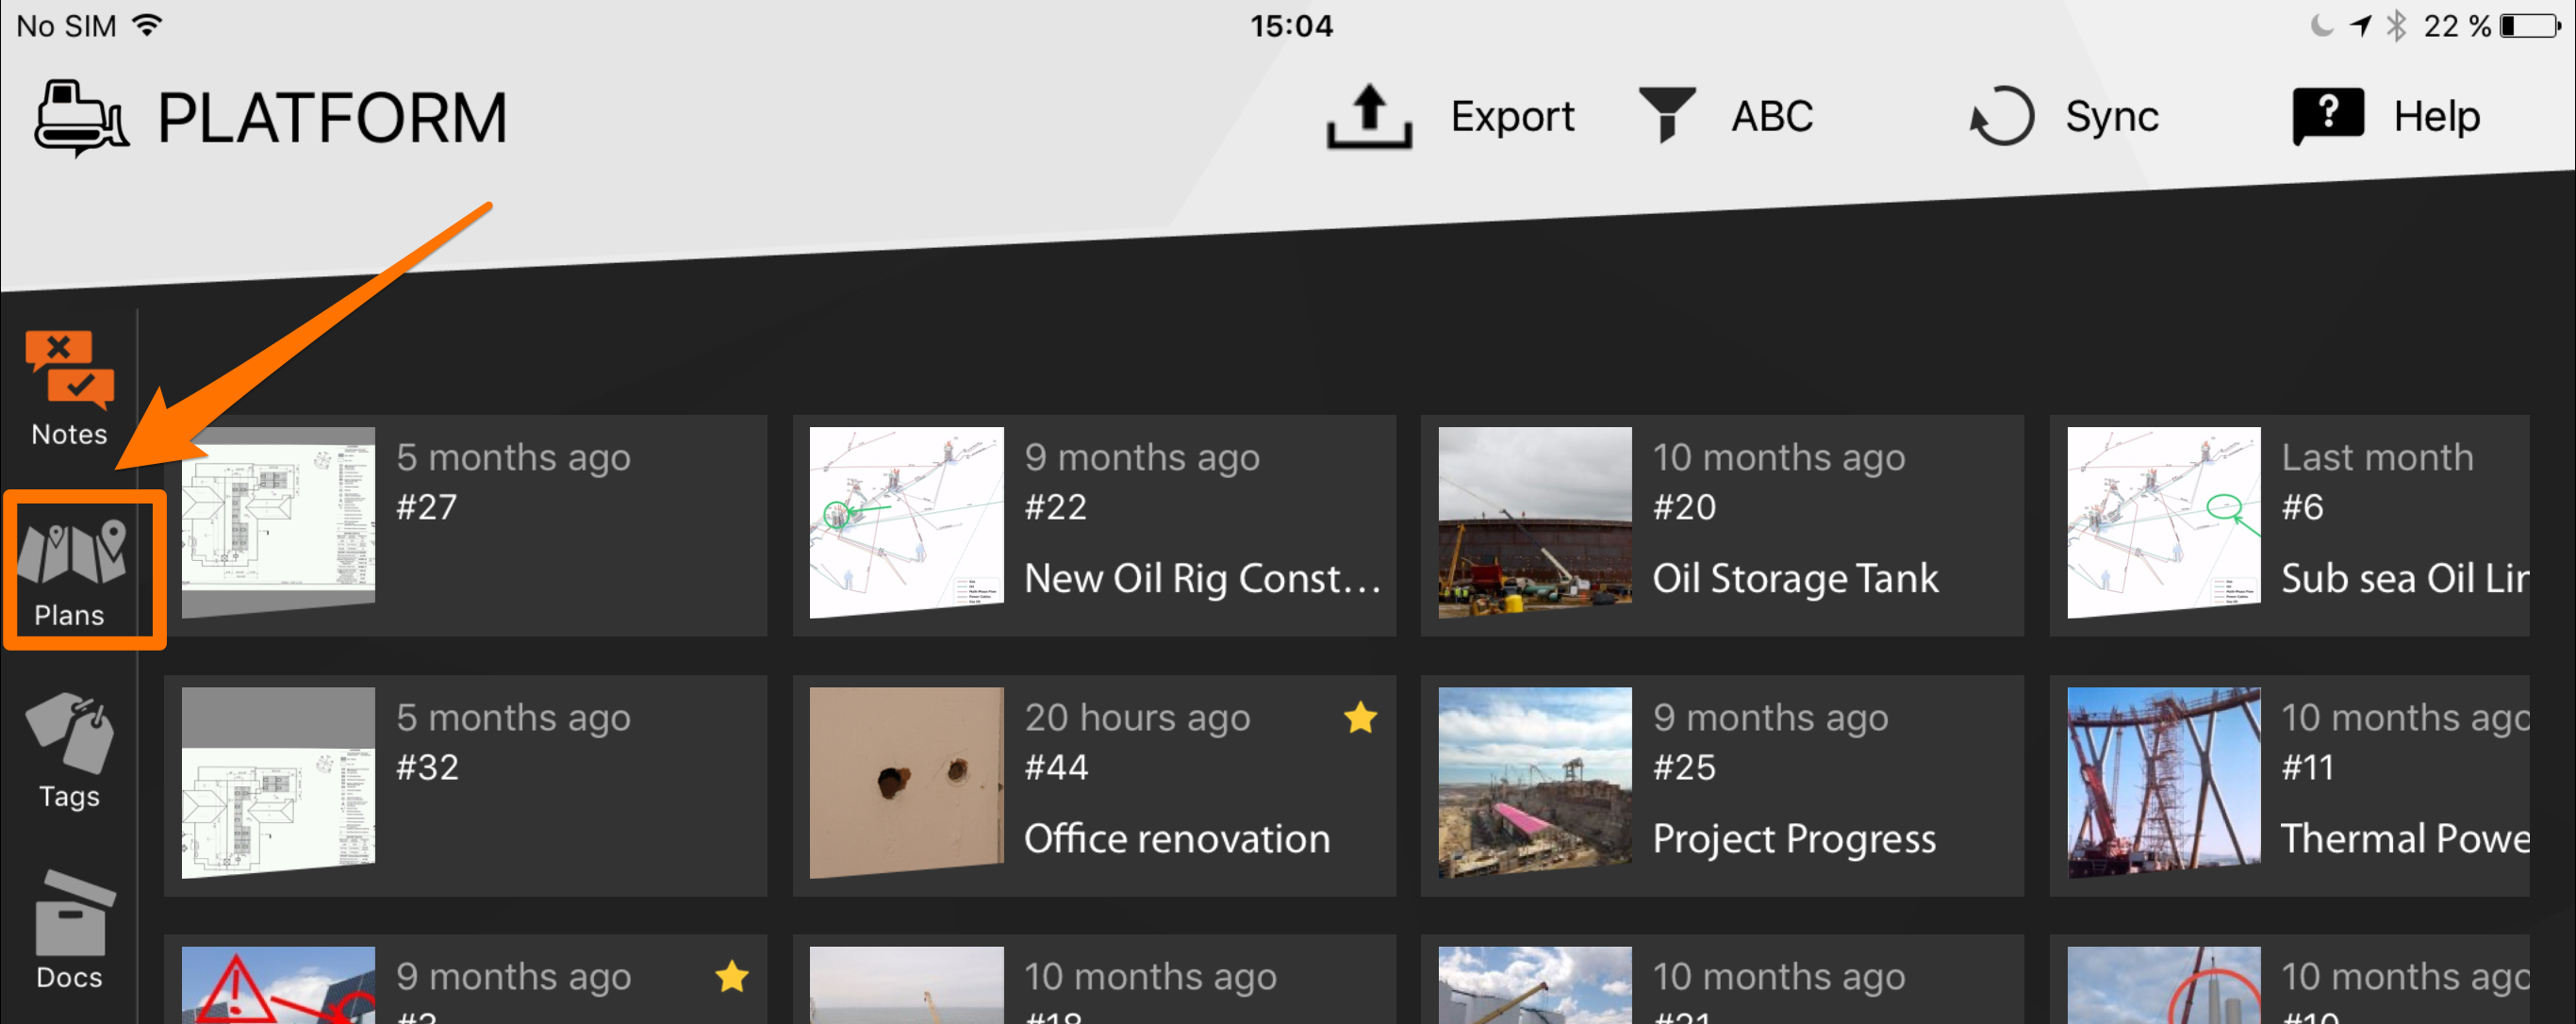
- Go to “Plans” in the toolbar
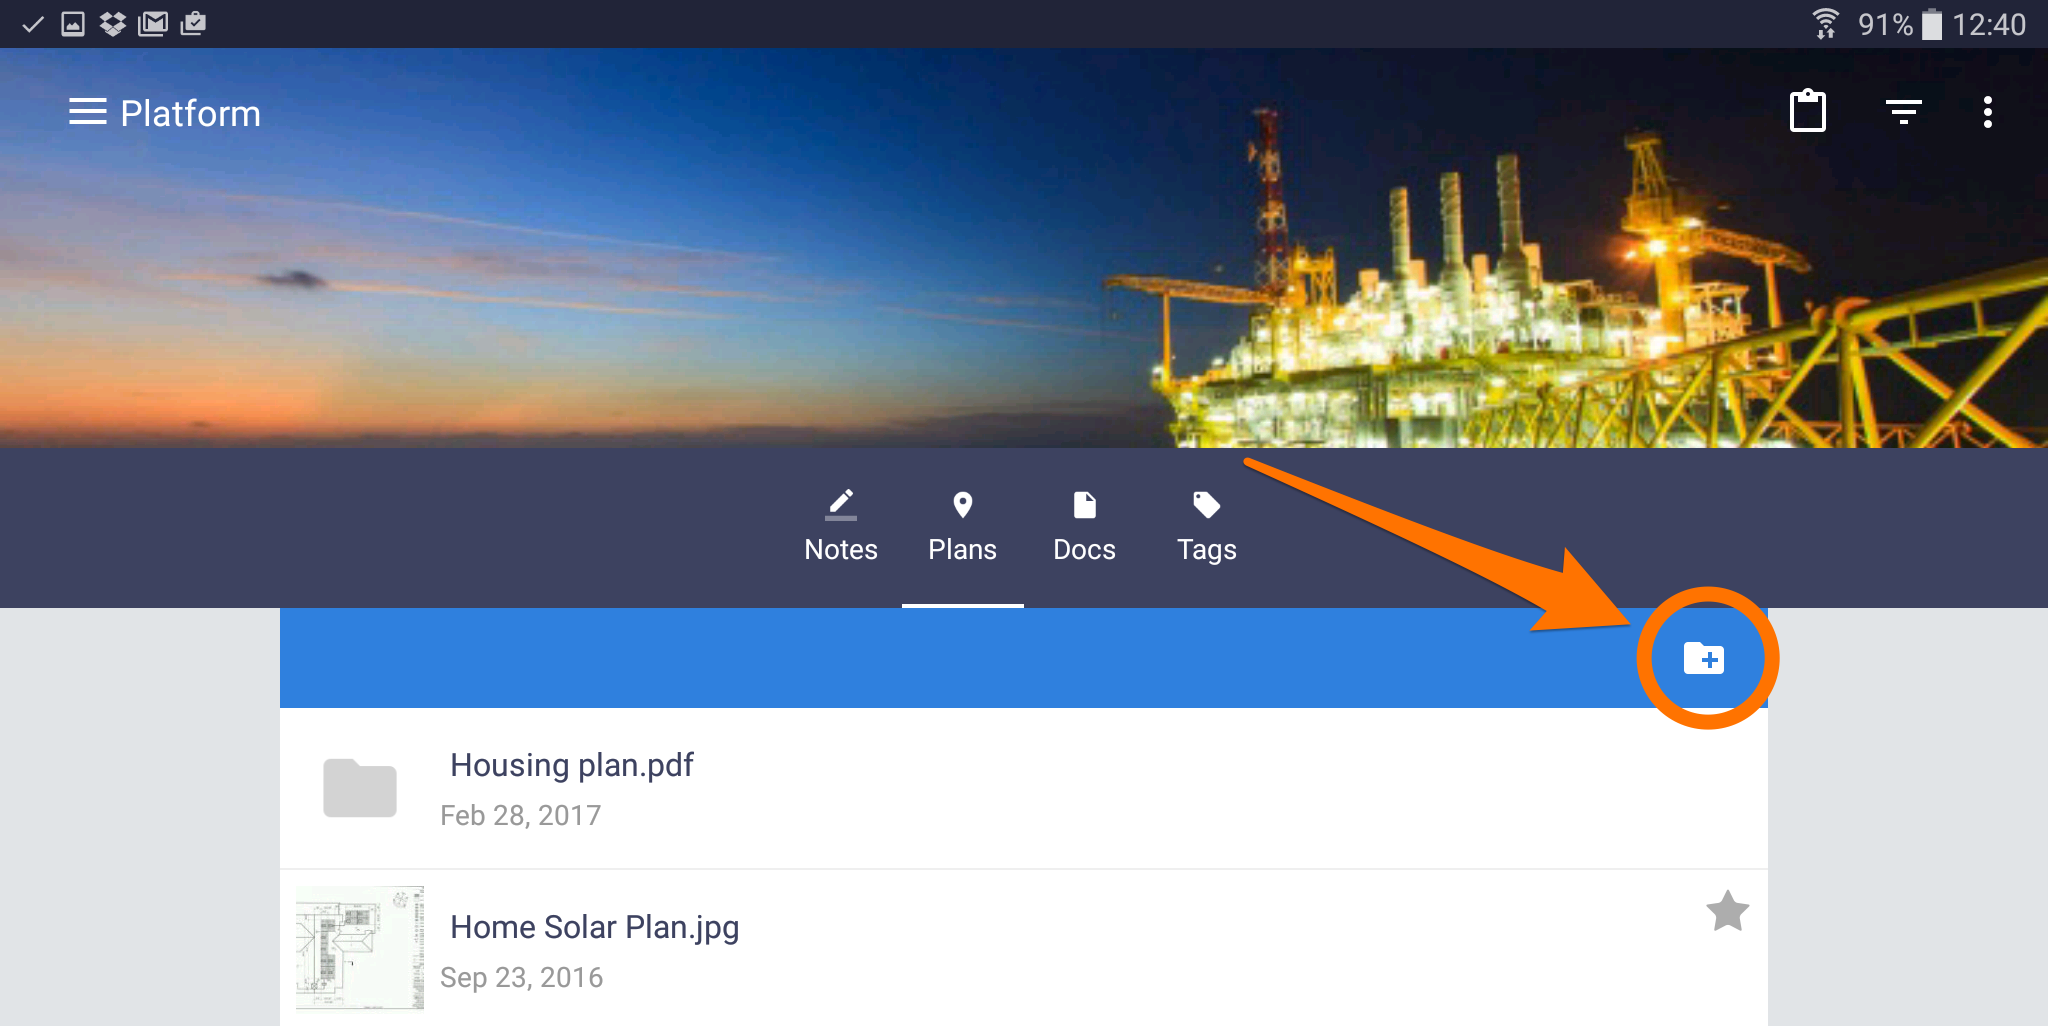
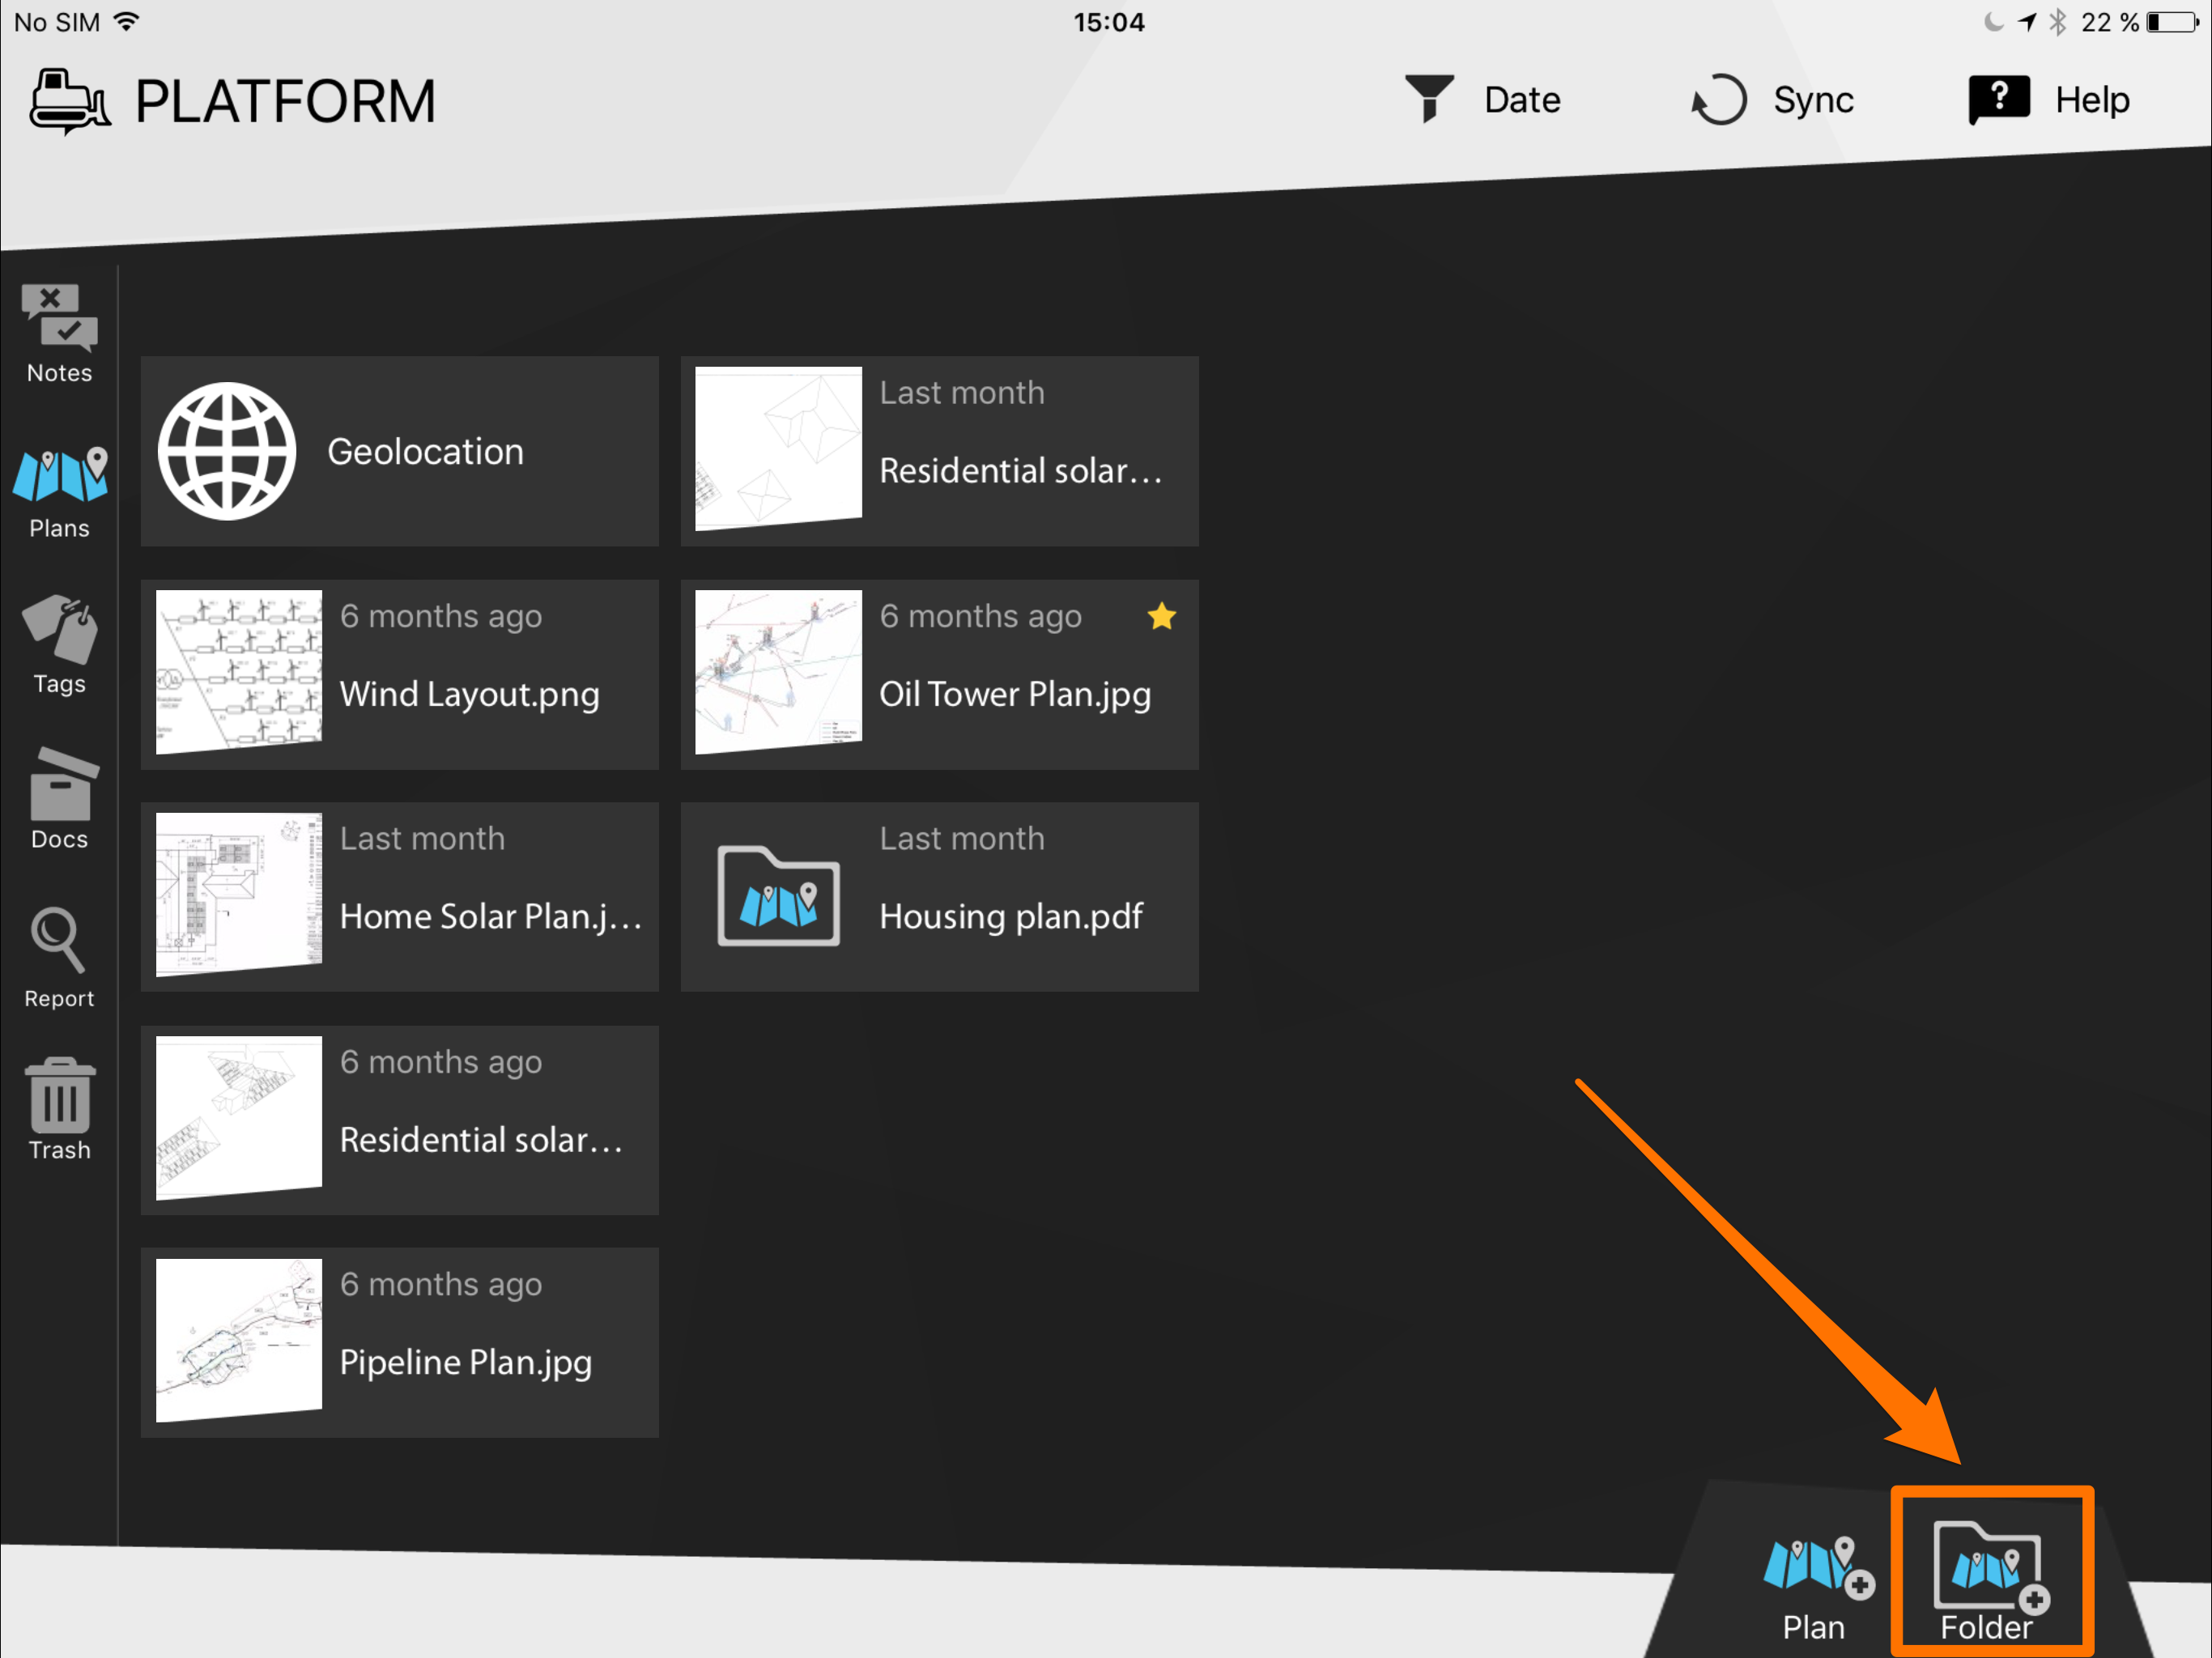
- Tap the folder icon on the right, under the toolbar
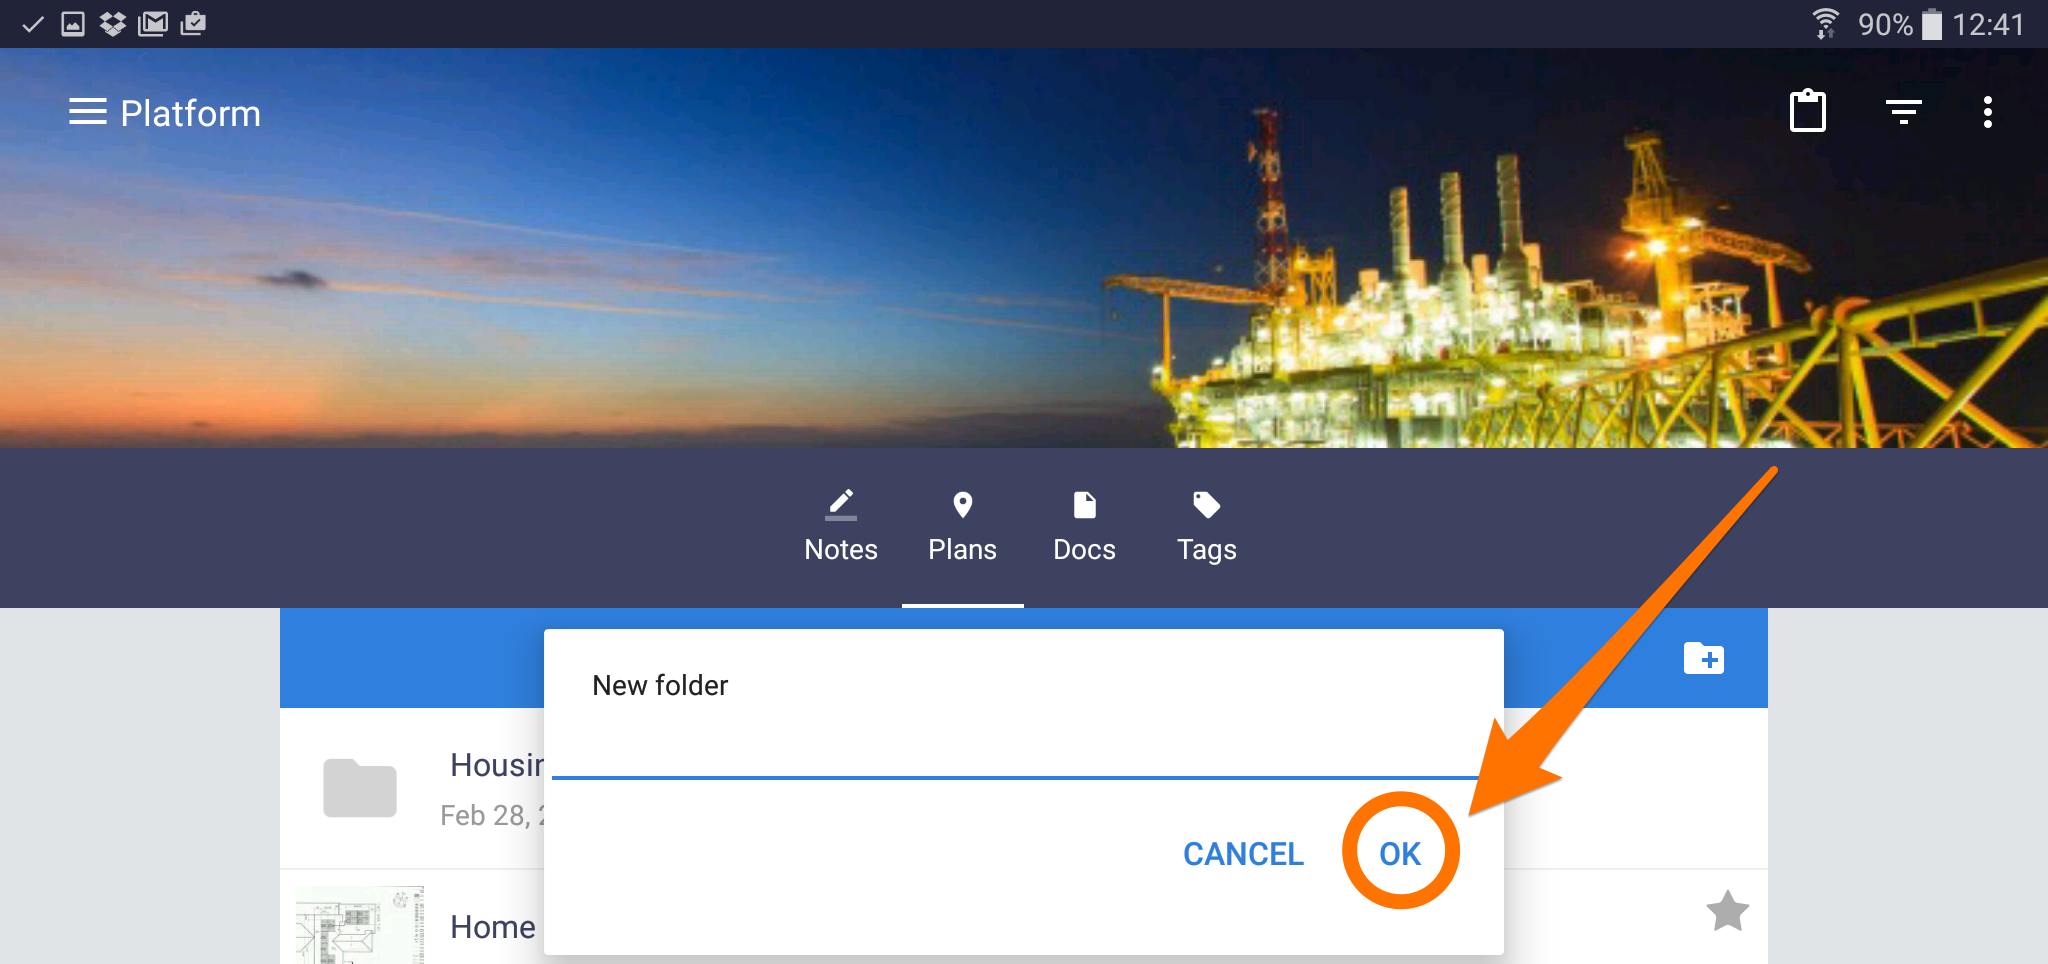
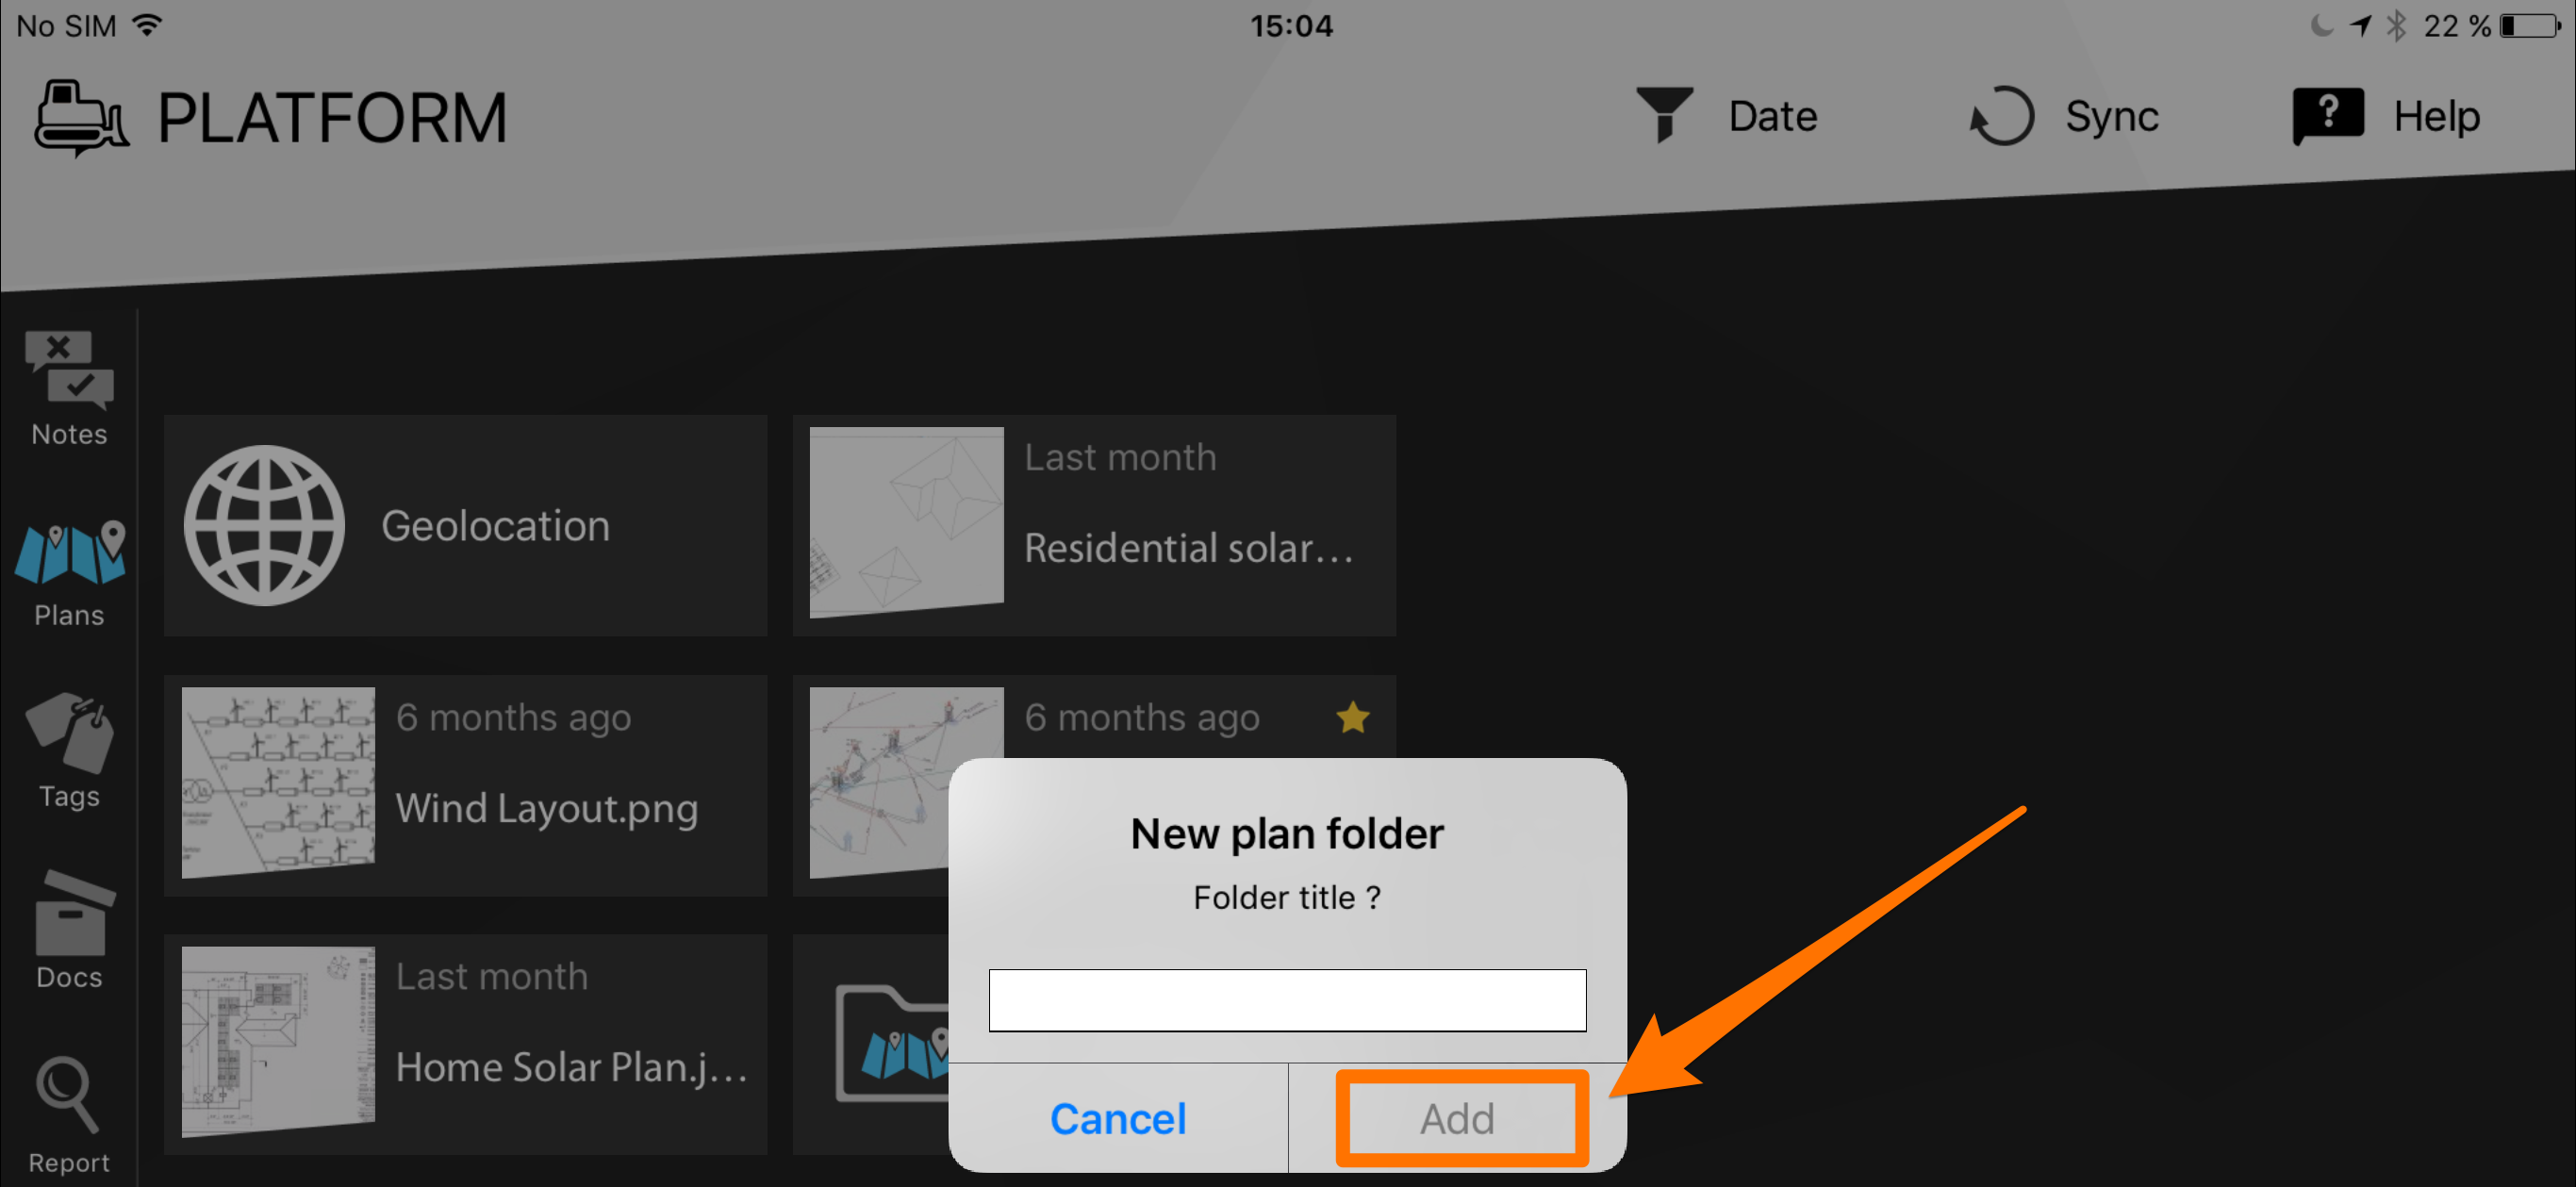
- Type the name of the new folder then select “OK”
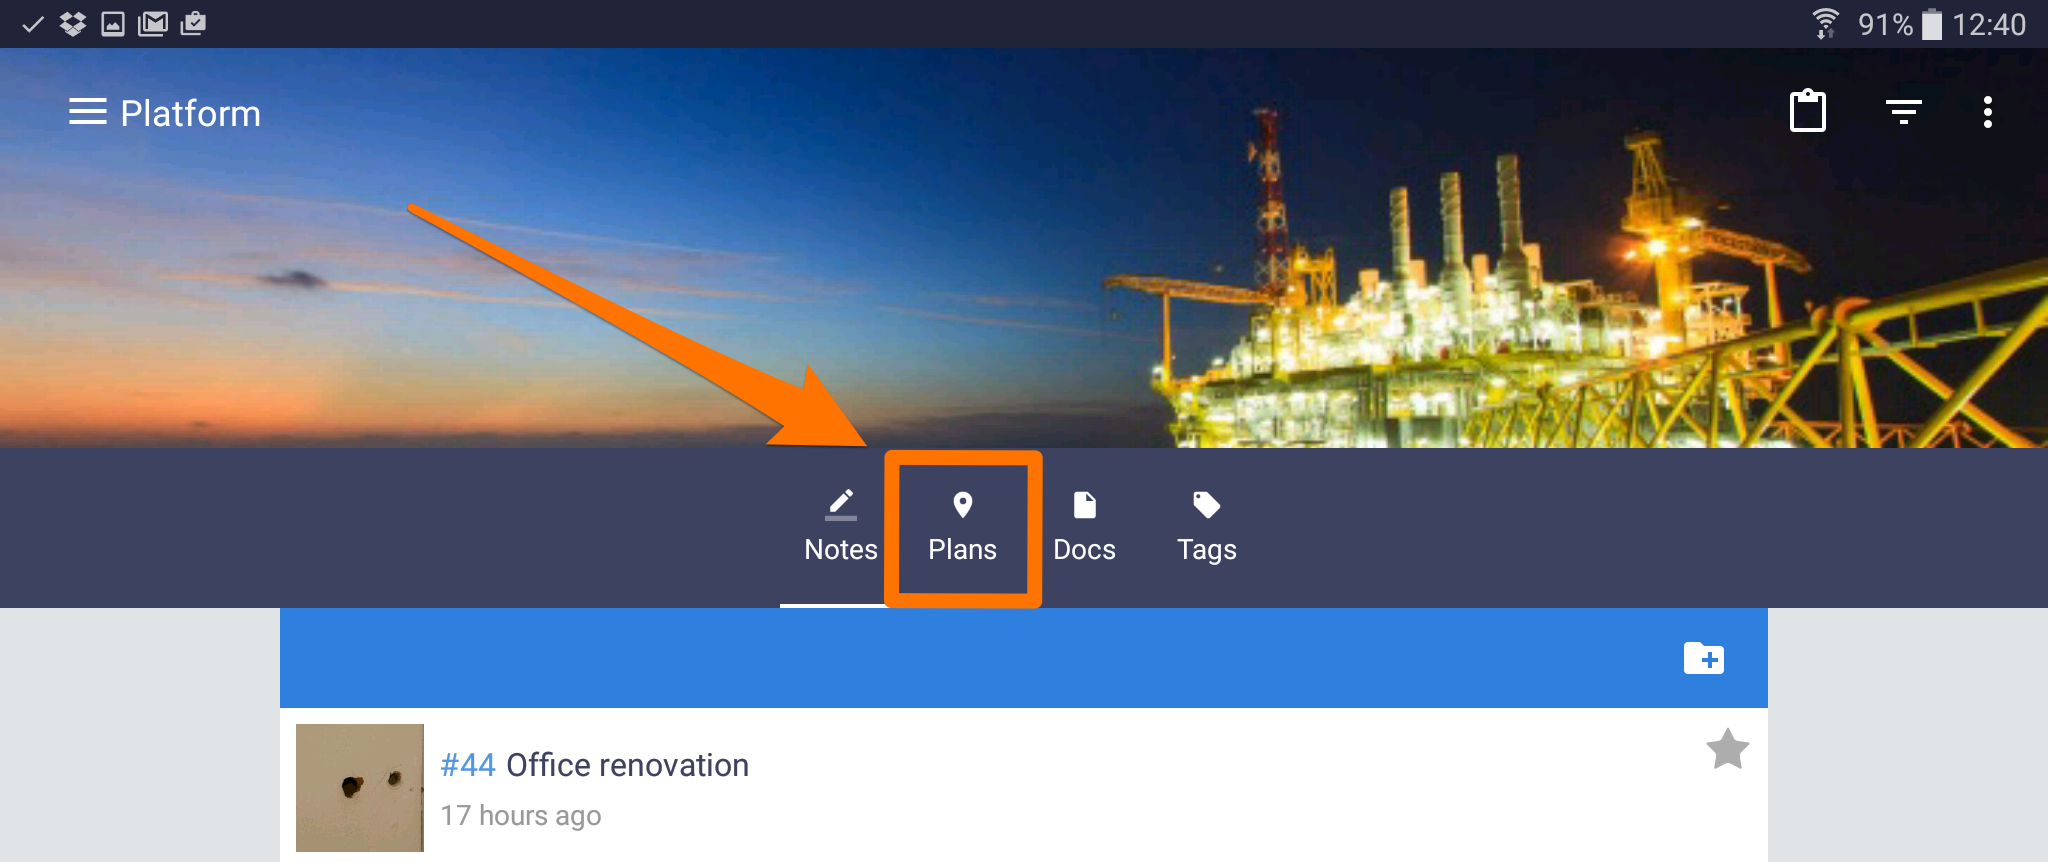
- Access the project where you want to create your new folder
- Go to “Plans” on the left side menu
- Tap “Folder+” on the bottom right corner of the app
- Type the name of the new folder then select “Add”
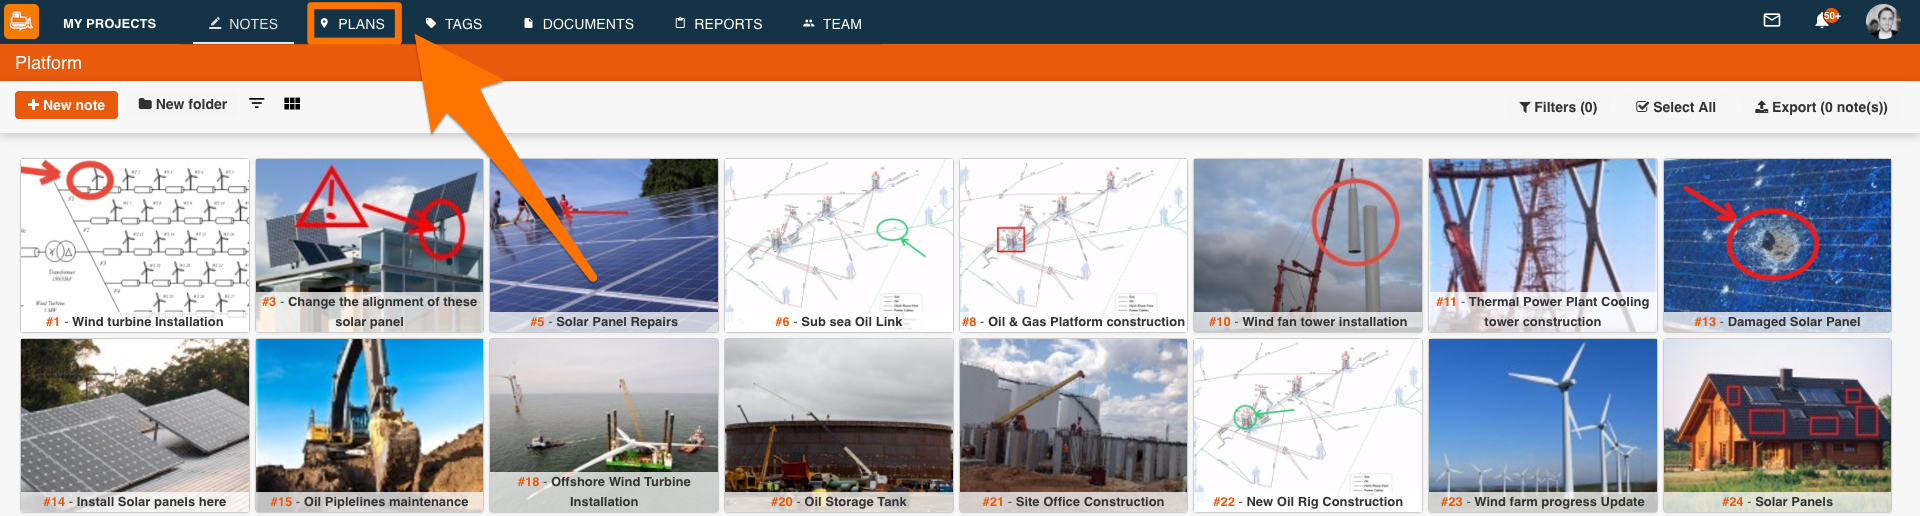
- Go to the project where you want to create the folder
- Click on “PLANS” in the top toolbar
- Select “New folder” on the upper left side of the window
- Write the name of the new folder
- Click on “Validate” to create your new folder