Add plans to your notes
You can add plans to your note’s timeline as images or place your notes as positions on your plans in order to gather all the information you might need in one place, to improve the communication between participants, etc. Your plans can be in PDF, JPEG, PNG, TIFF or even A1 format files.
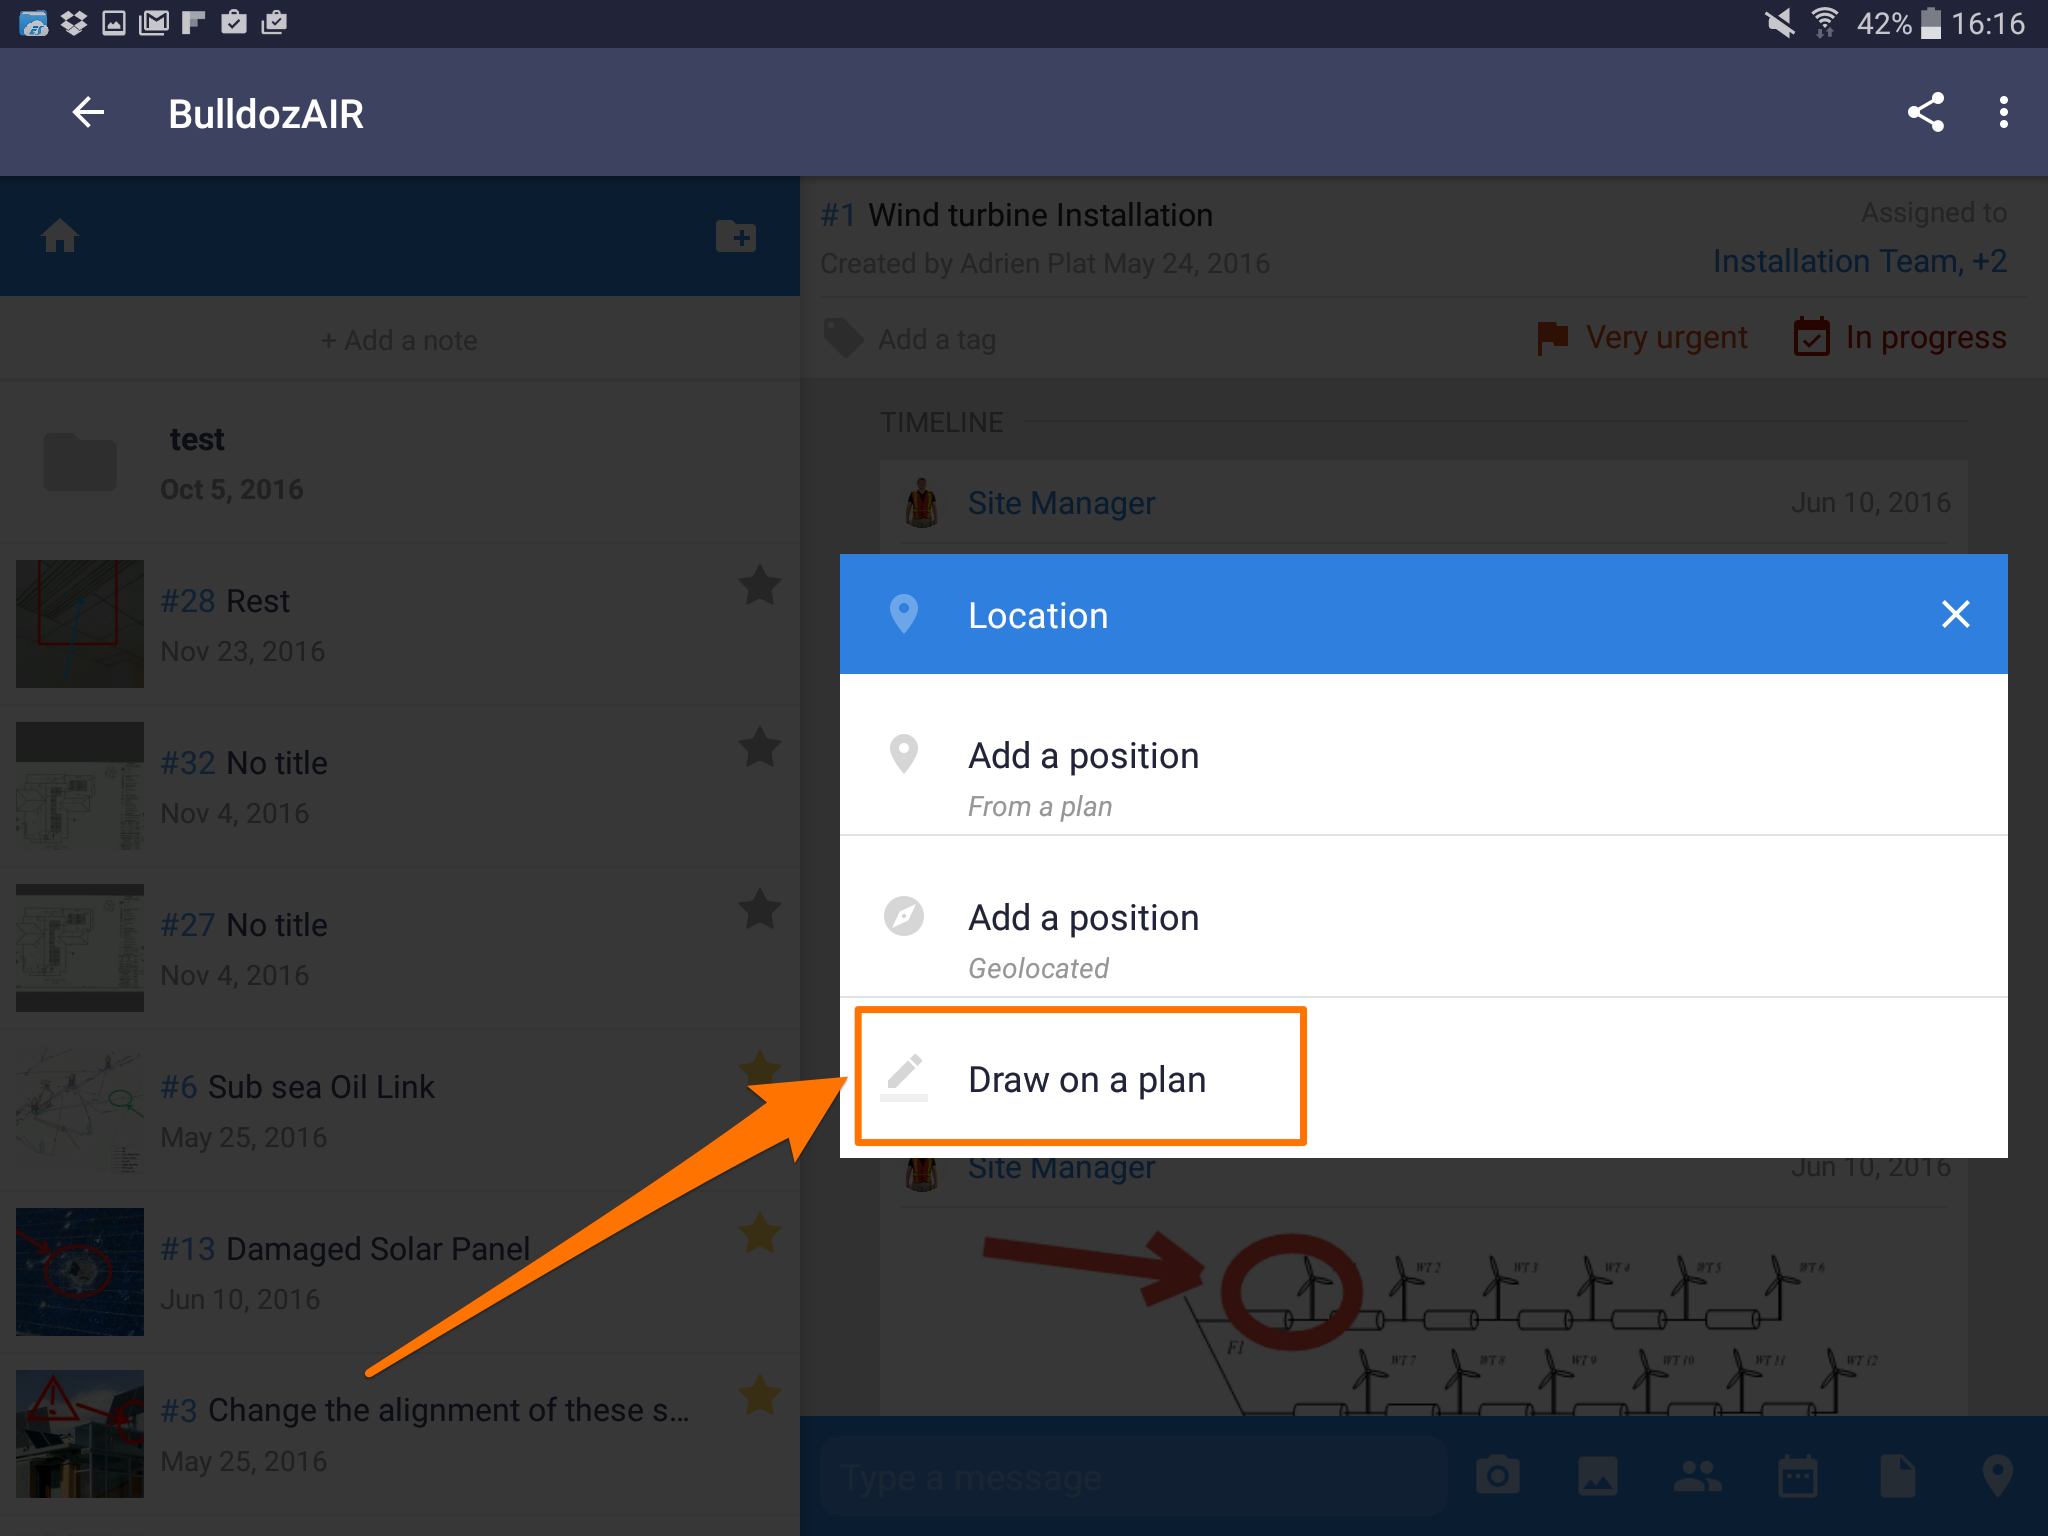
- To add plans to your notes, select the pin icon on the bottom
- Tap “Draw on a plan” to draw or make annotations, then select the plan you wish edit to be able to modify it as you want
- When you are done editing, simply tap “Validate” on the bottom right corner to add it to your note’s timeline

- If you chose to add them as files, just select the document icon on the bottom and choose between importing from your device or from BulldozAIR
- If you select BulldozAIR, the files previously added as documents will be displayed, tap the plan you want to add to input it on your note
- If you add your plan from your device, you will be shown outside sources in your device
- Remember adding plans as a document will not allow you to edit it as if you had chosen to add it as an image or as a position
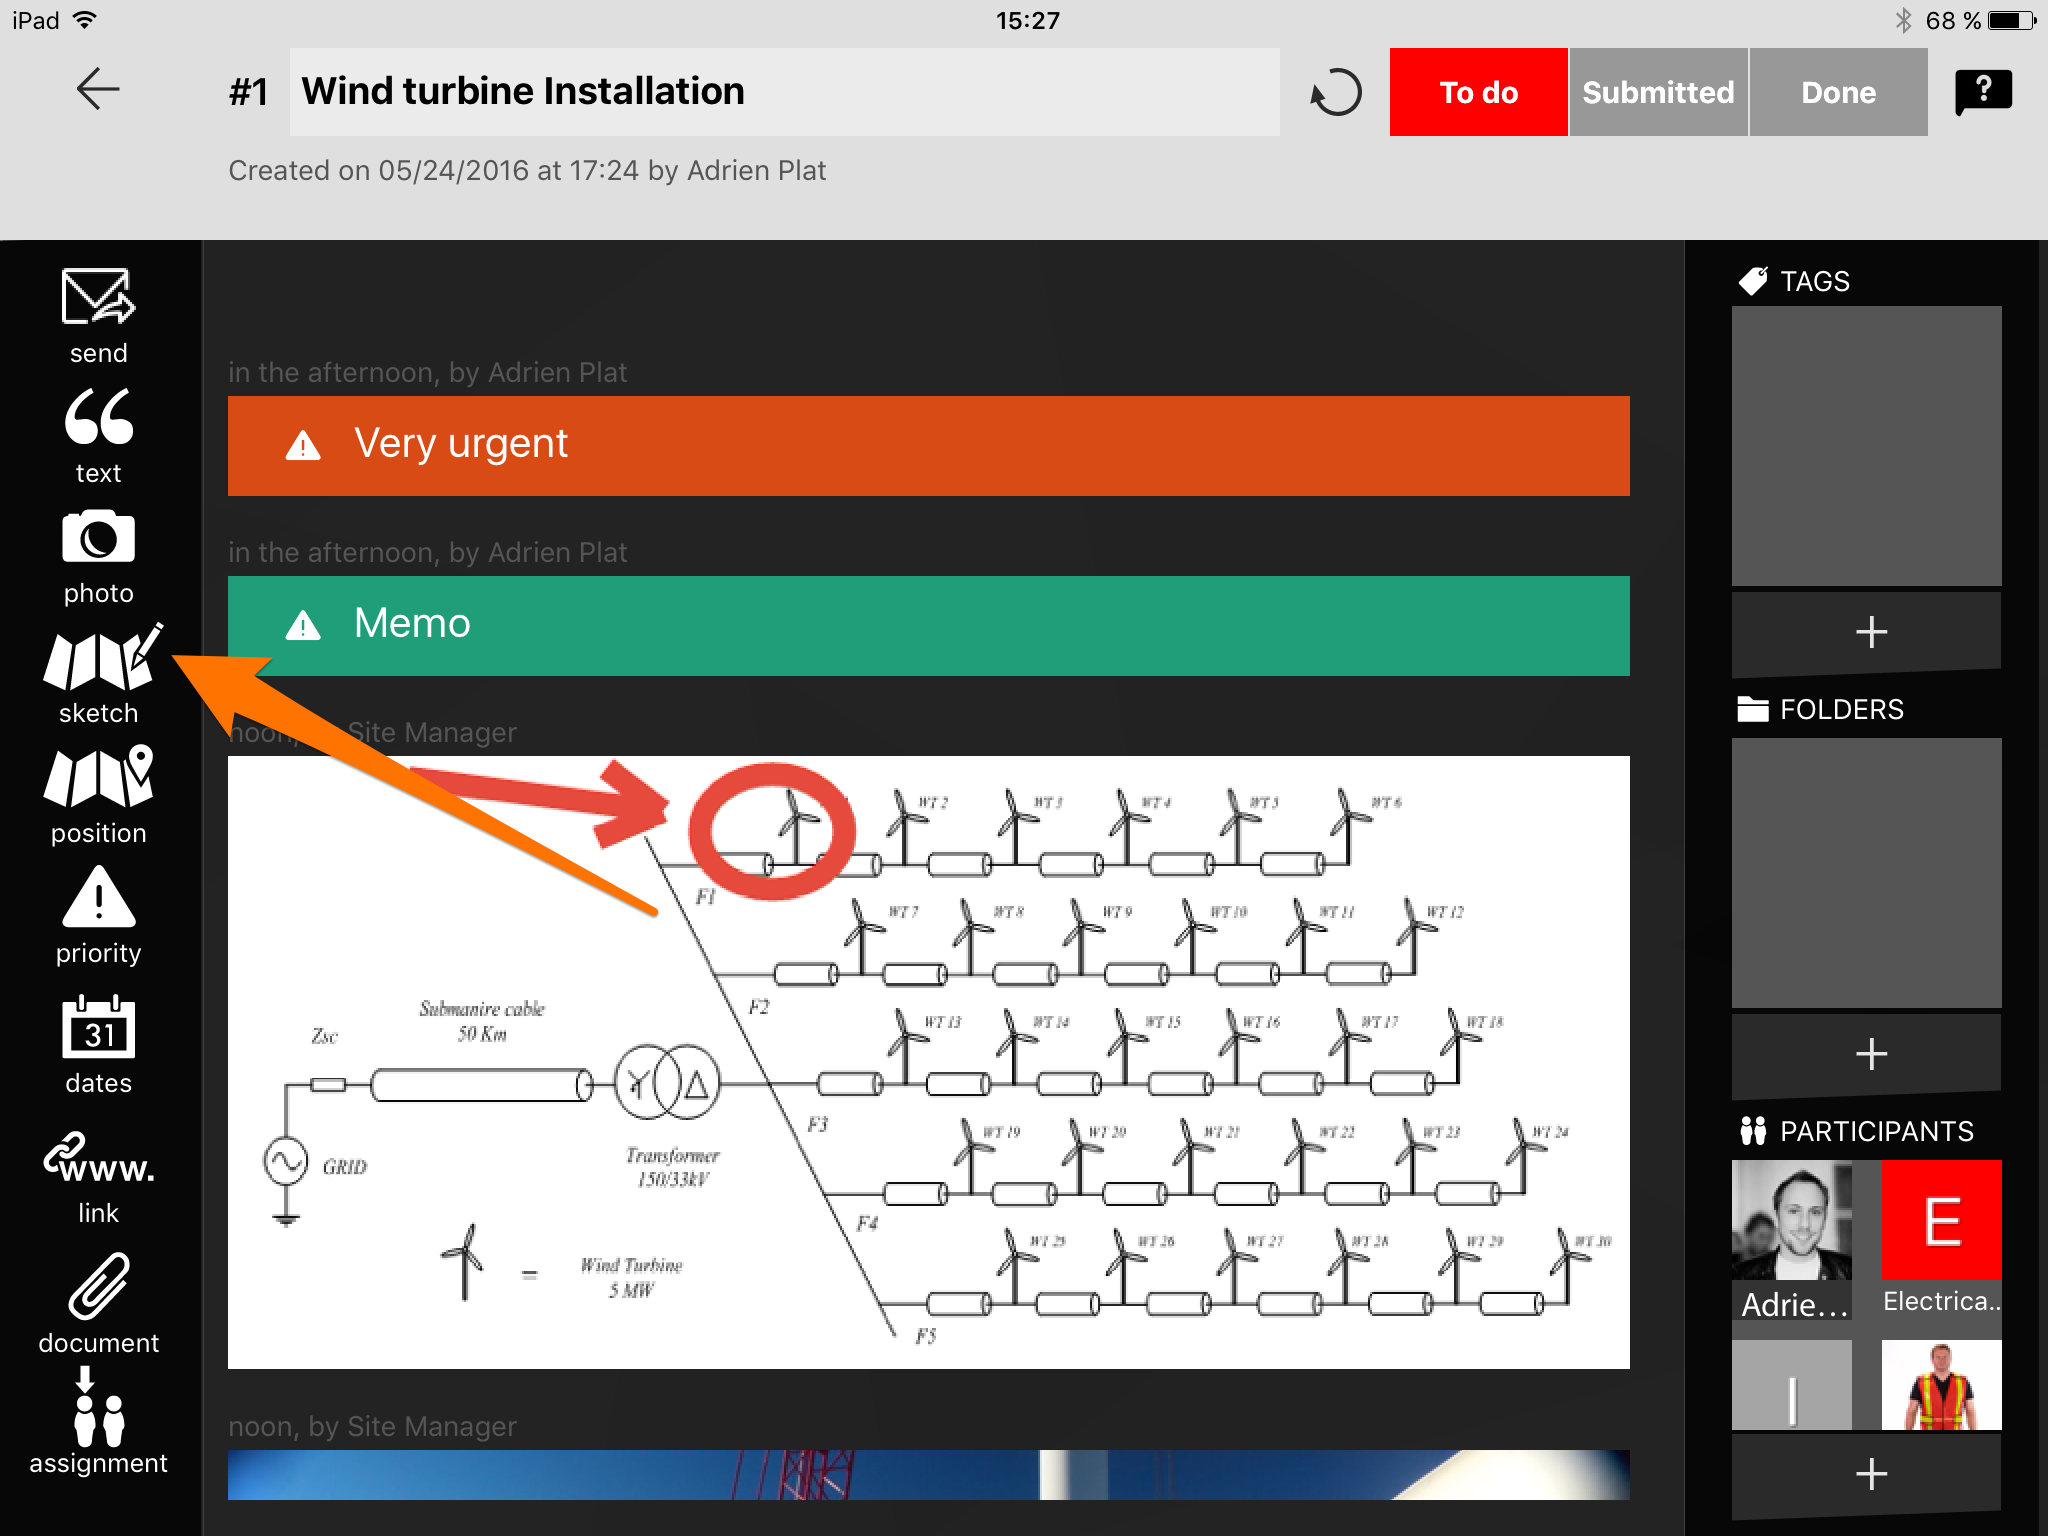
- Access your note by tapping the note
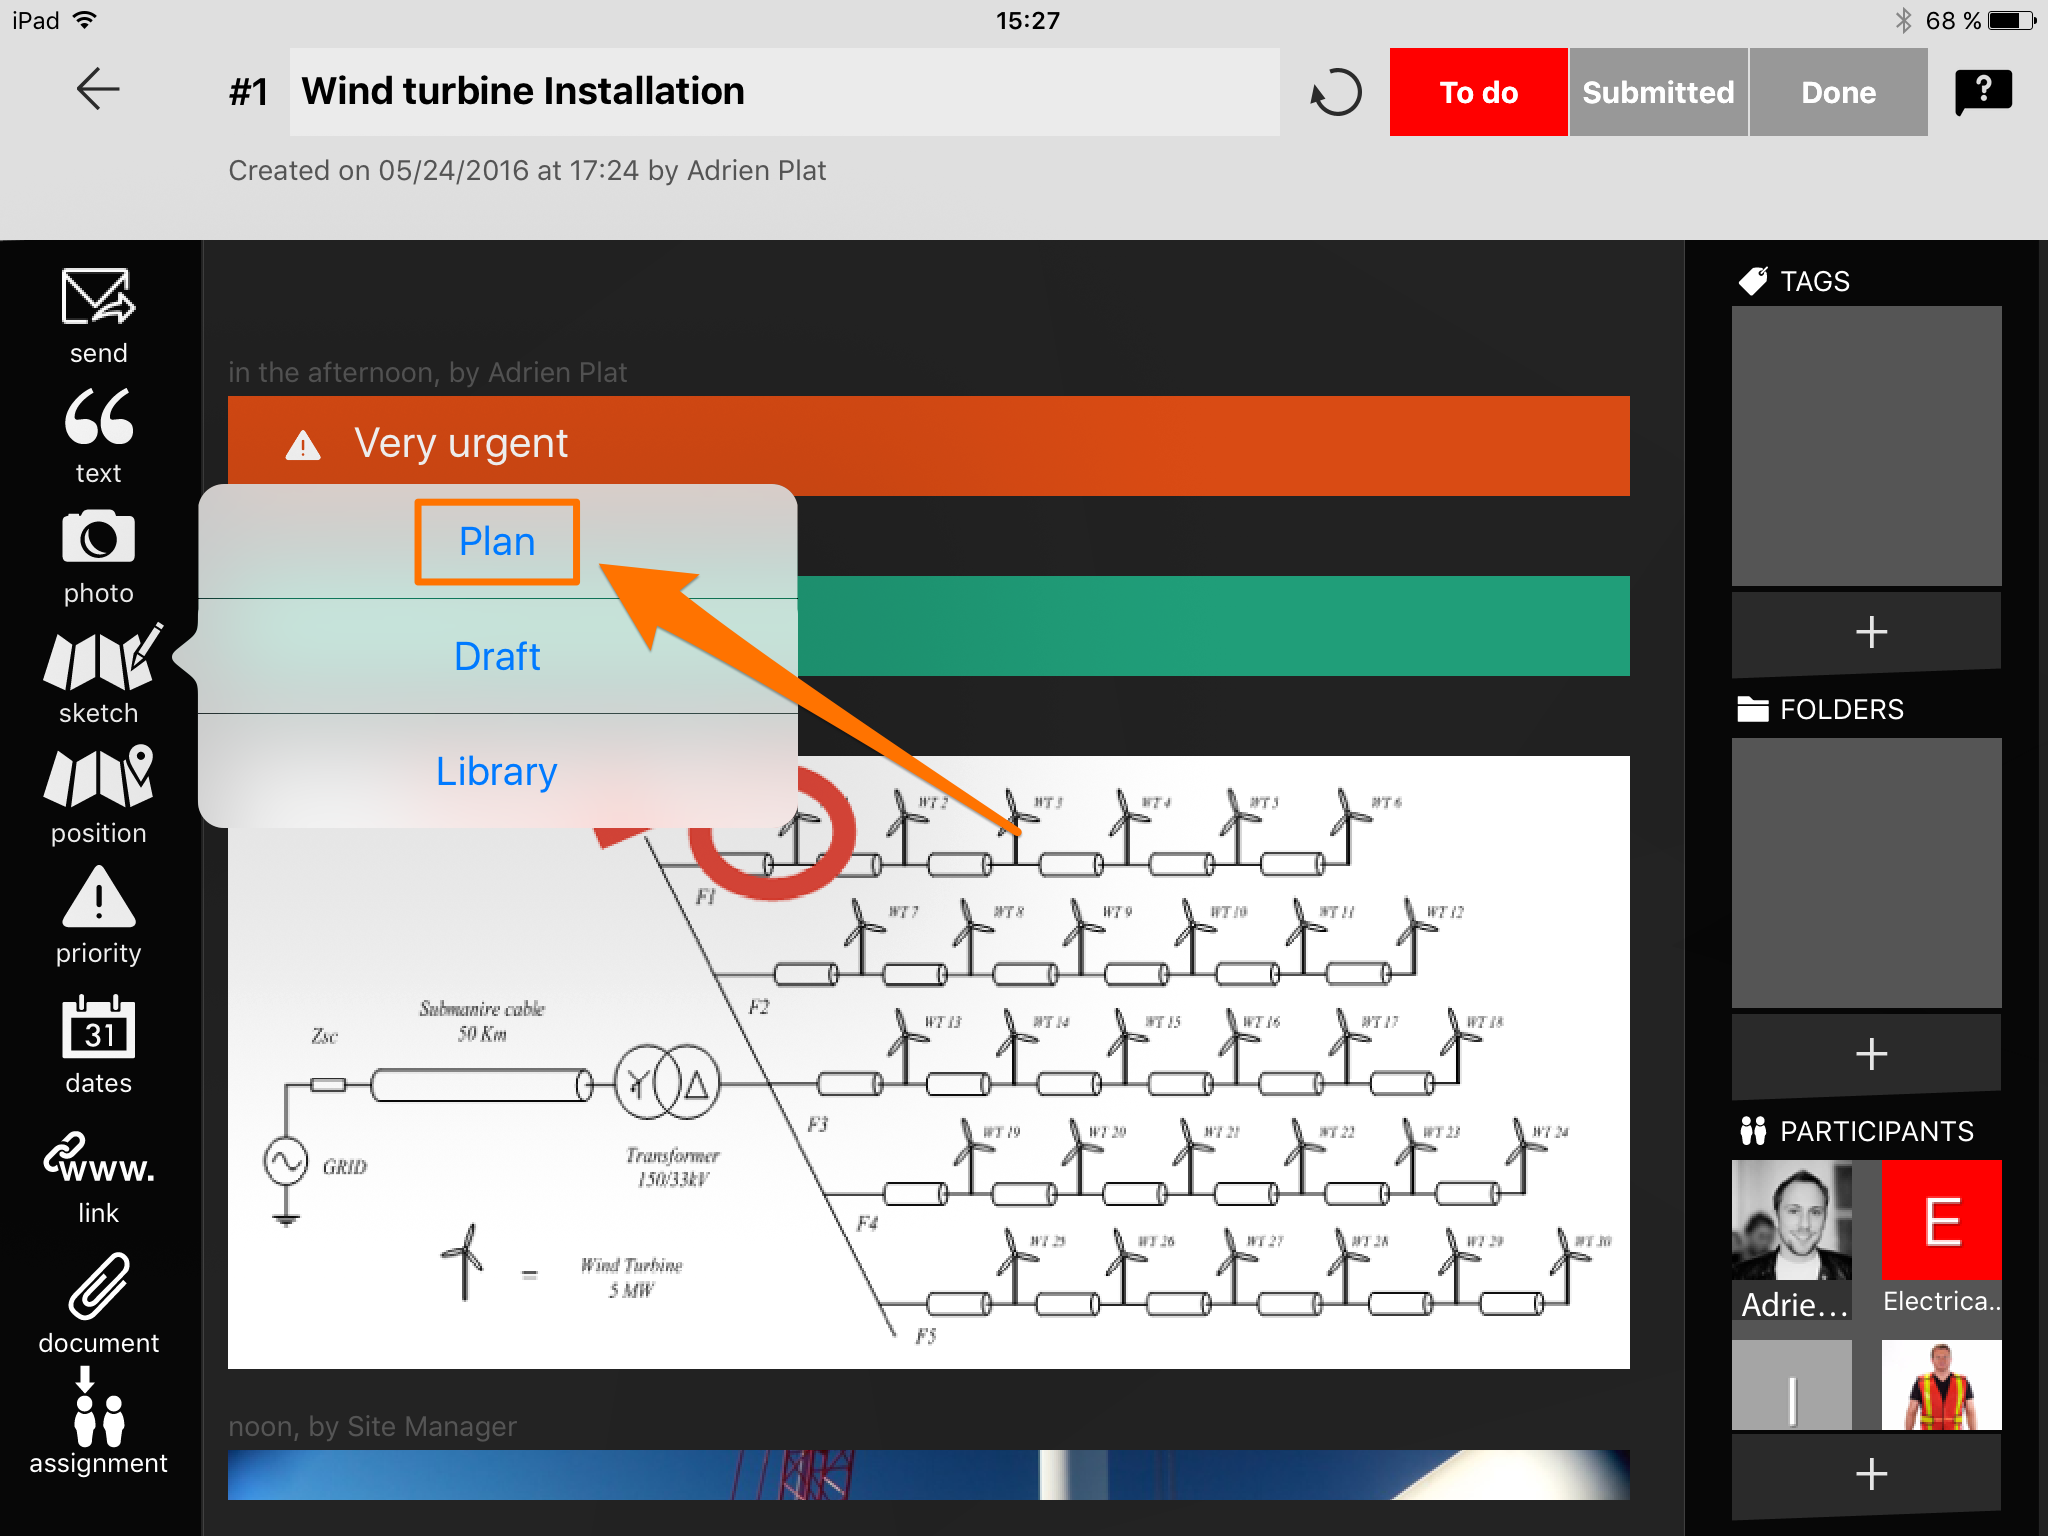
- Tap “Sketch” on the left side of the app
- Then select “Plan”
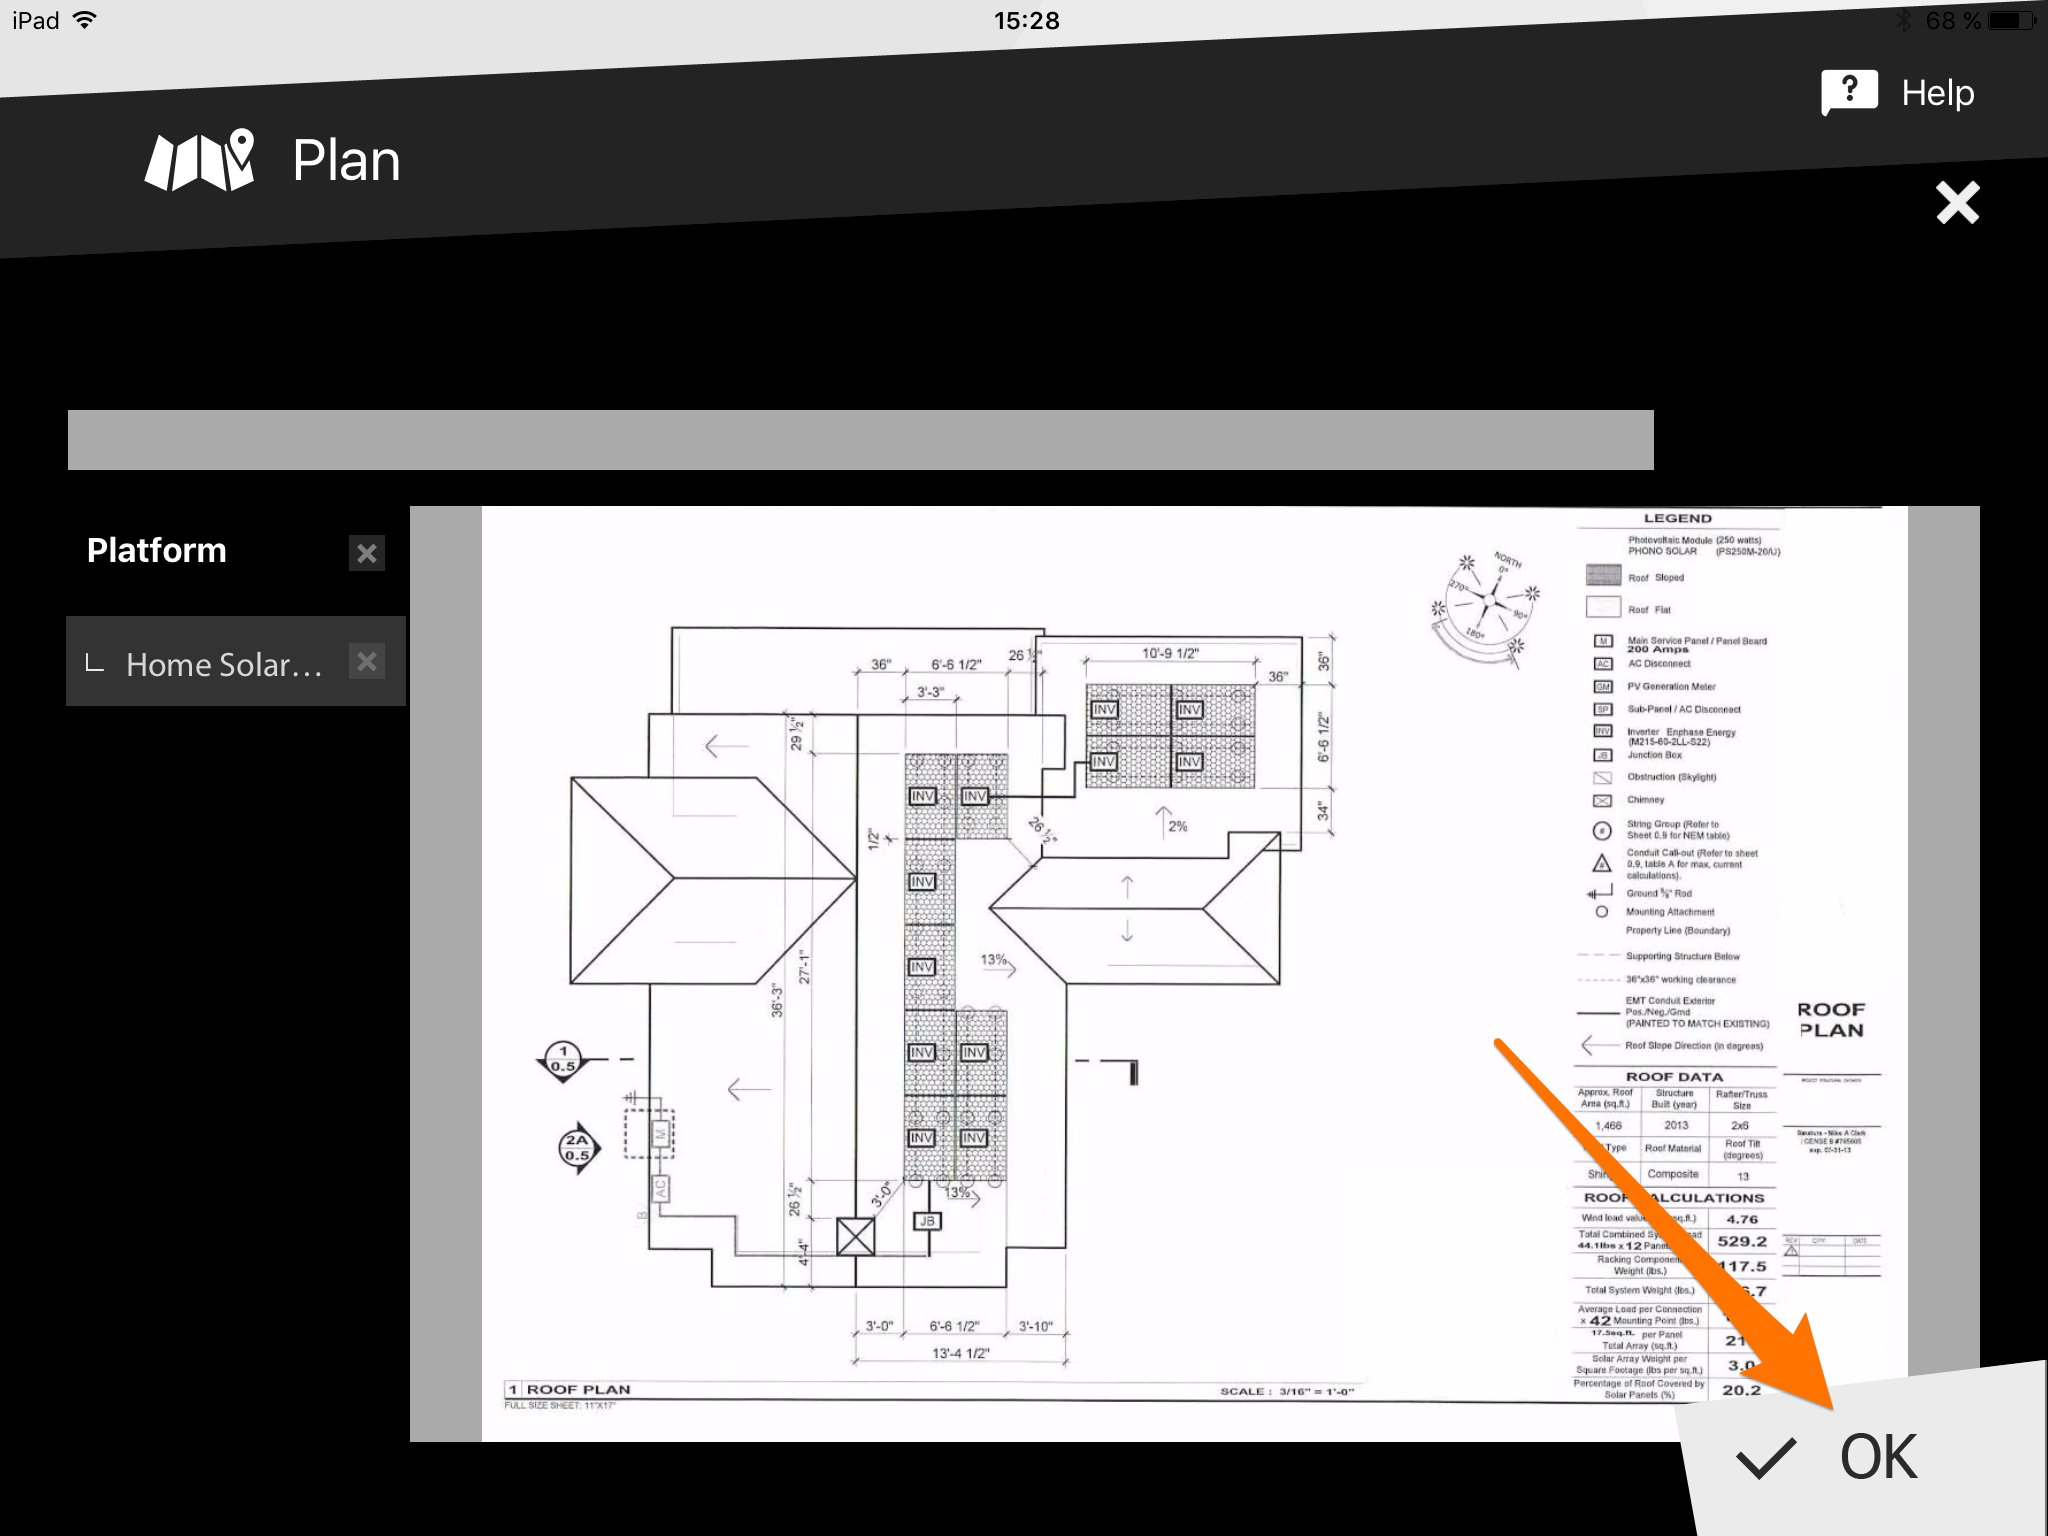
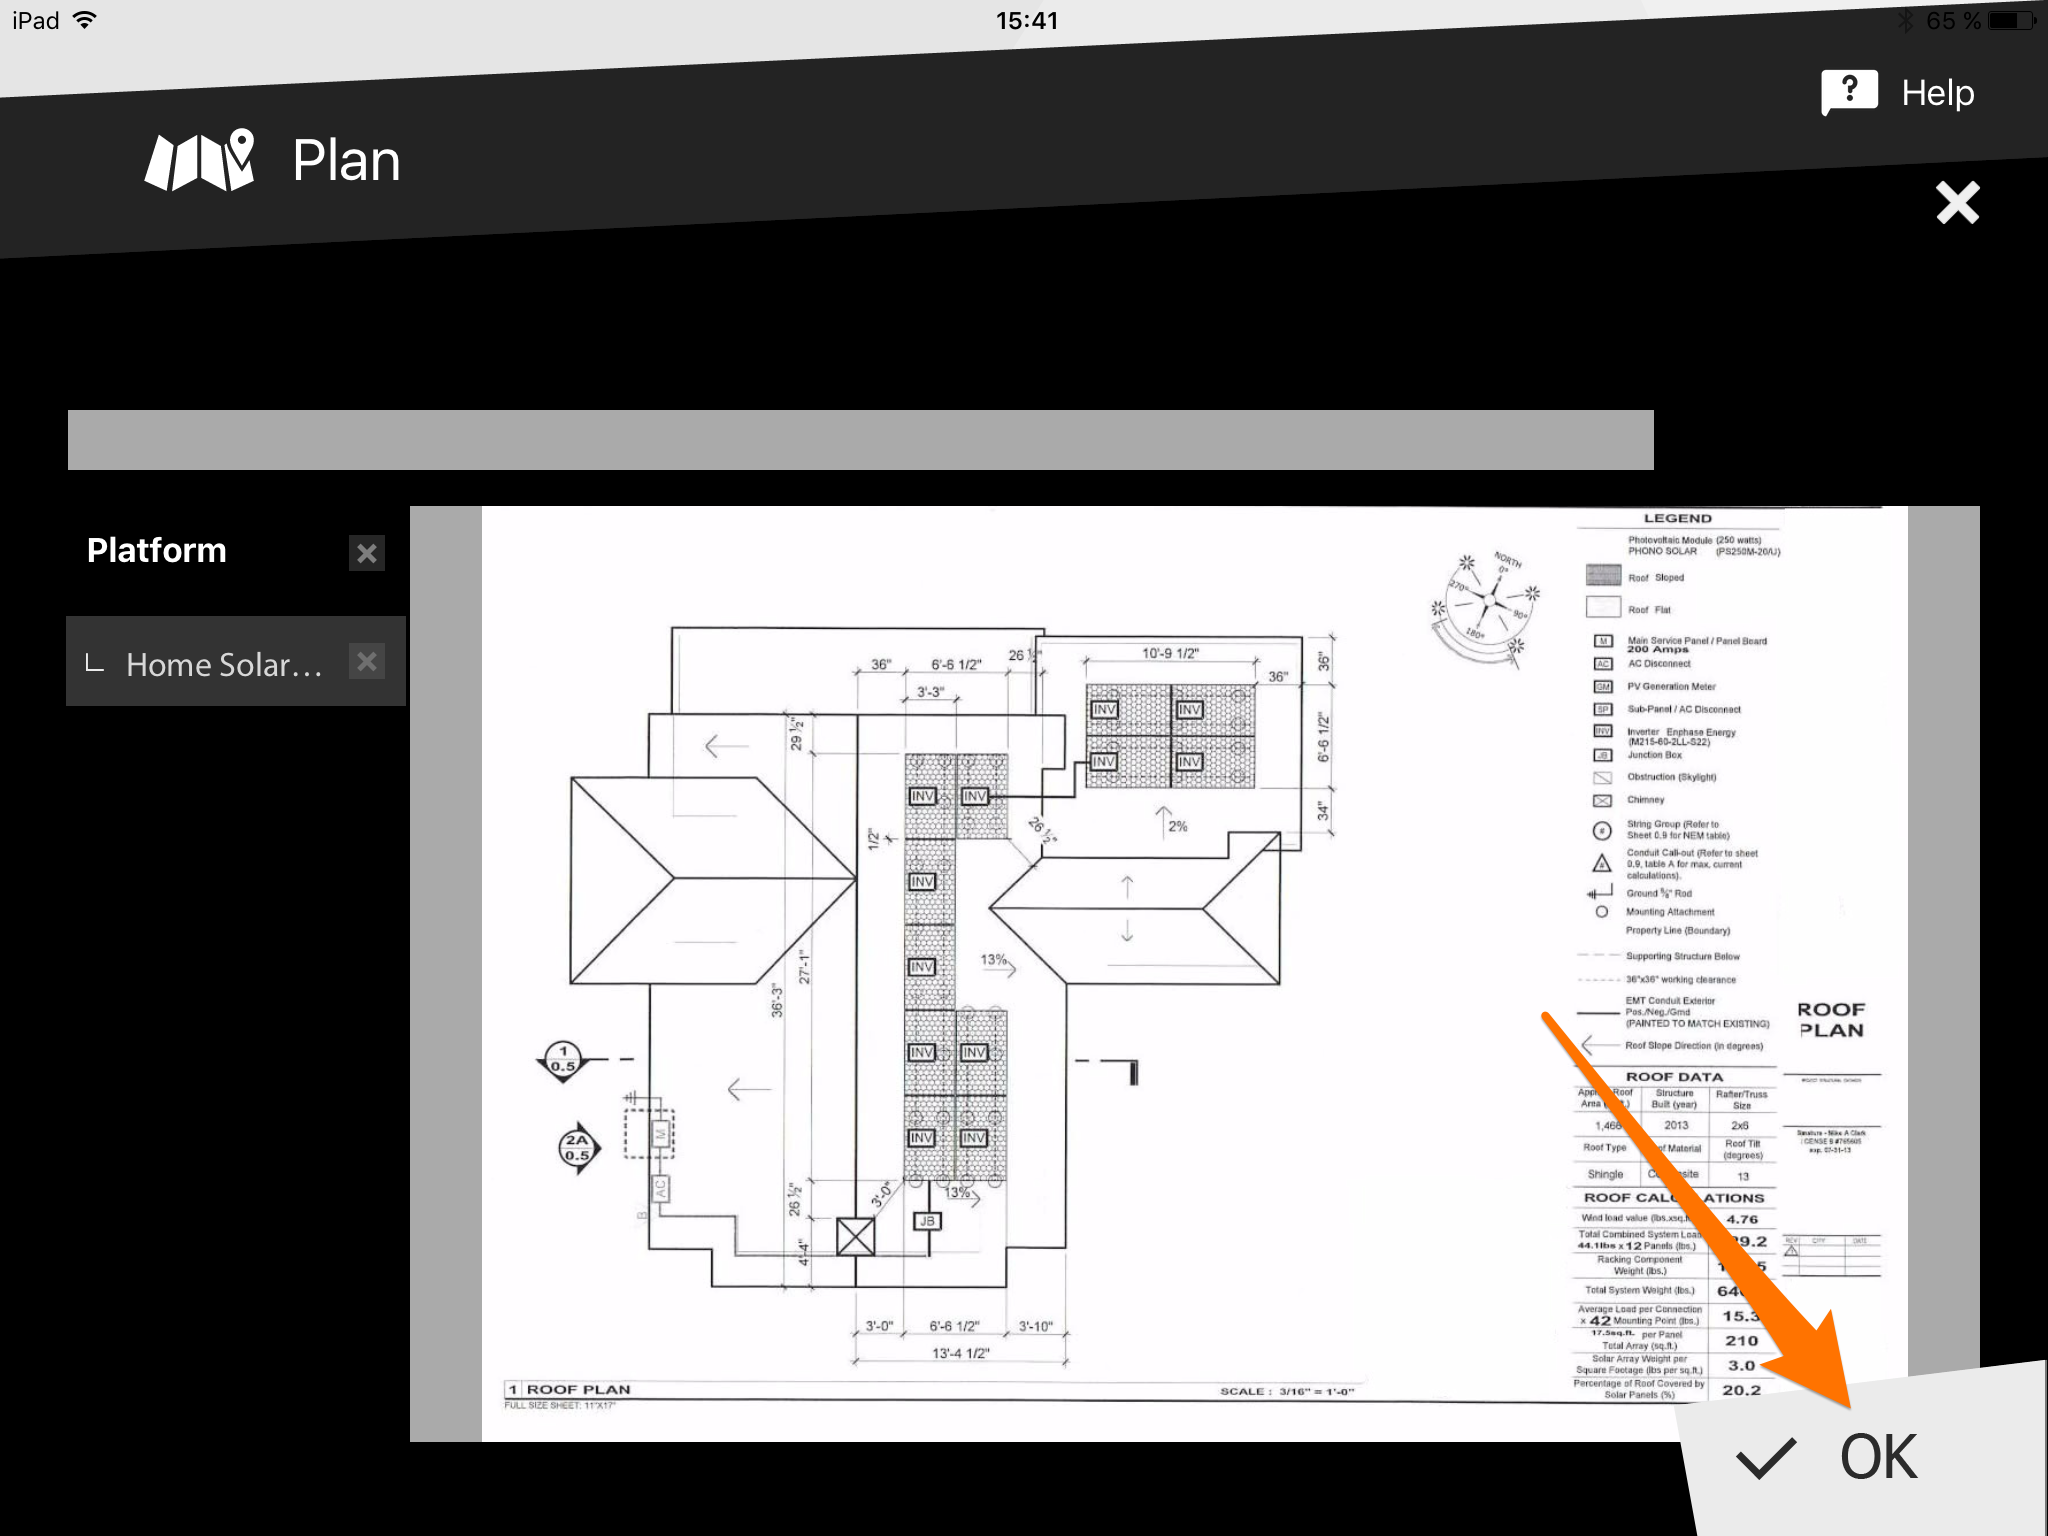
- Select your desired plan by tapping it, then select “OK”
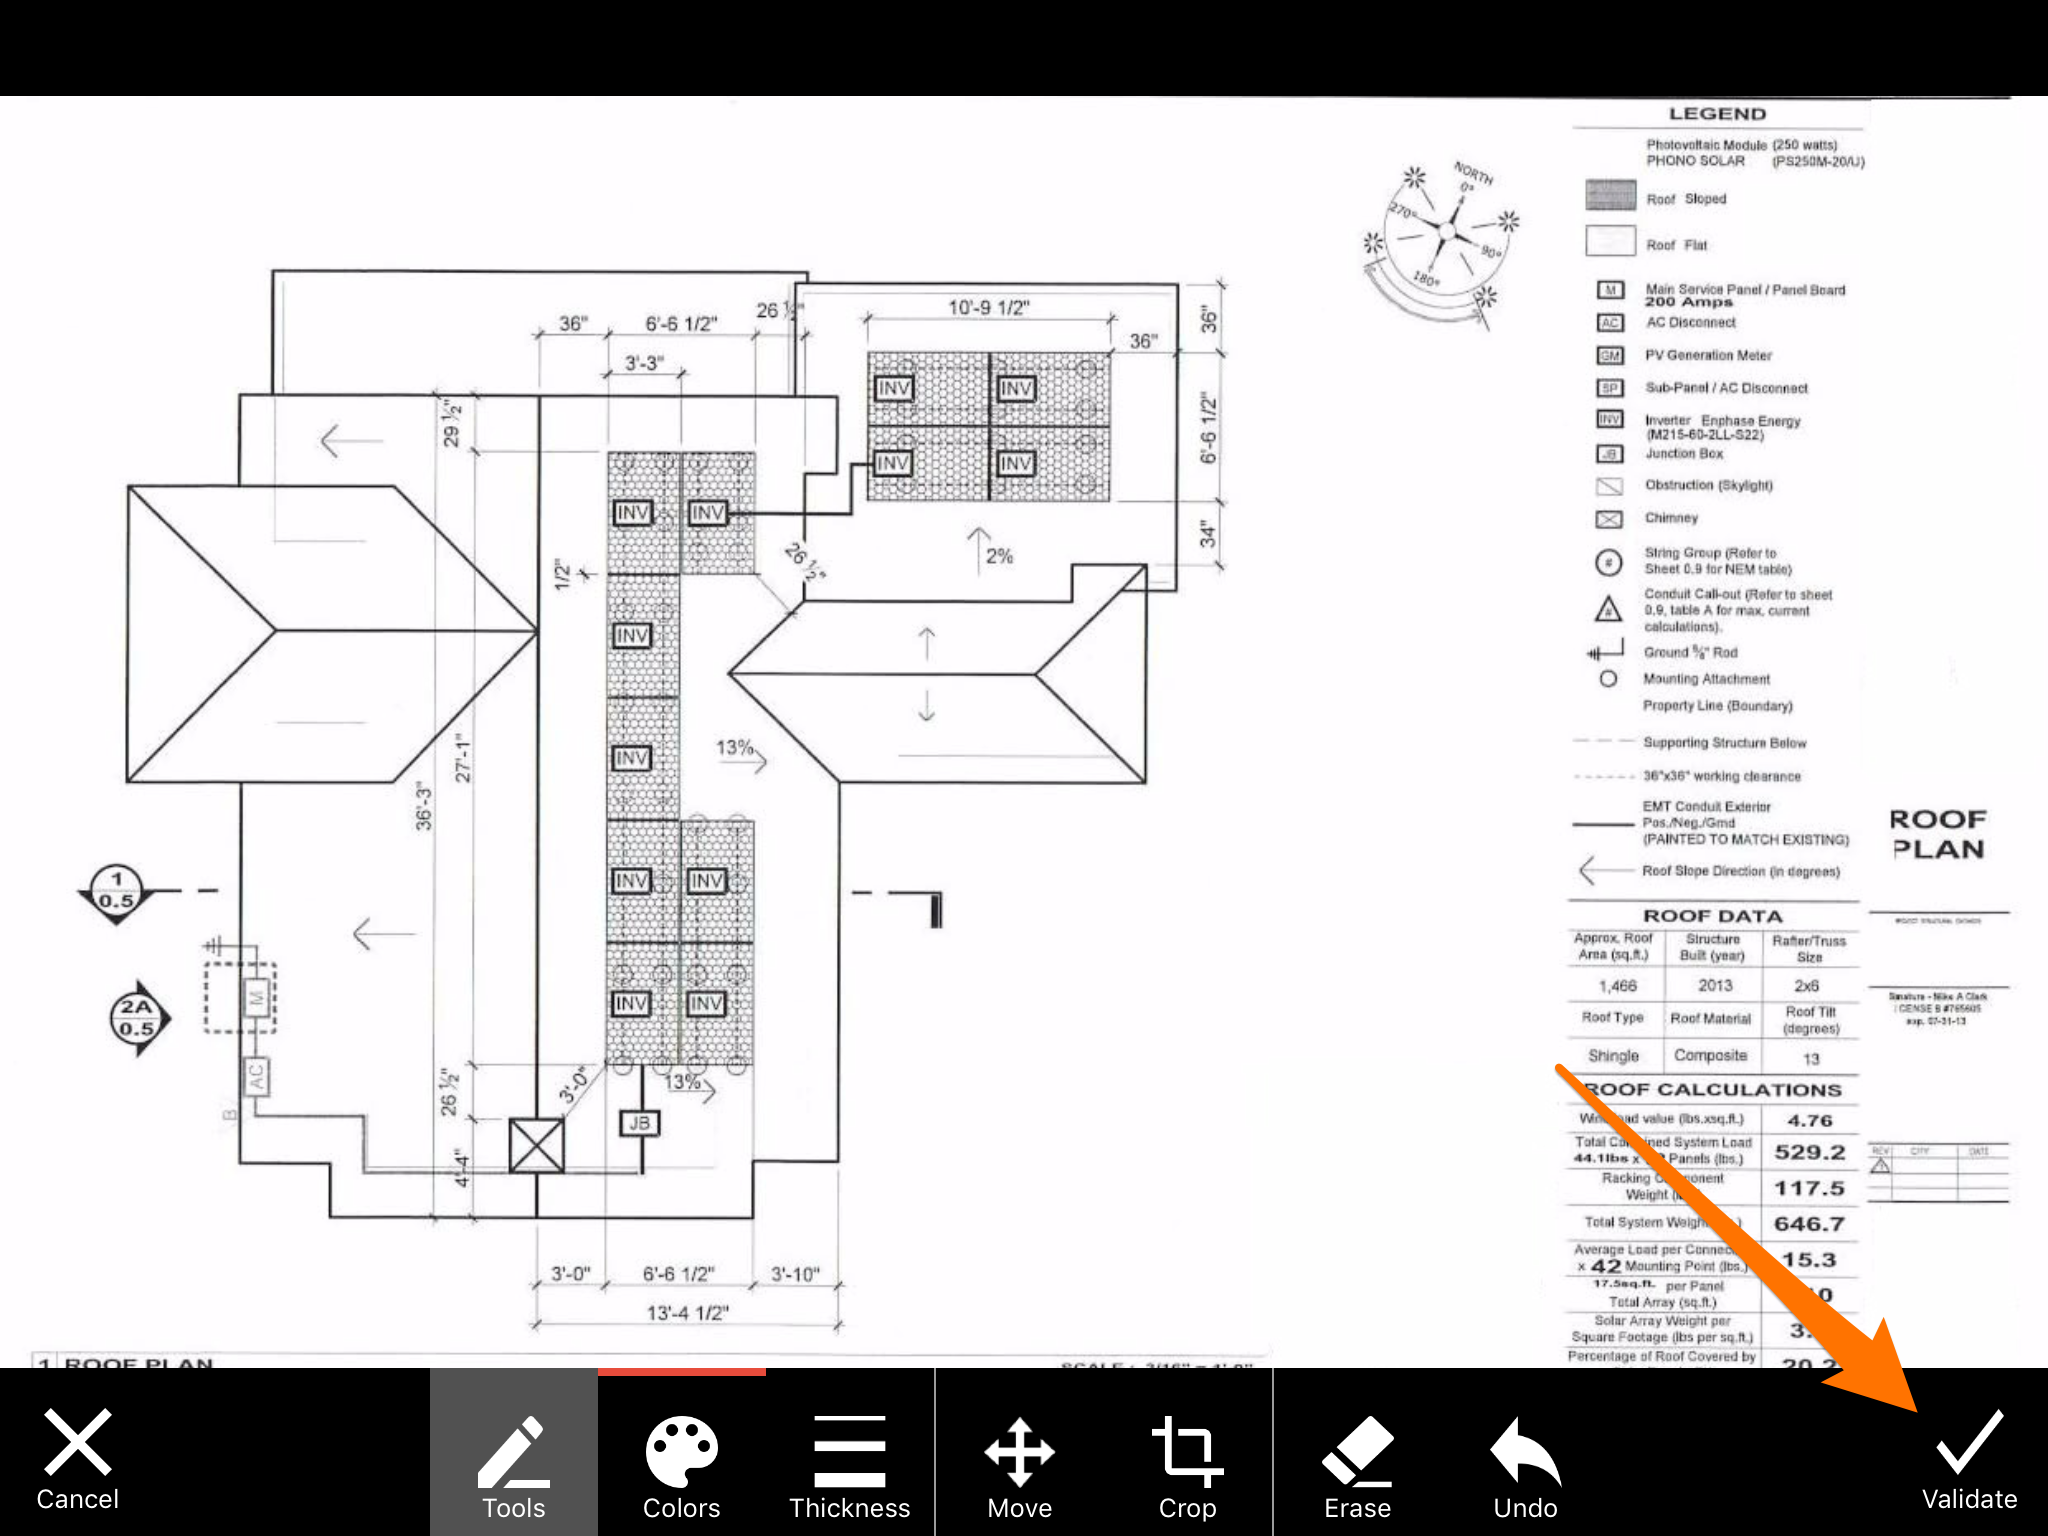
- You can edit your file before adding it to your timeline
- Once you are finished or do not wish to edit the file, simply tap “Validate” on the bottom right corner to finalize
- Remember that to add a plan to your note, it is necessary first to add it to your project
- Click on the note to open it
- Select the pin icon, second icon from the right
- Select “Add a general position”
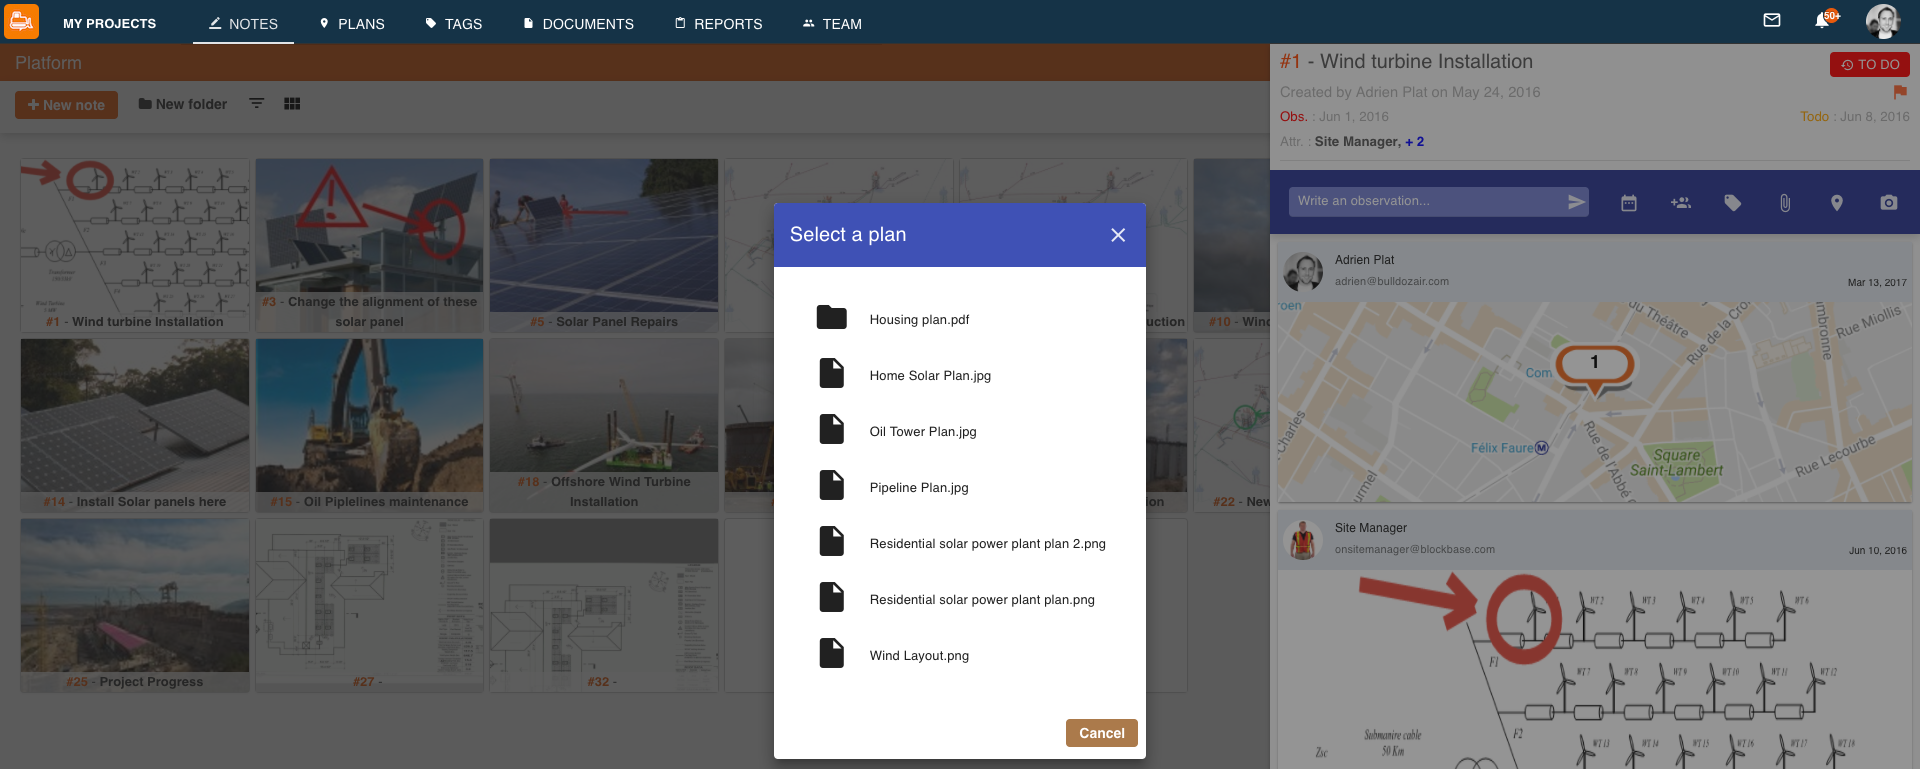
- Select the plan you want to add to your note
Add a plan from BulldozAIR

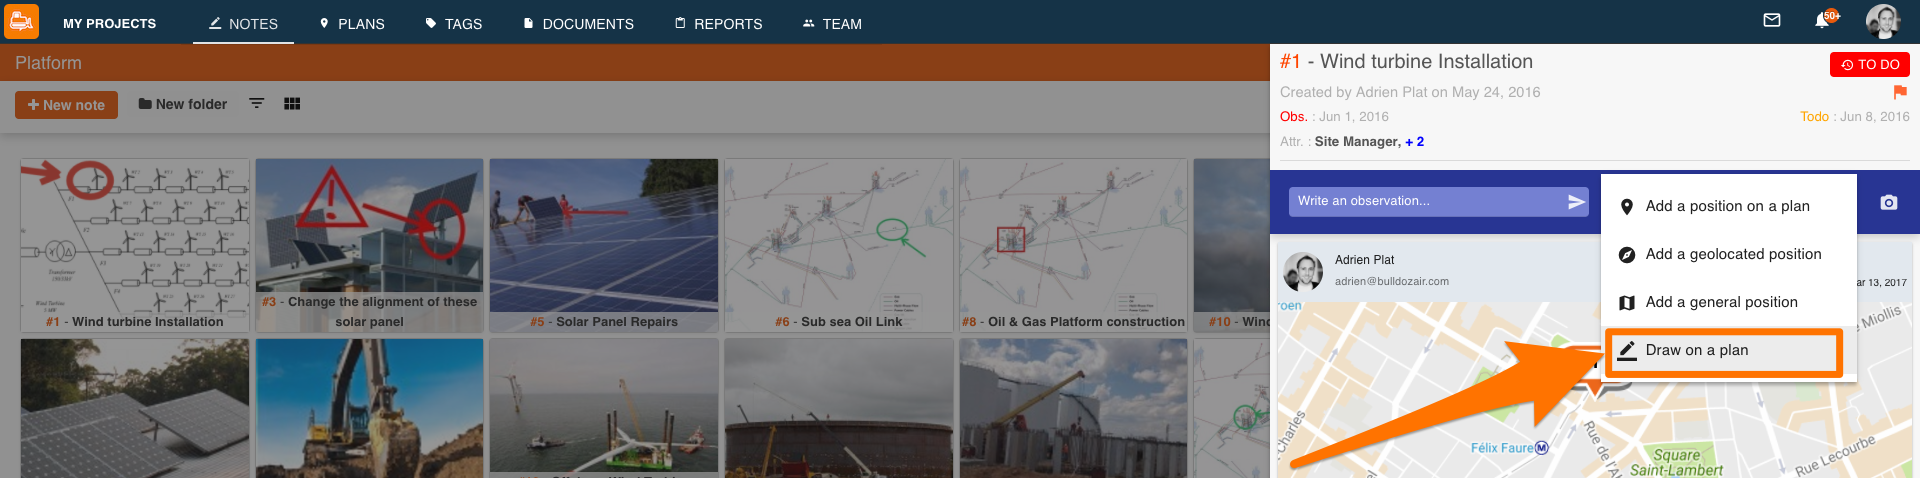
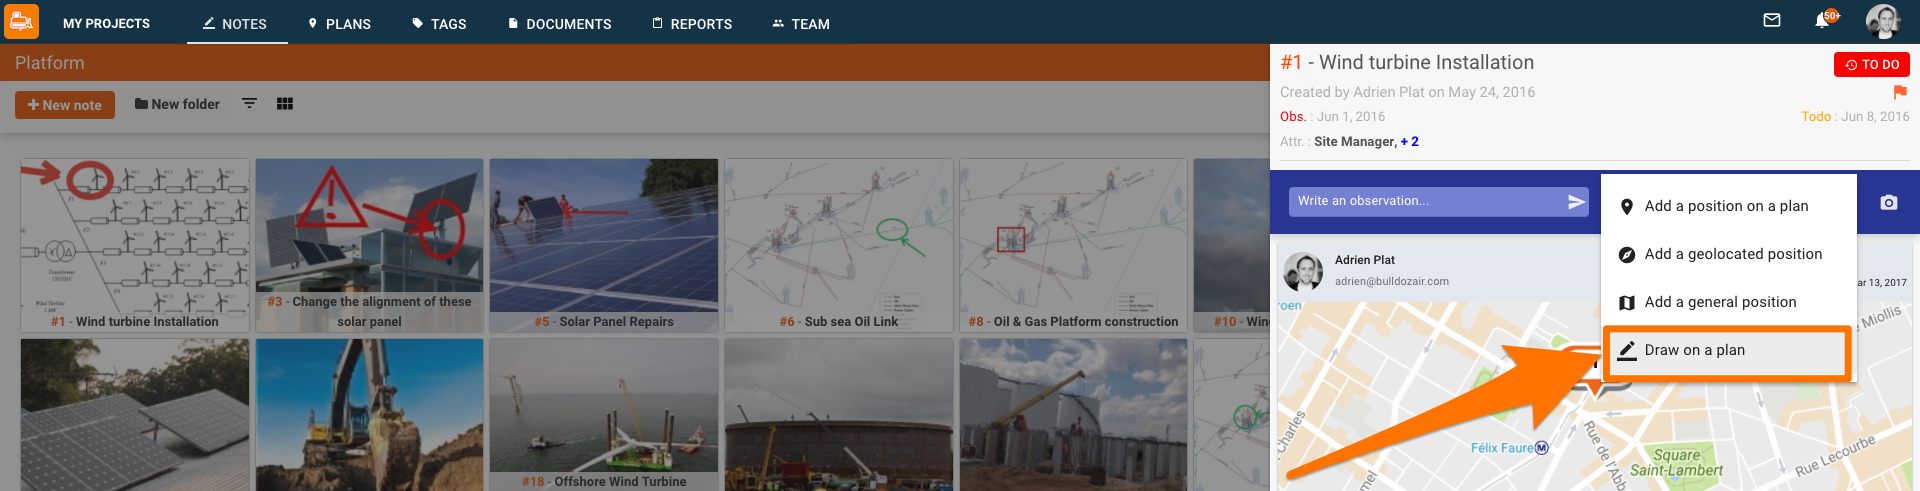
- Click on the note to open it
- Select the pin icon, second icon from the right
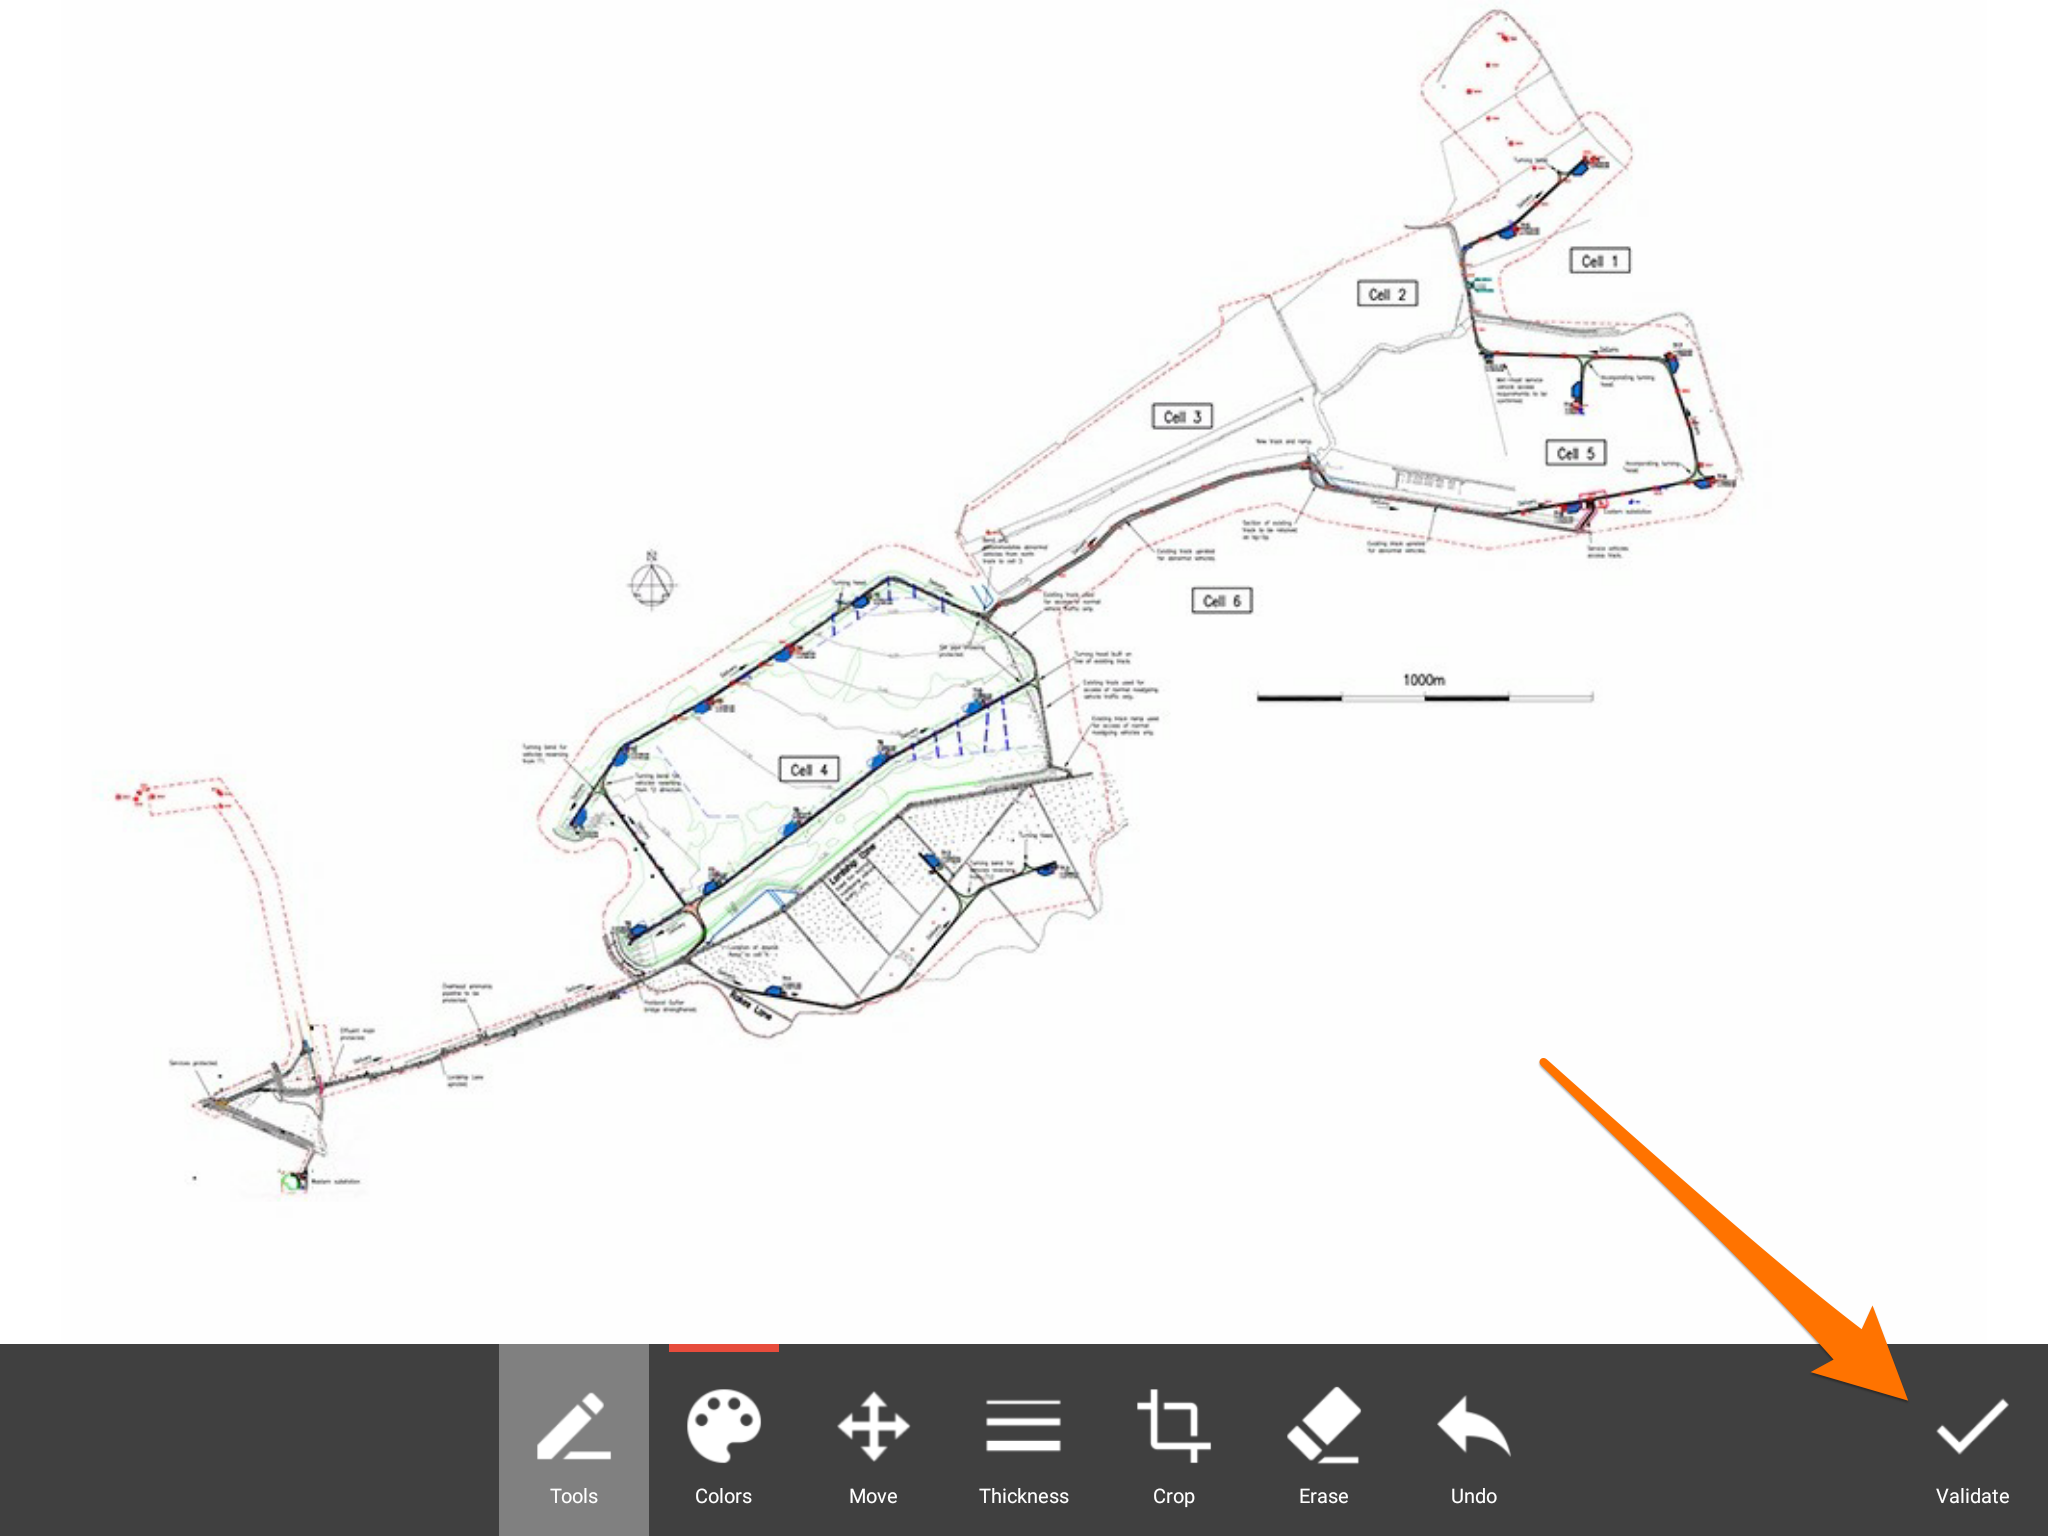
- Select “Draw on a plan”
- Select your plan
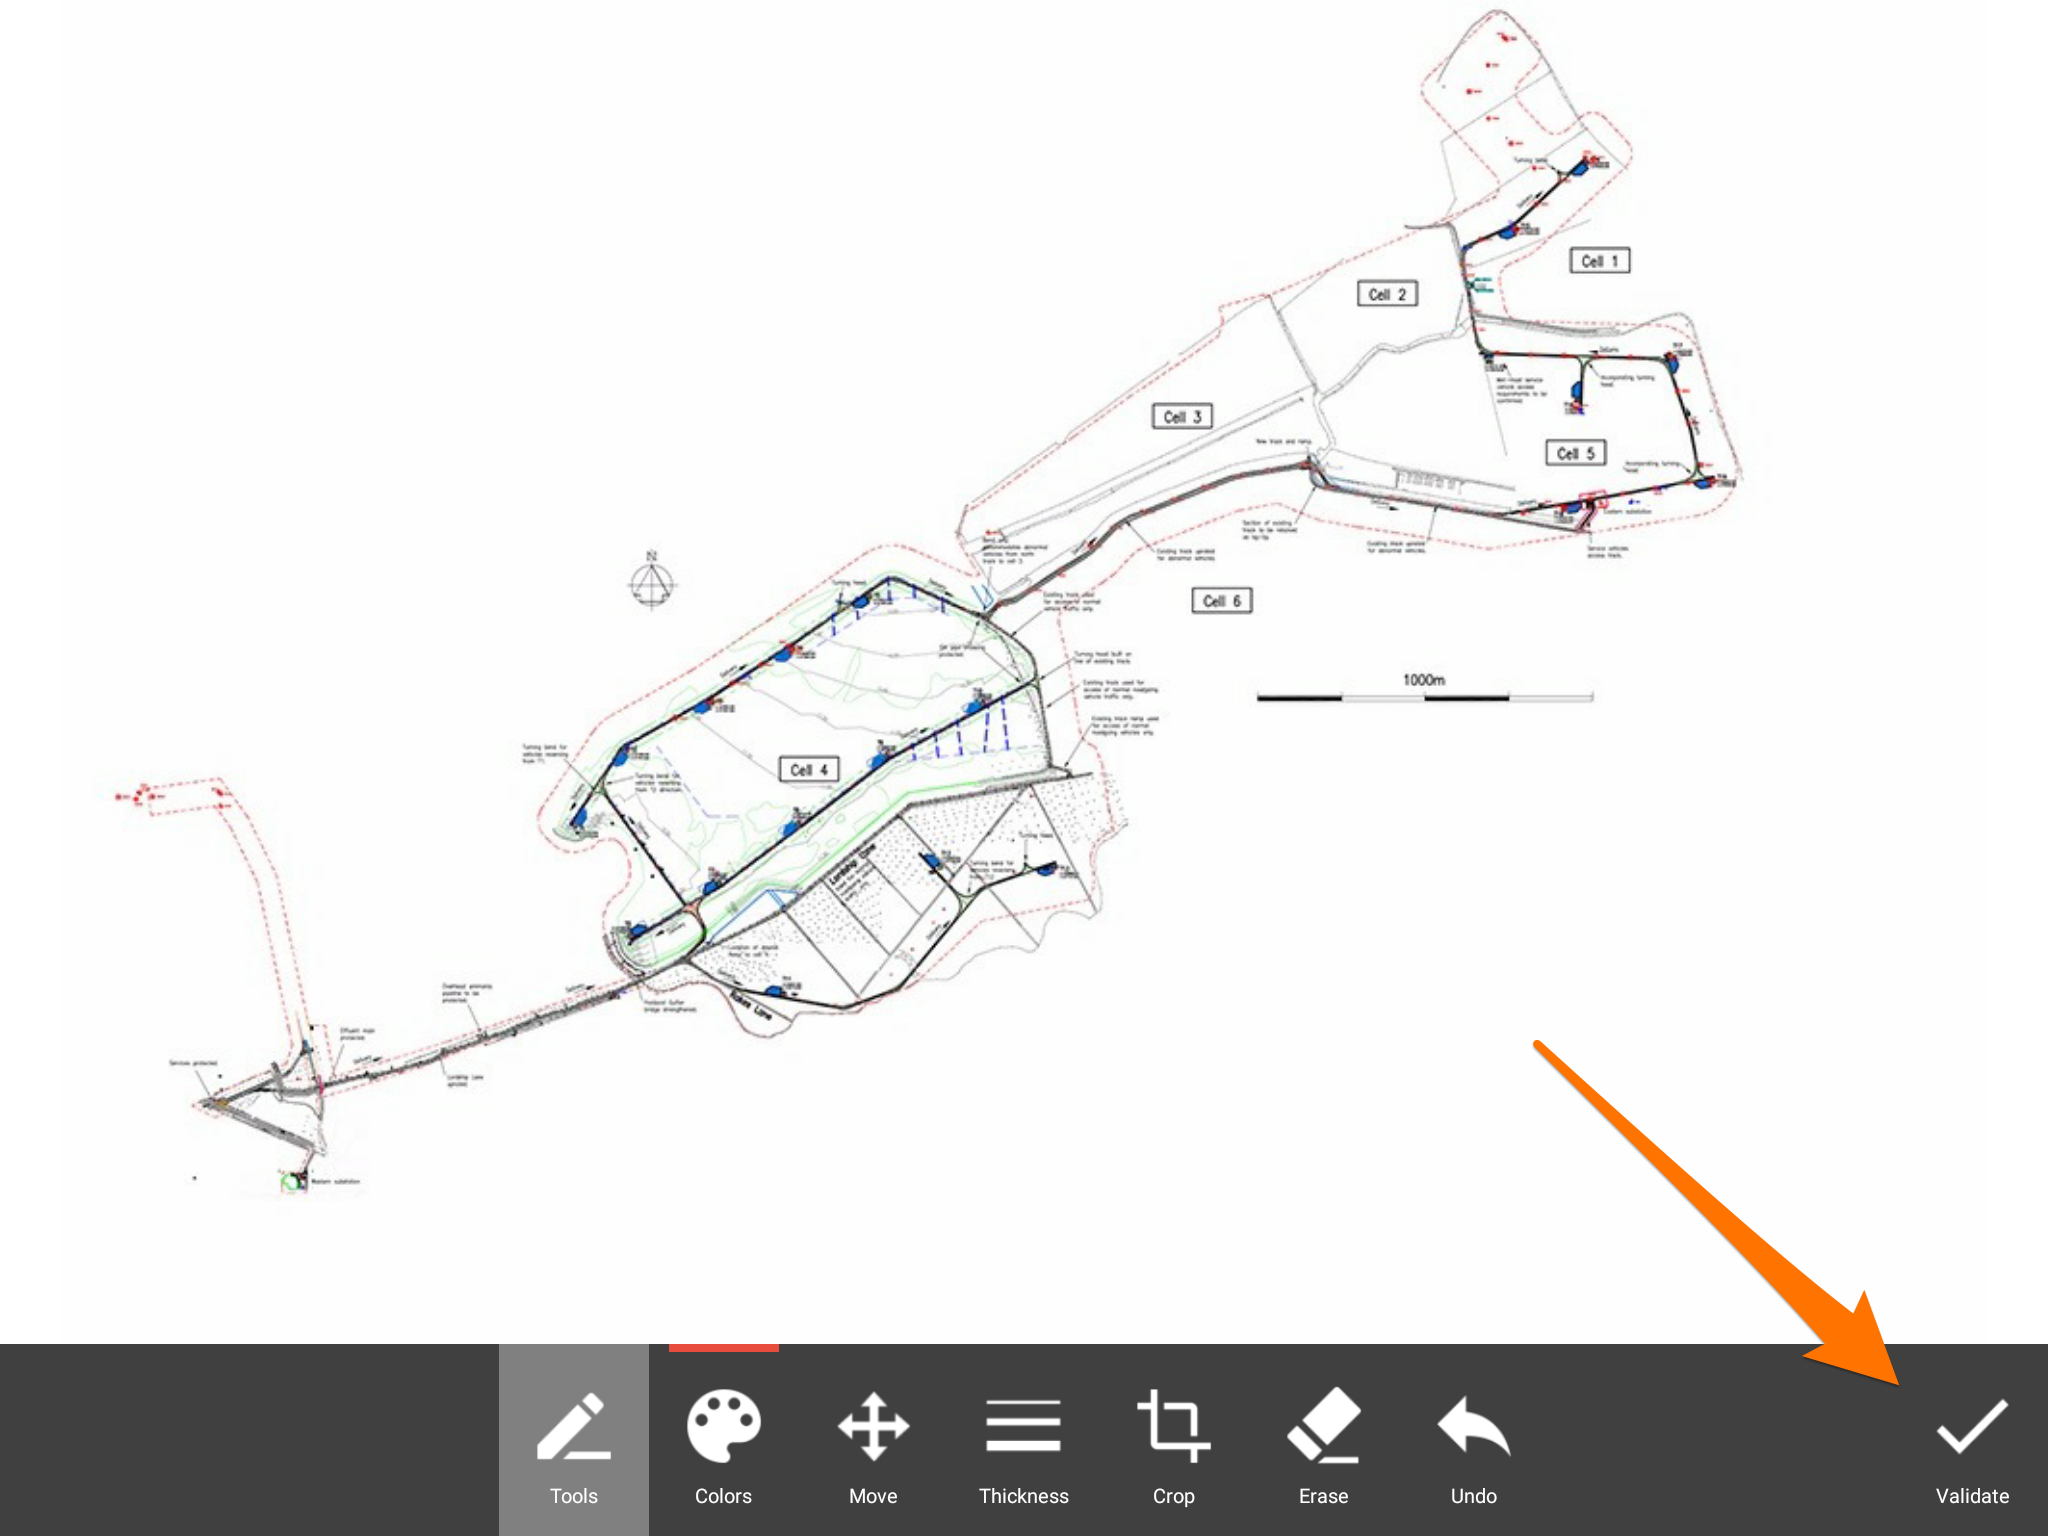
- Use the design tools on top to draw on your plan
- Select the checkmark icon on the upper right corner of the window to add it to your timeline
Add a plan from BulldozAIR with annotations

- Click on the note to open it
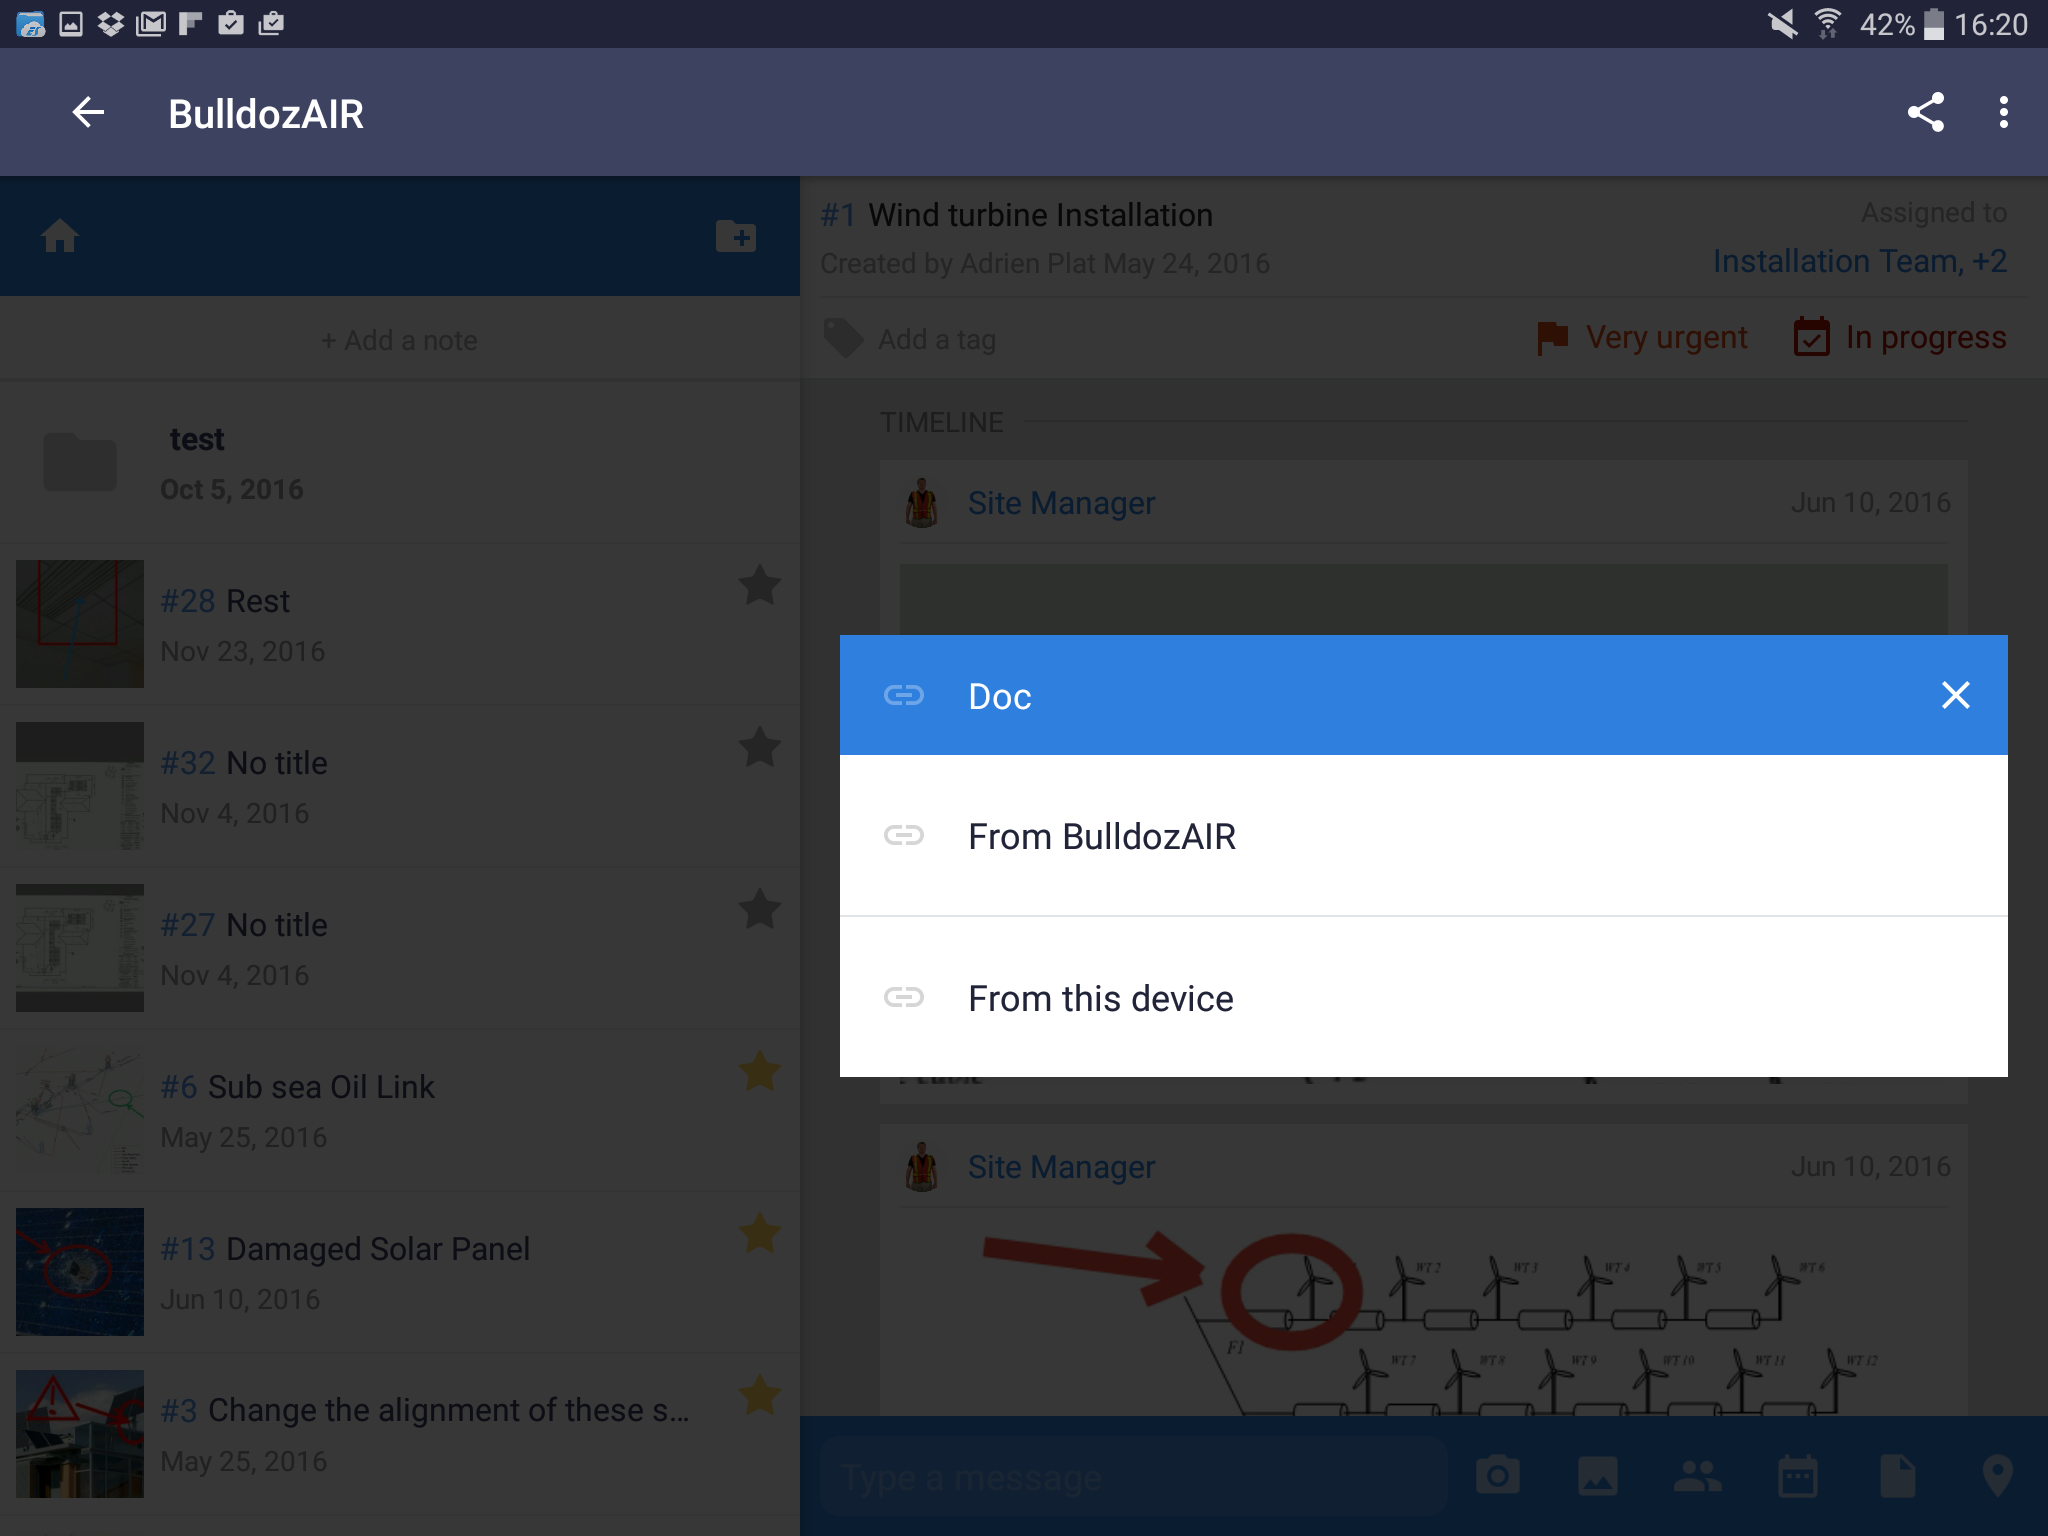
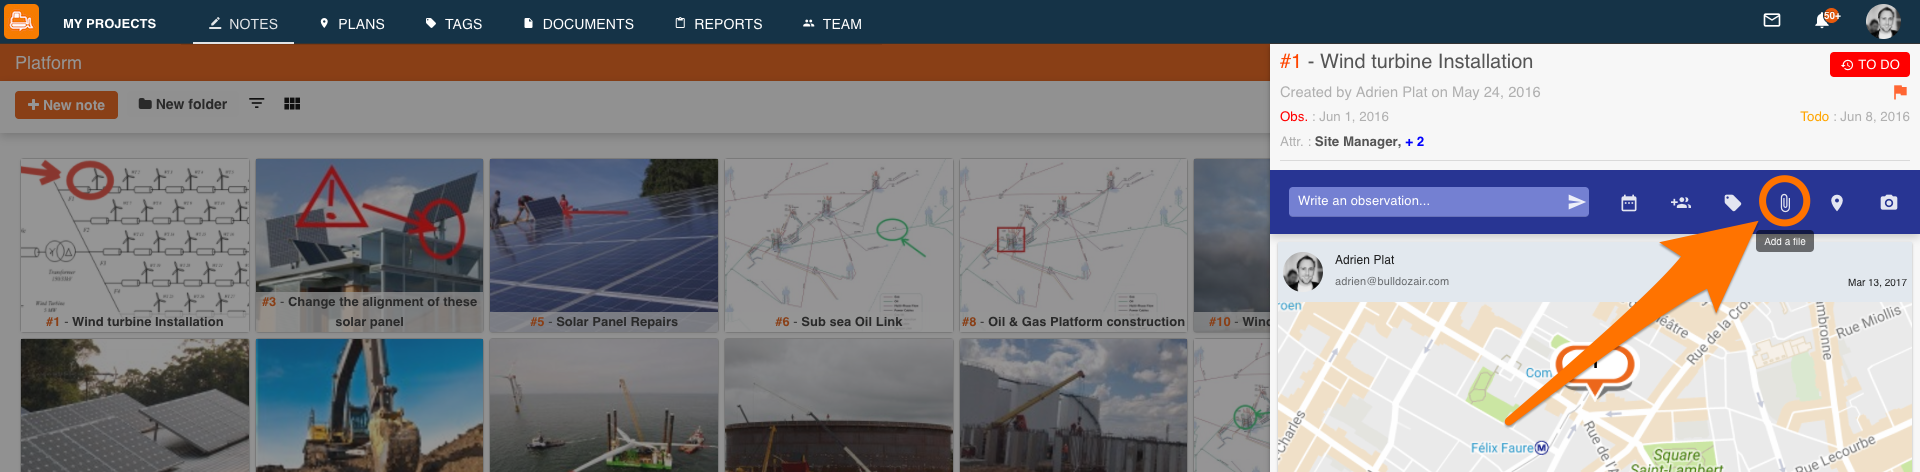
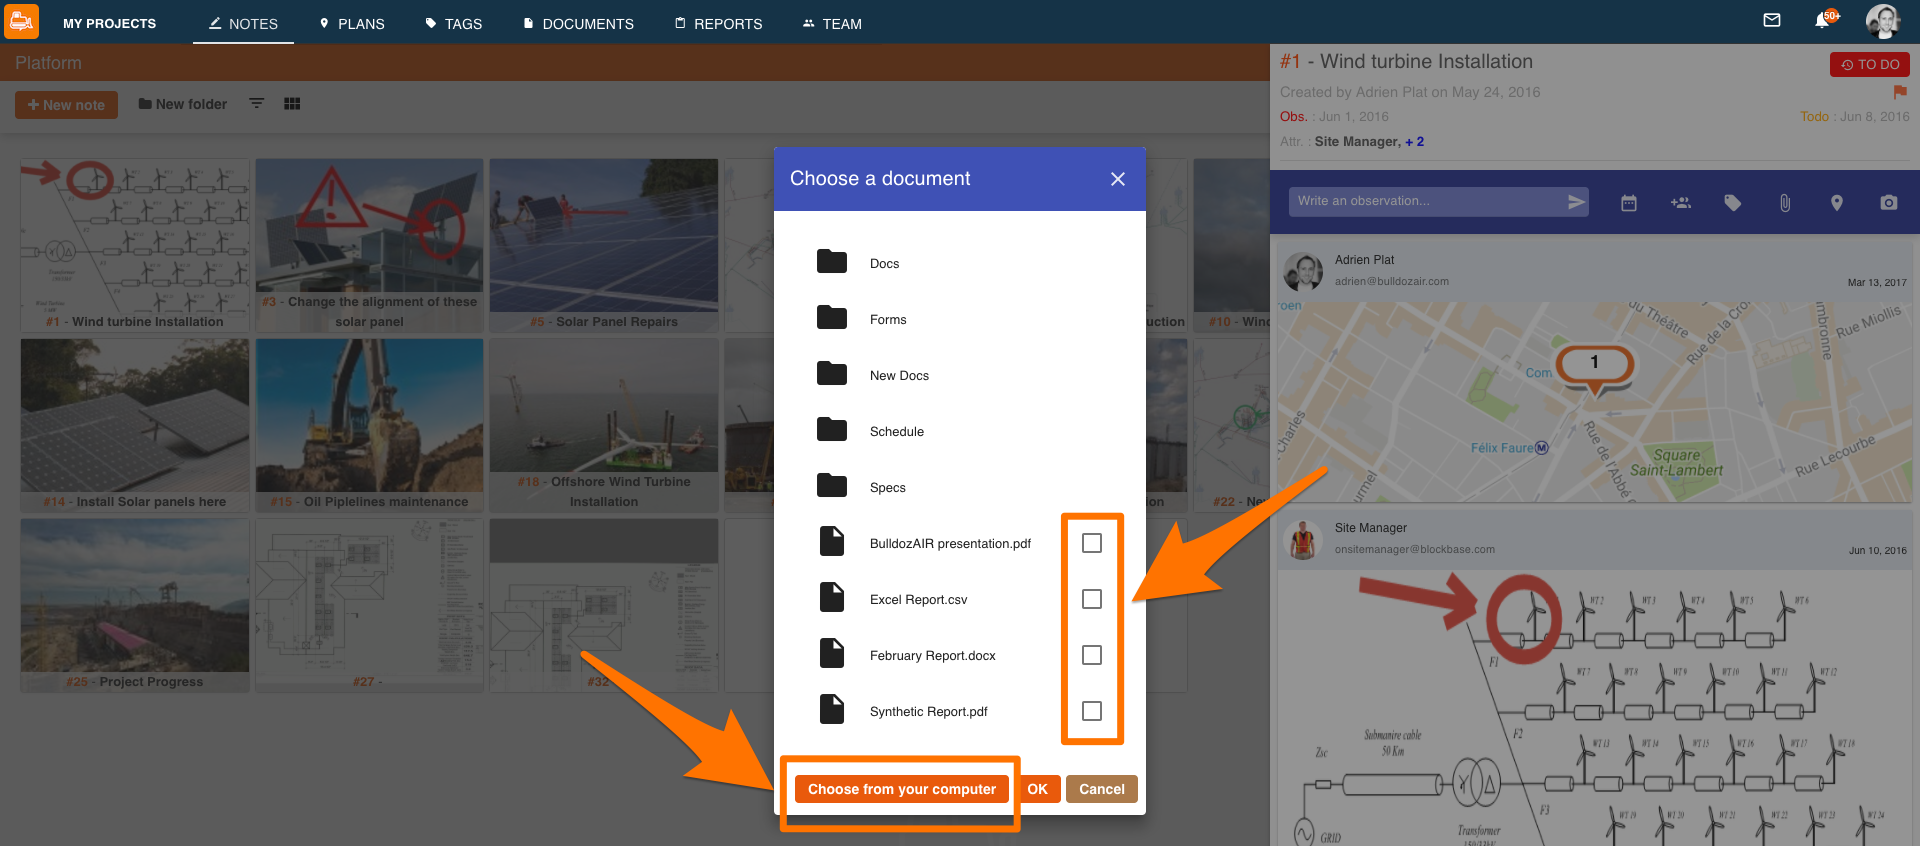
- Select the clip icon, third one from the right
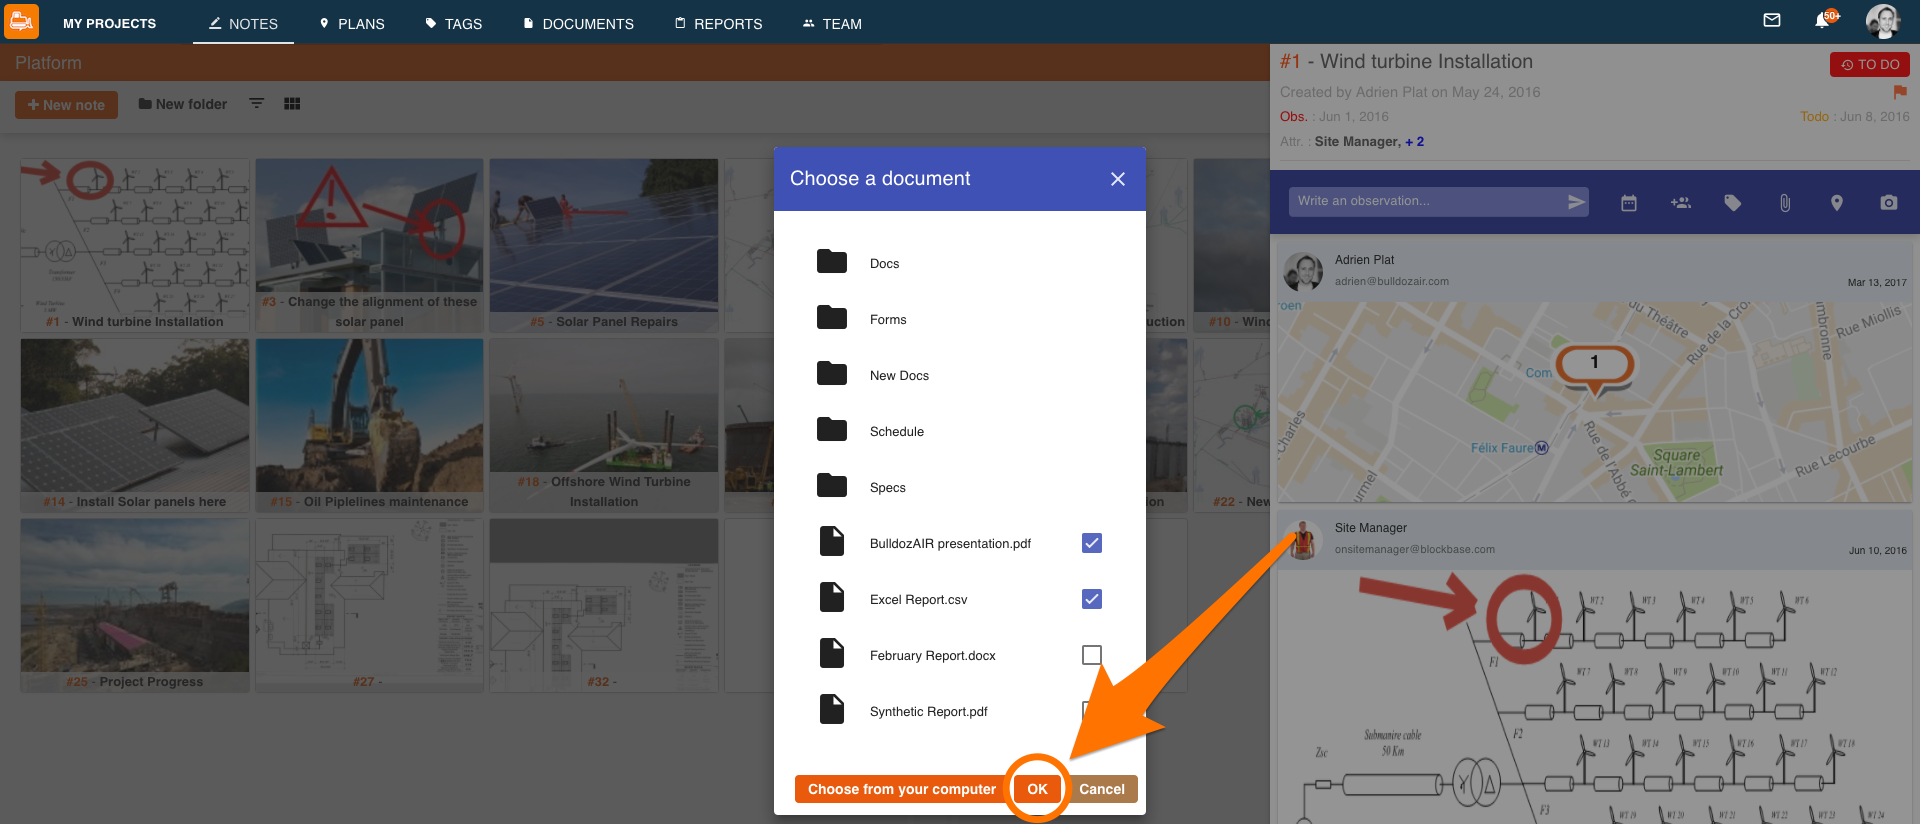
- You can choose a file previously added to BulldozAIR by ticking its corresponding box or choose one from your computer by selecting “Choose from your computer”
- Select
- “OK”
Add a plan as a file
to add it to your timeline
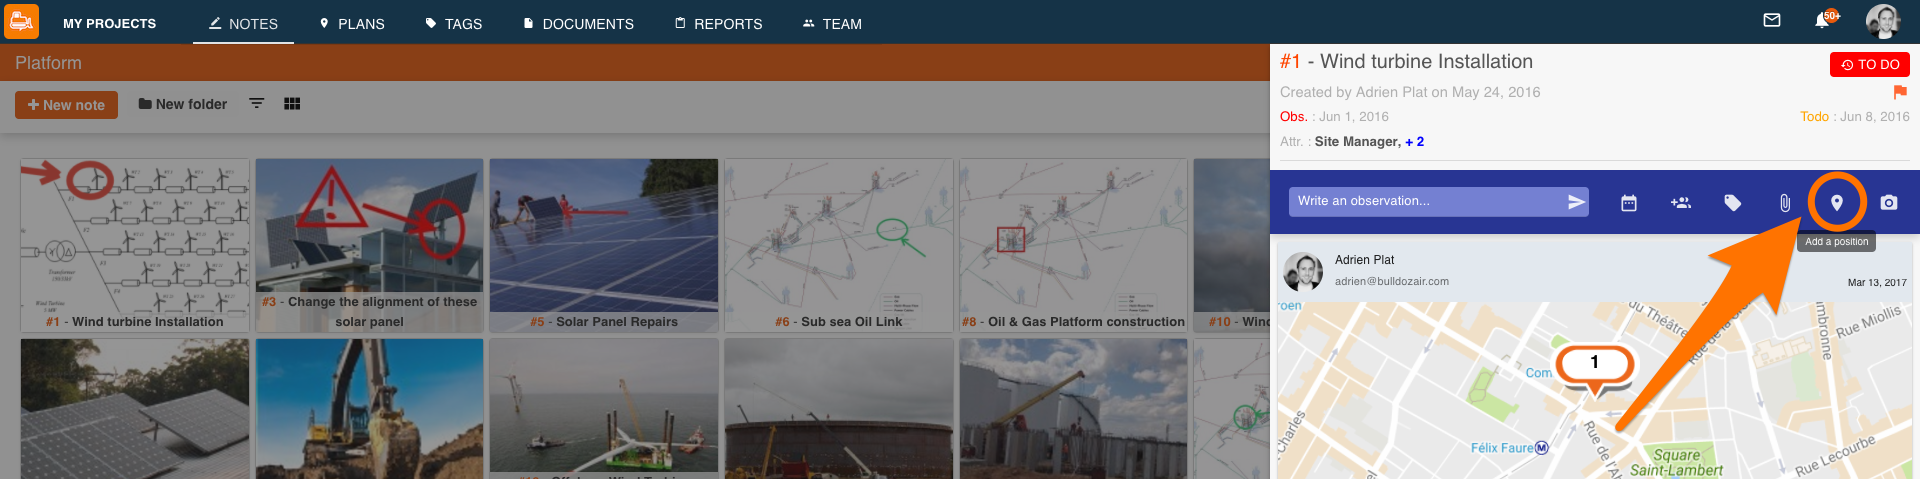
Positions
You can geolocate or place your notes in specific areas on a plan, this will allow you to track the developments all around your field with accuracy and grant you access to very complete information.
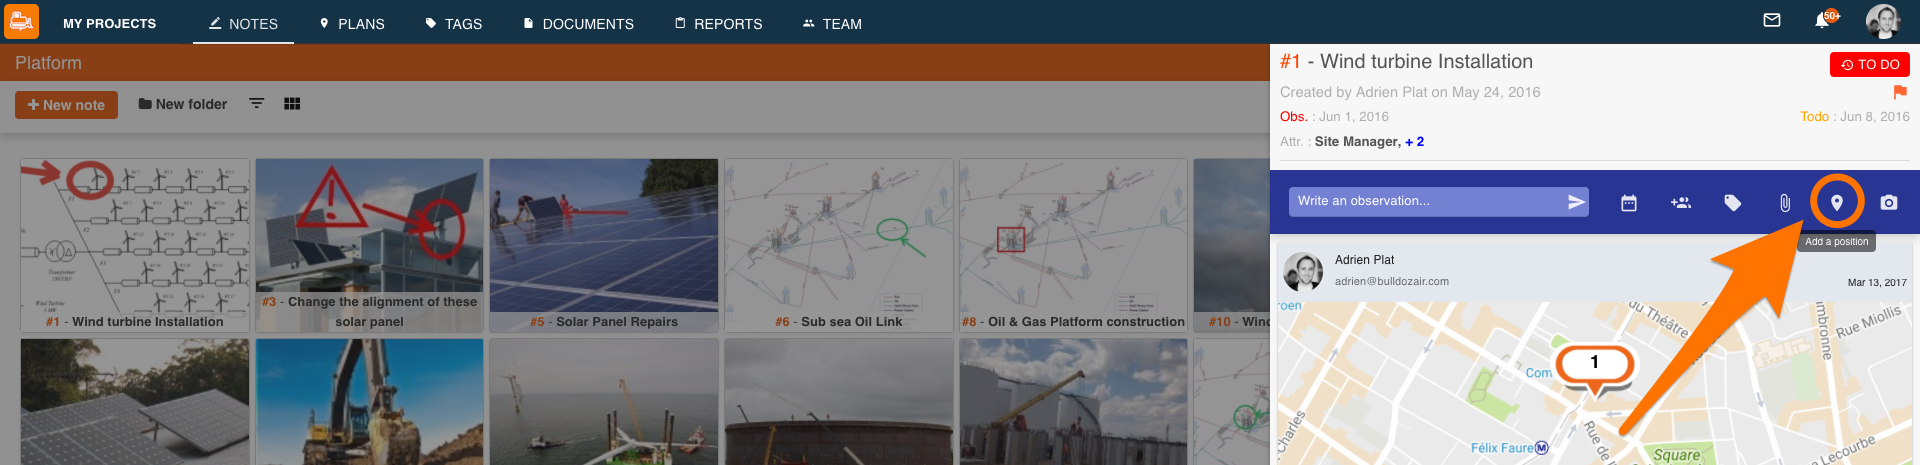
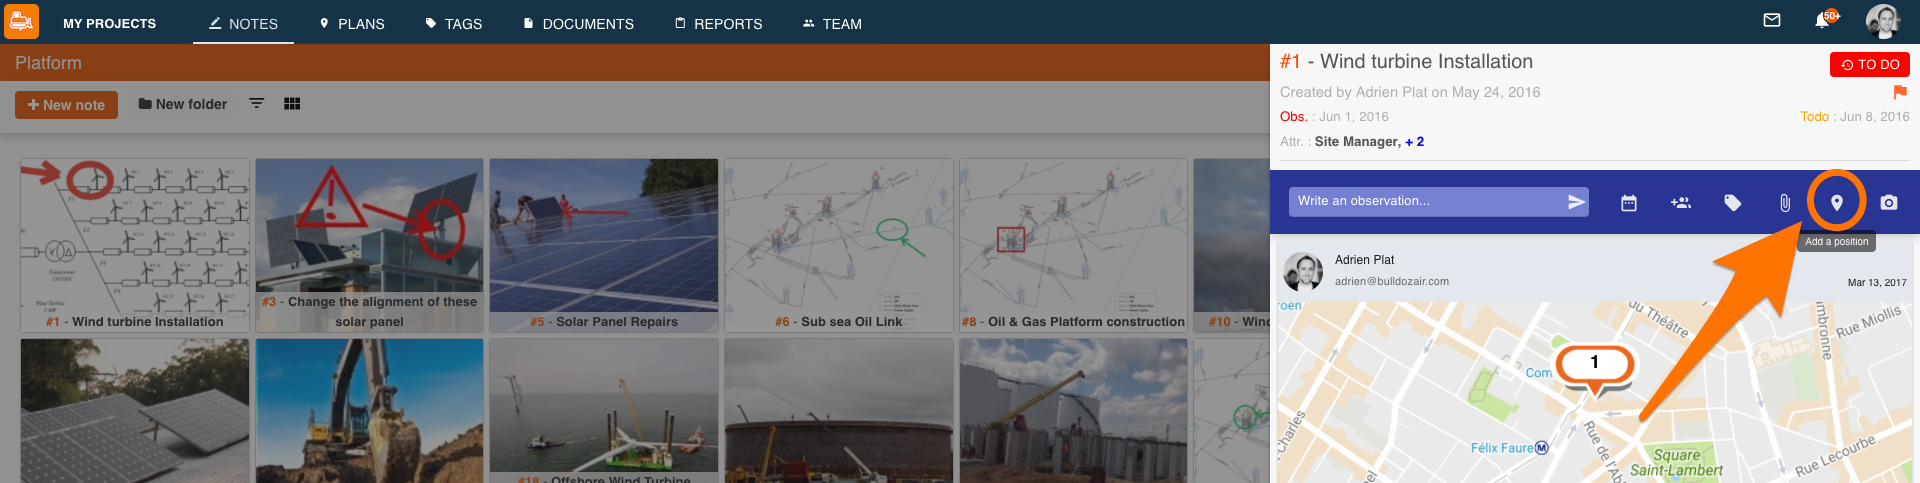
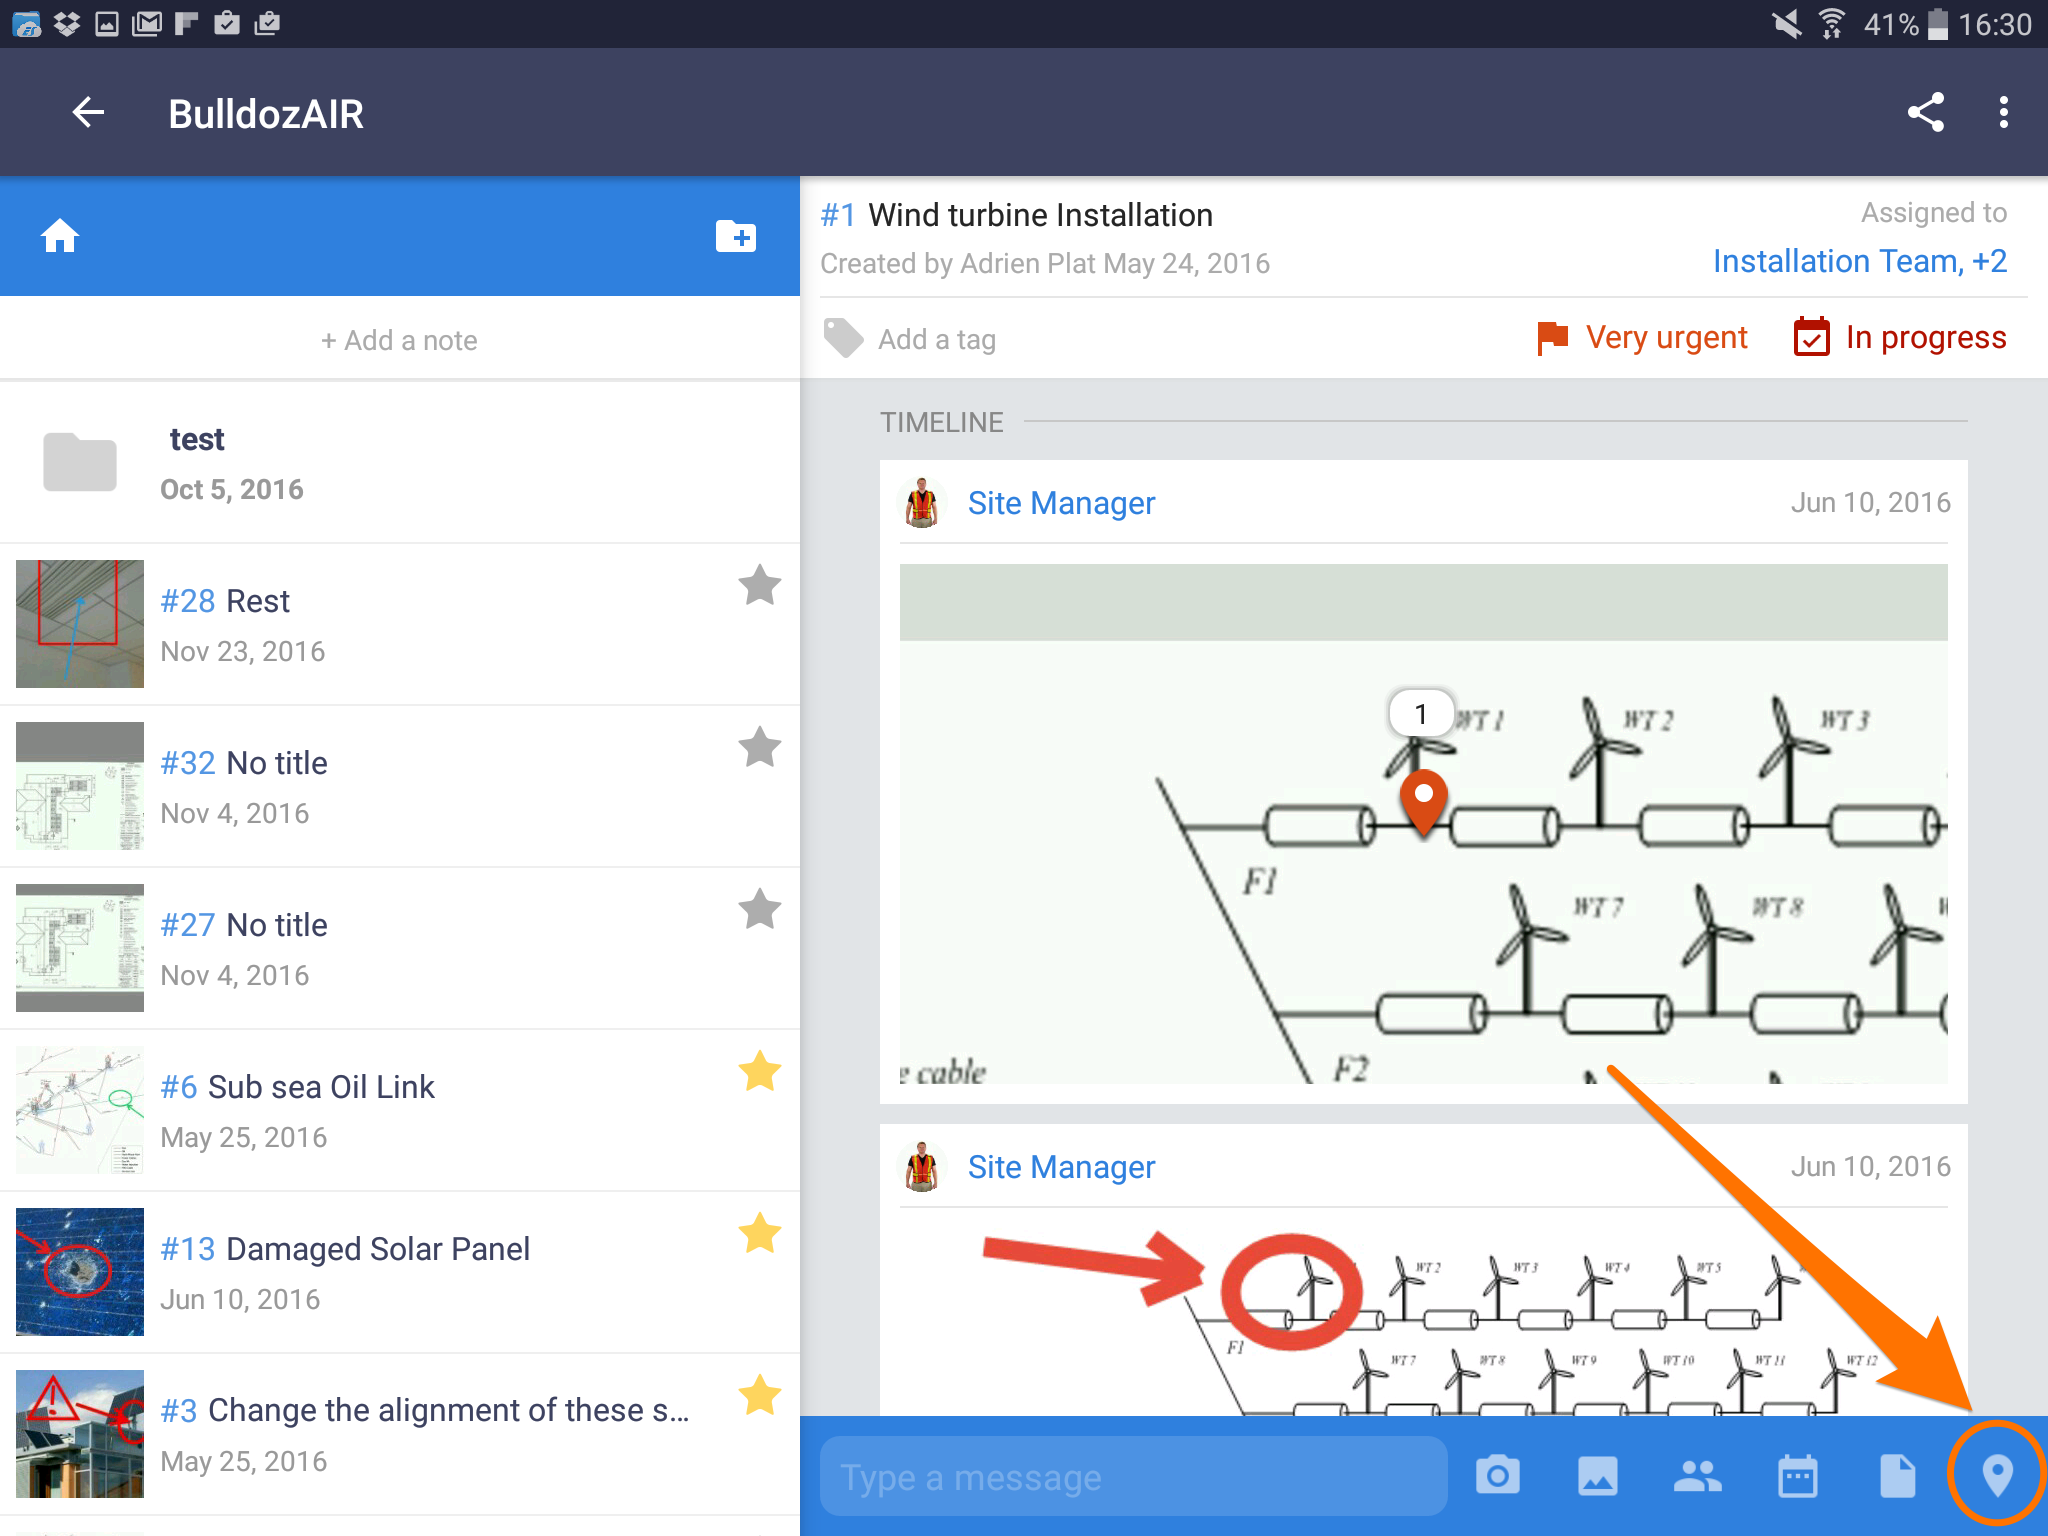
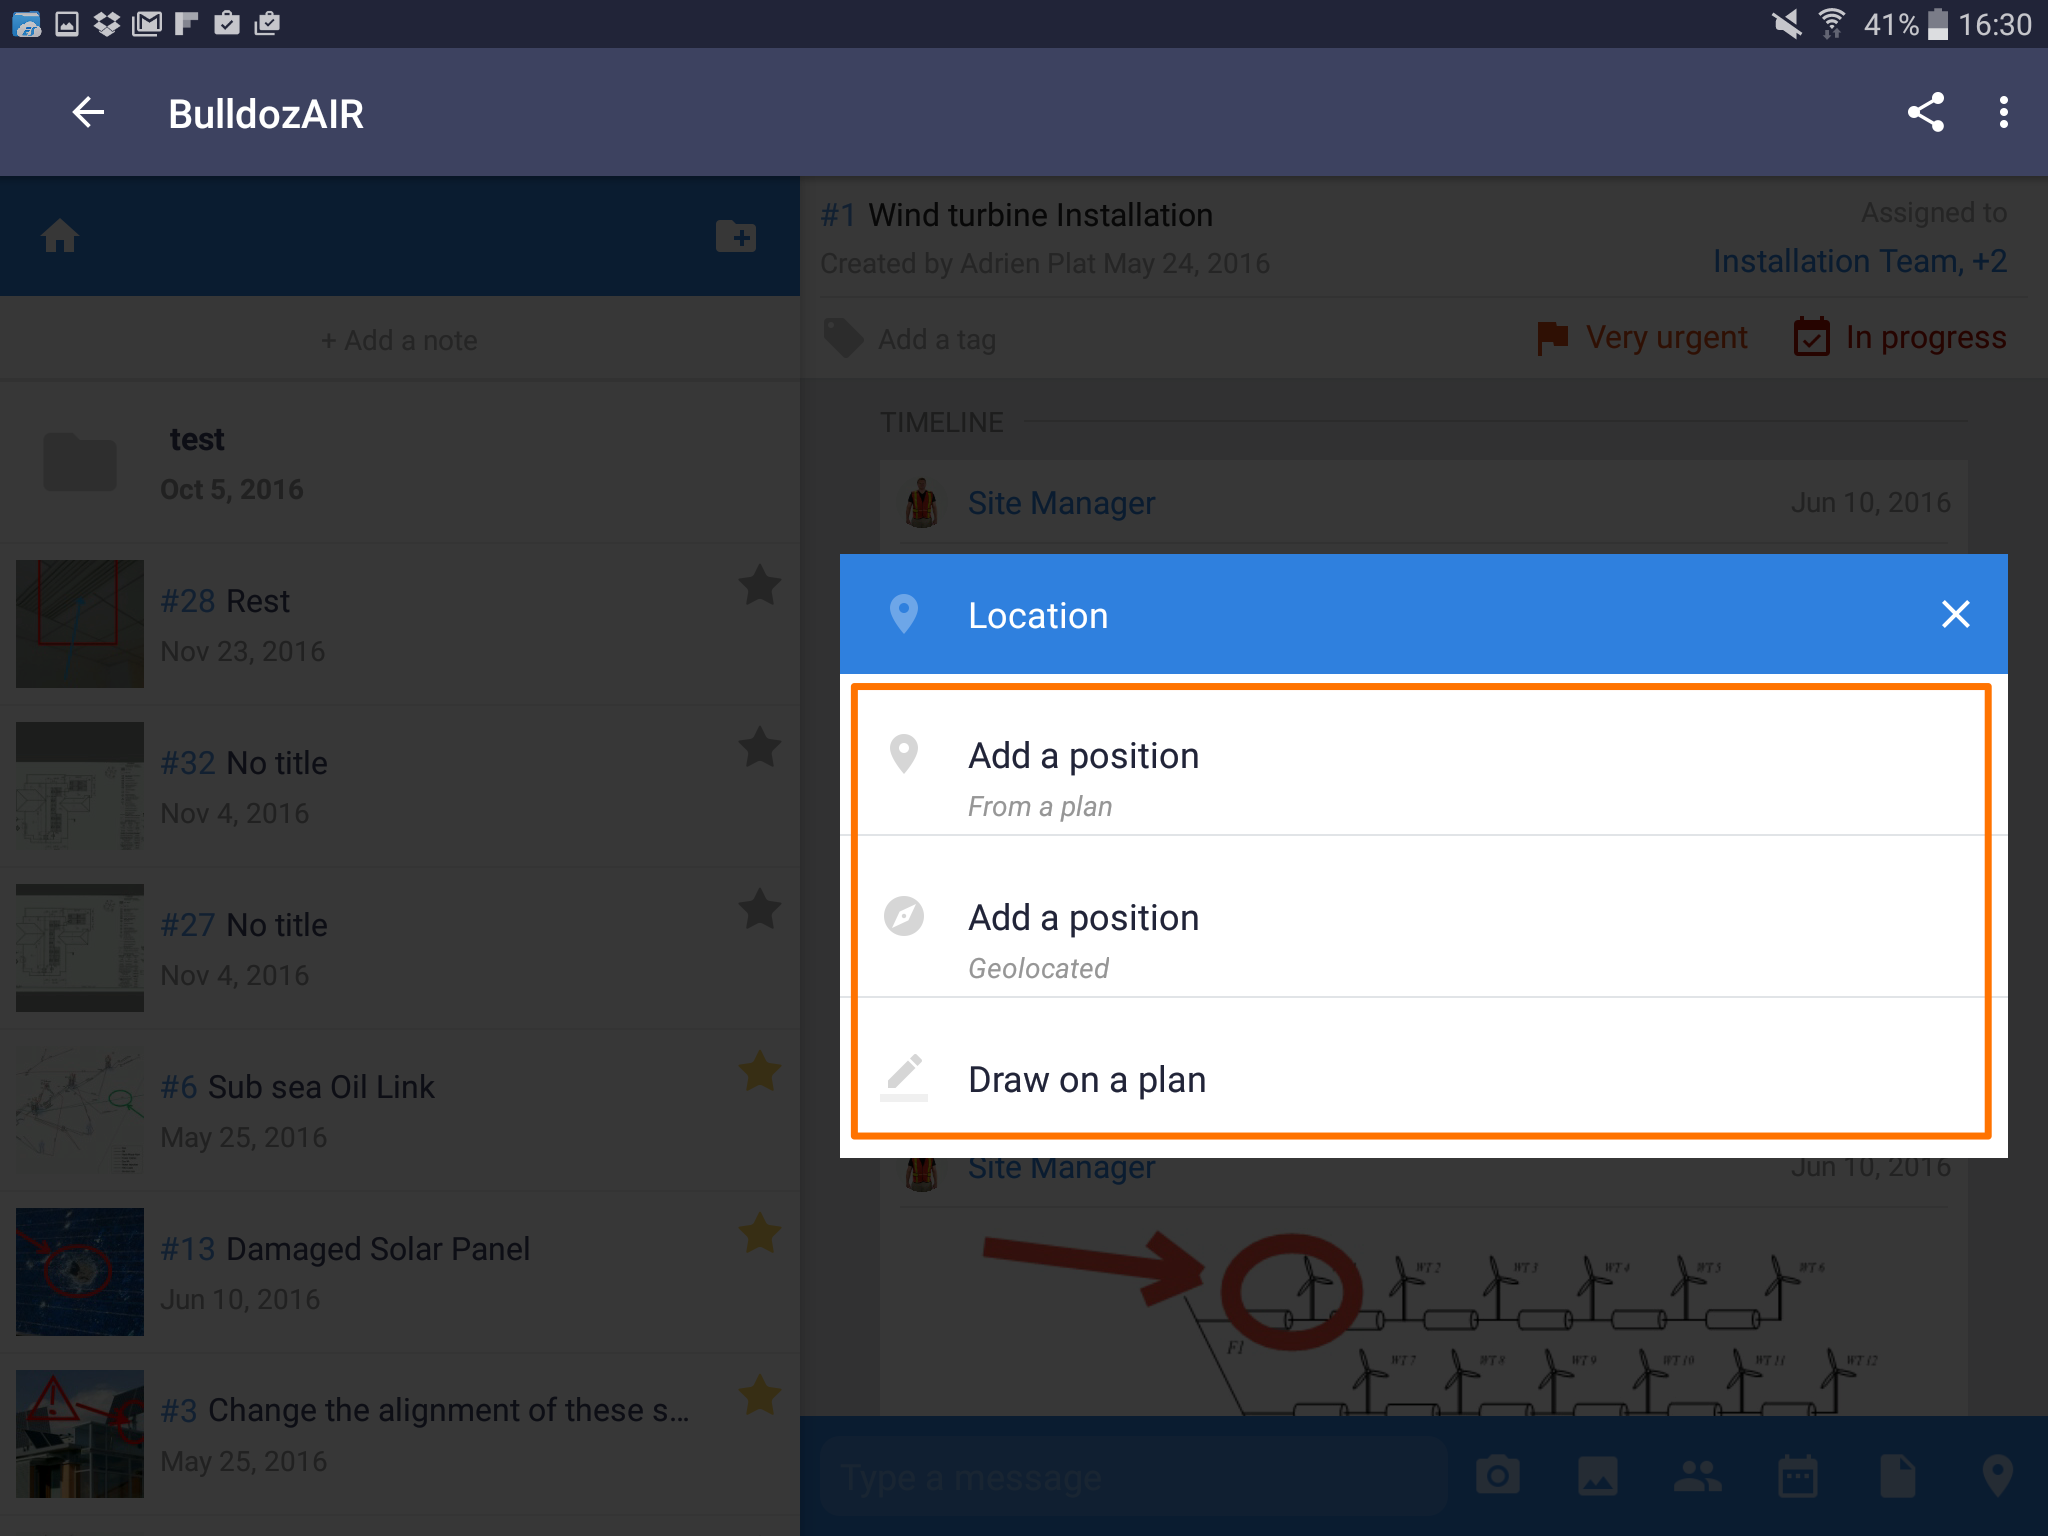
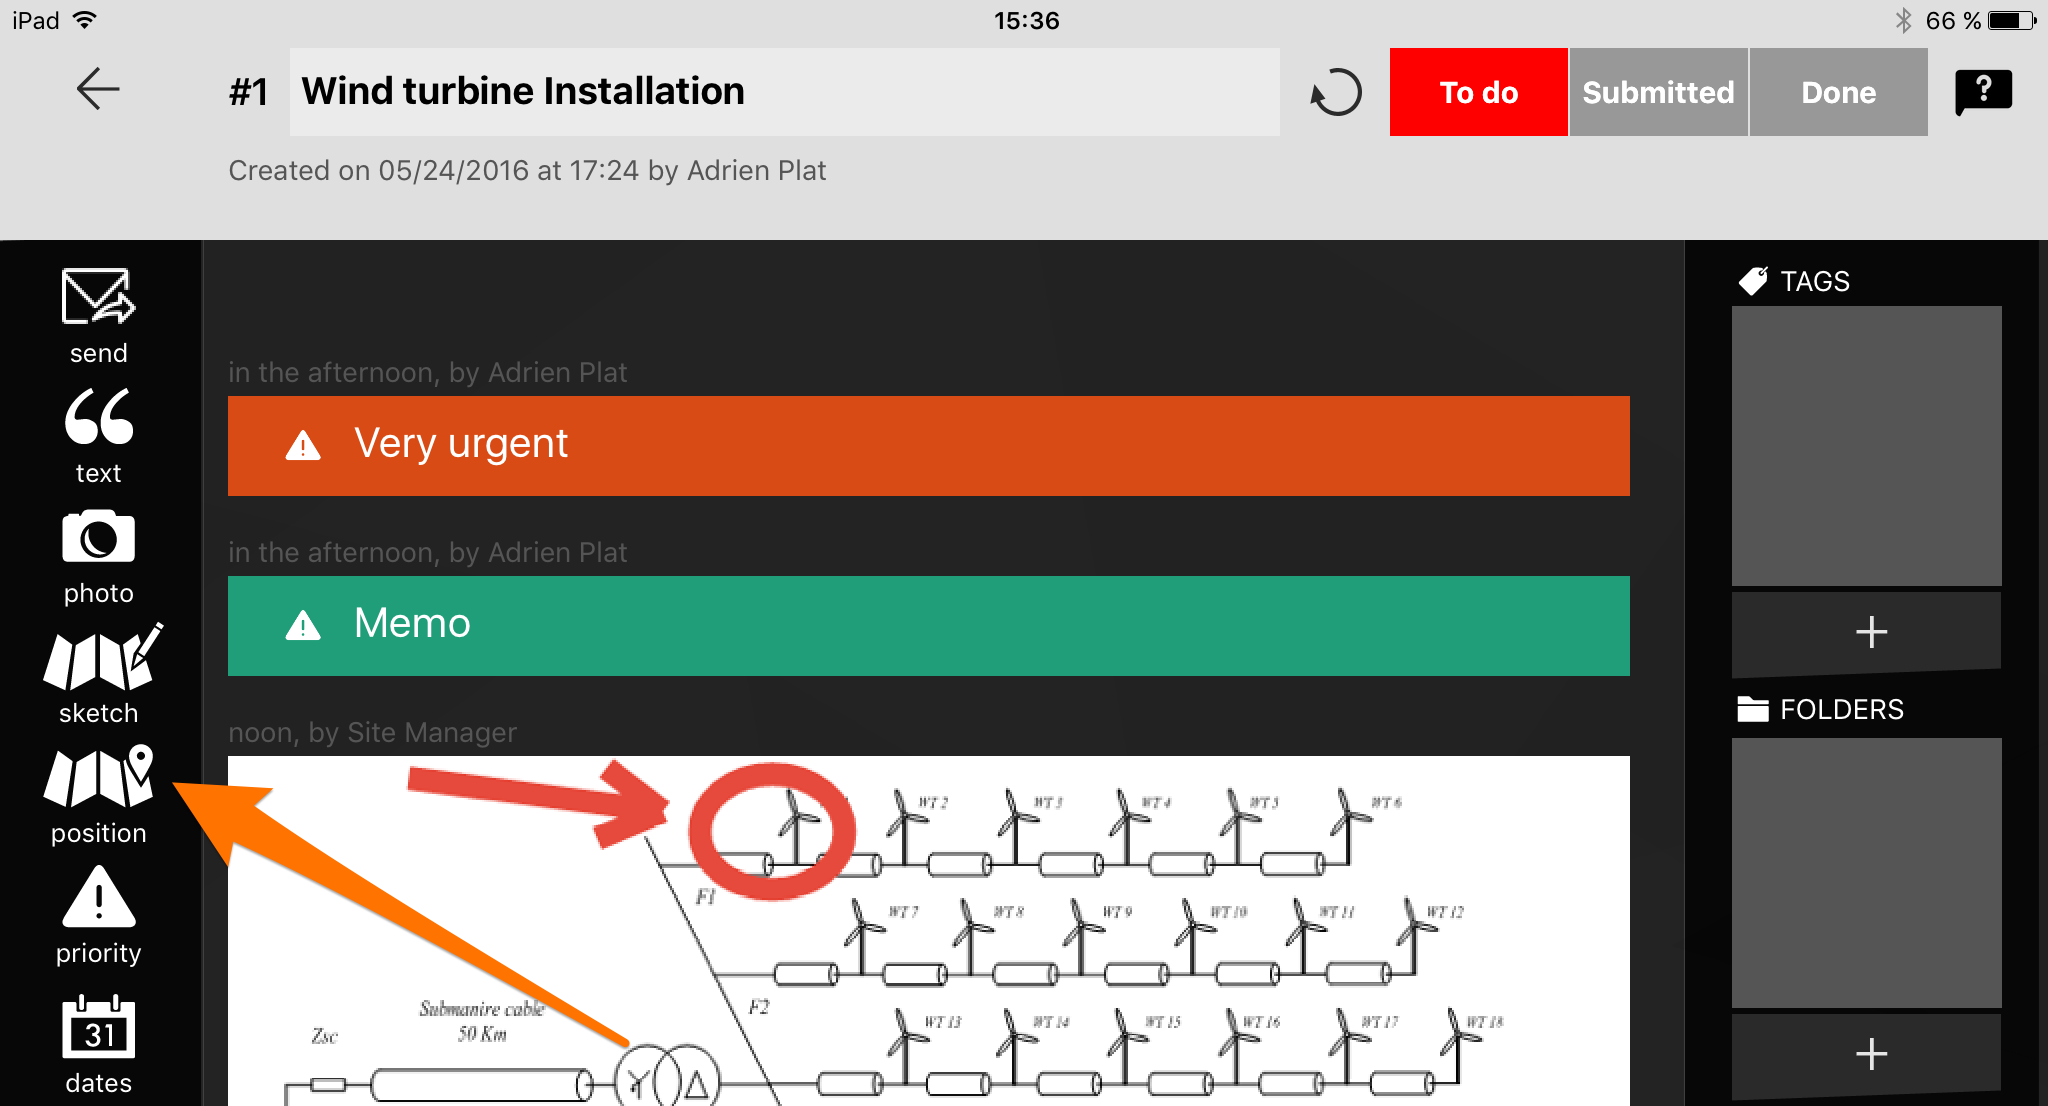
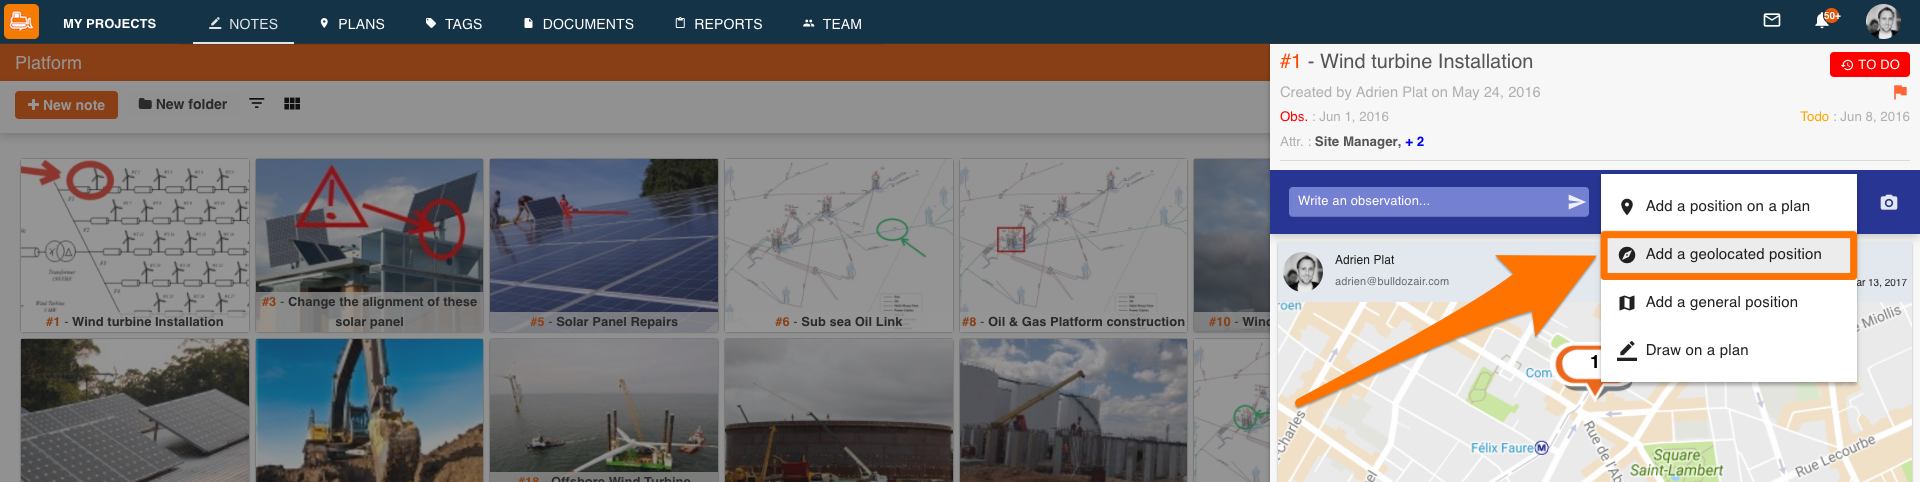
- To add positions, select the pin icon next to the bar designated for text
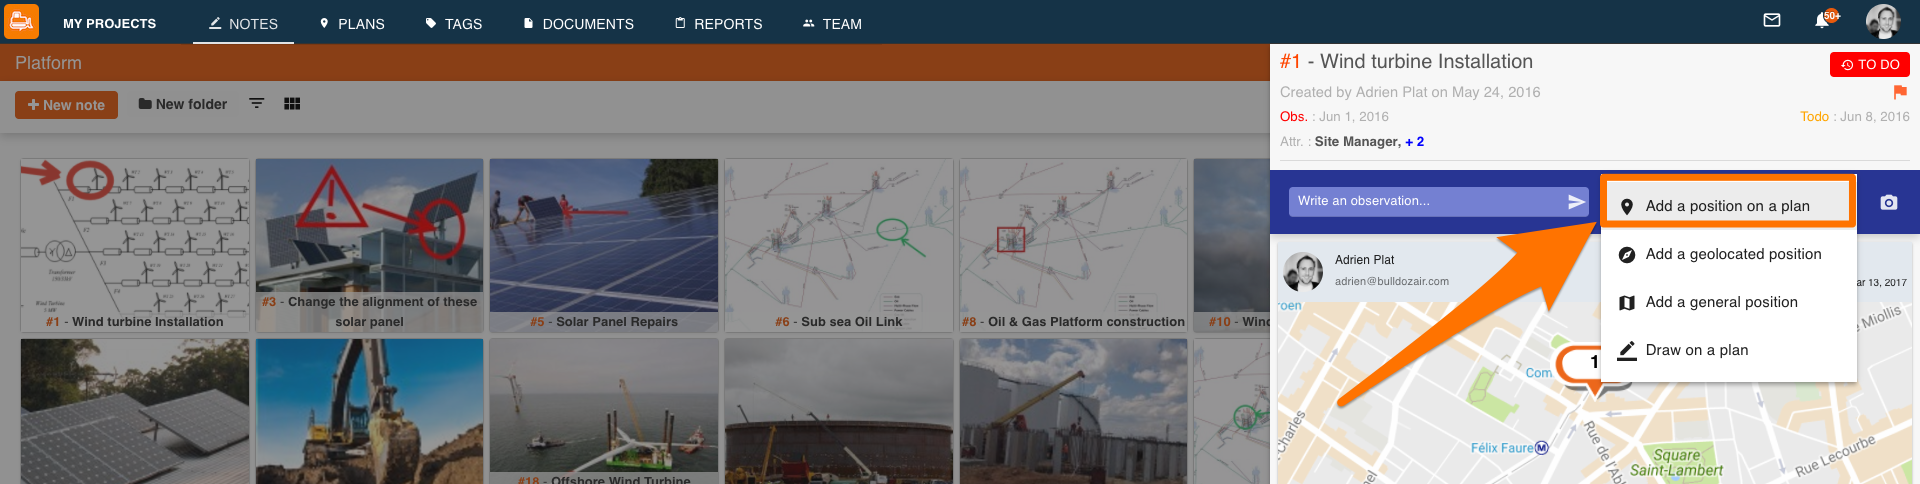
- Select between “Add a position from a plan”, “Add a position Geolocated” and “Draw on a plan”
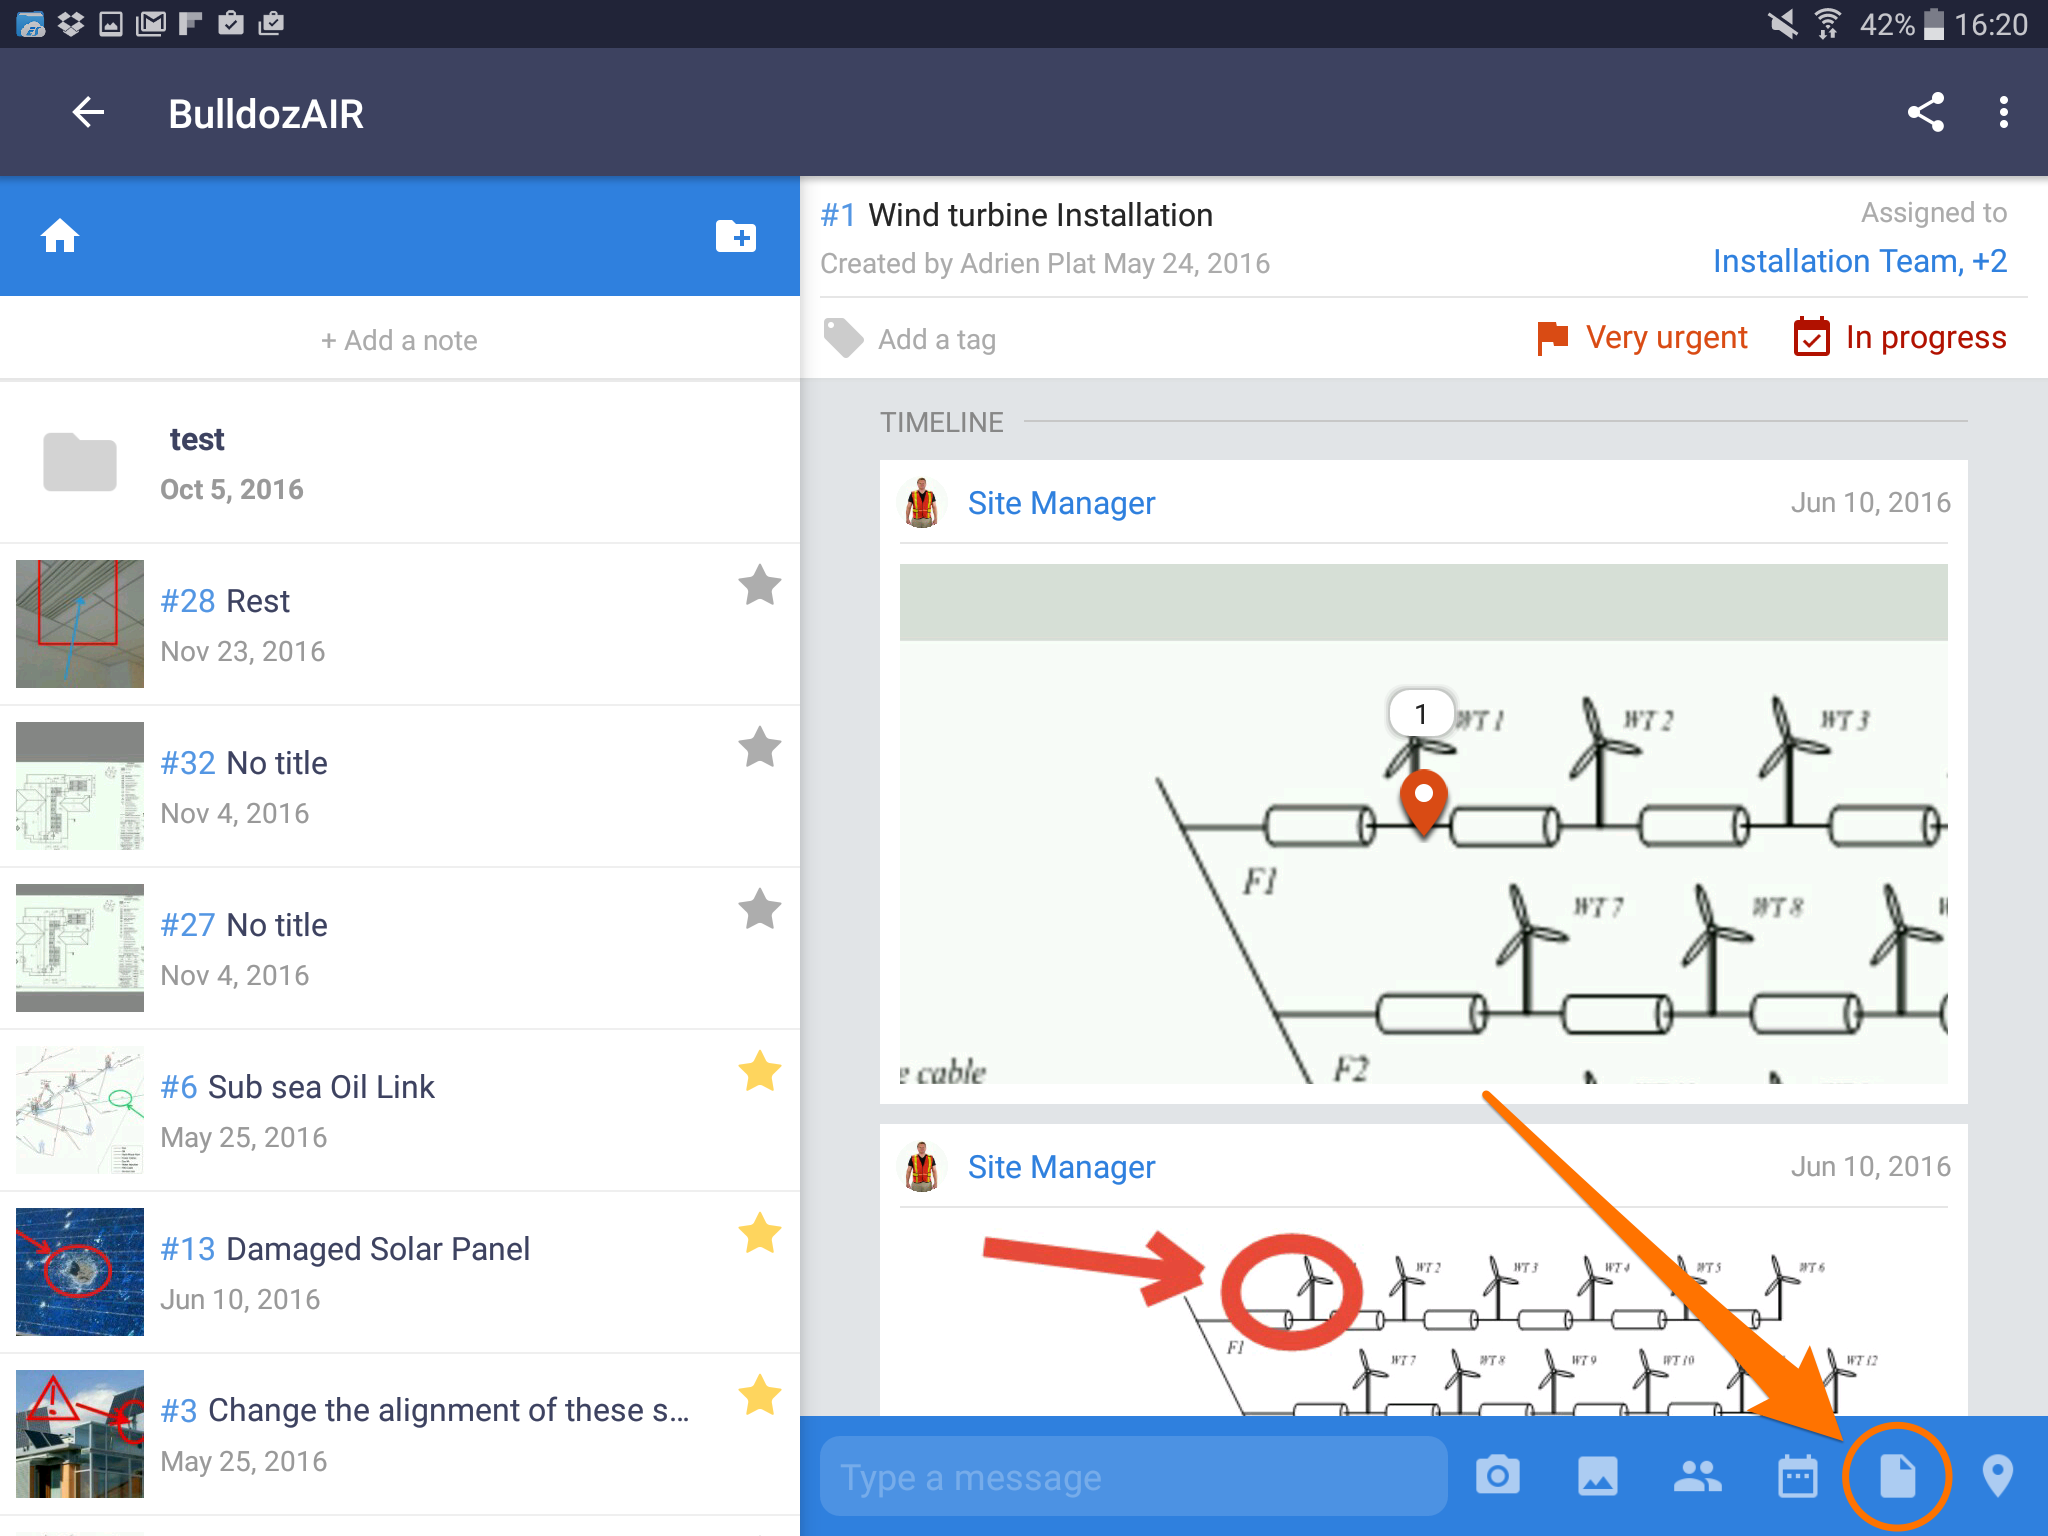
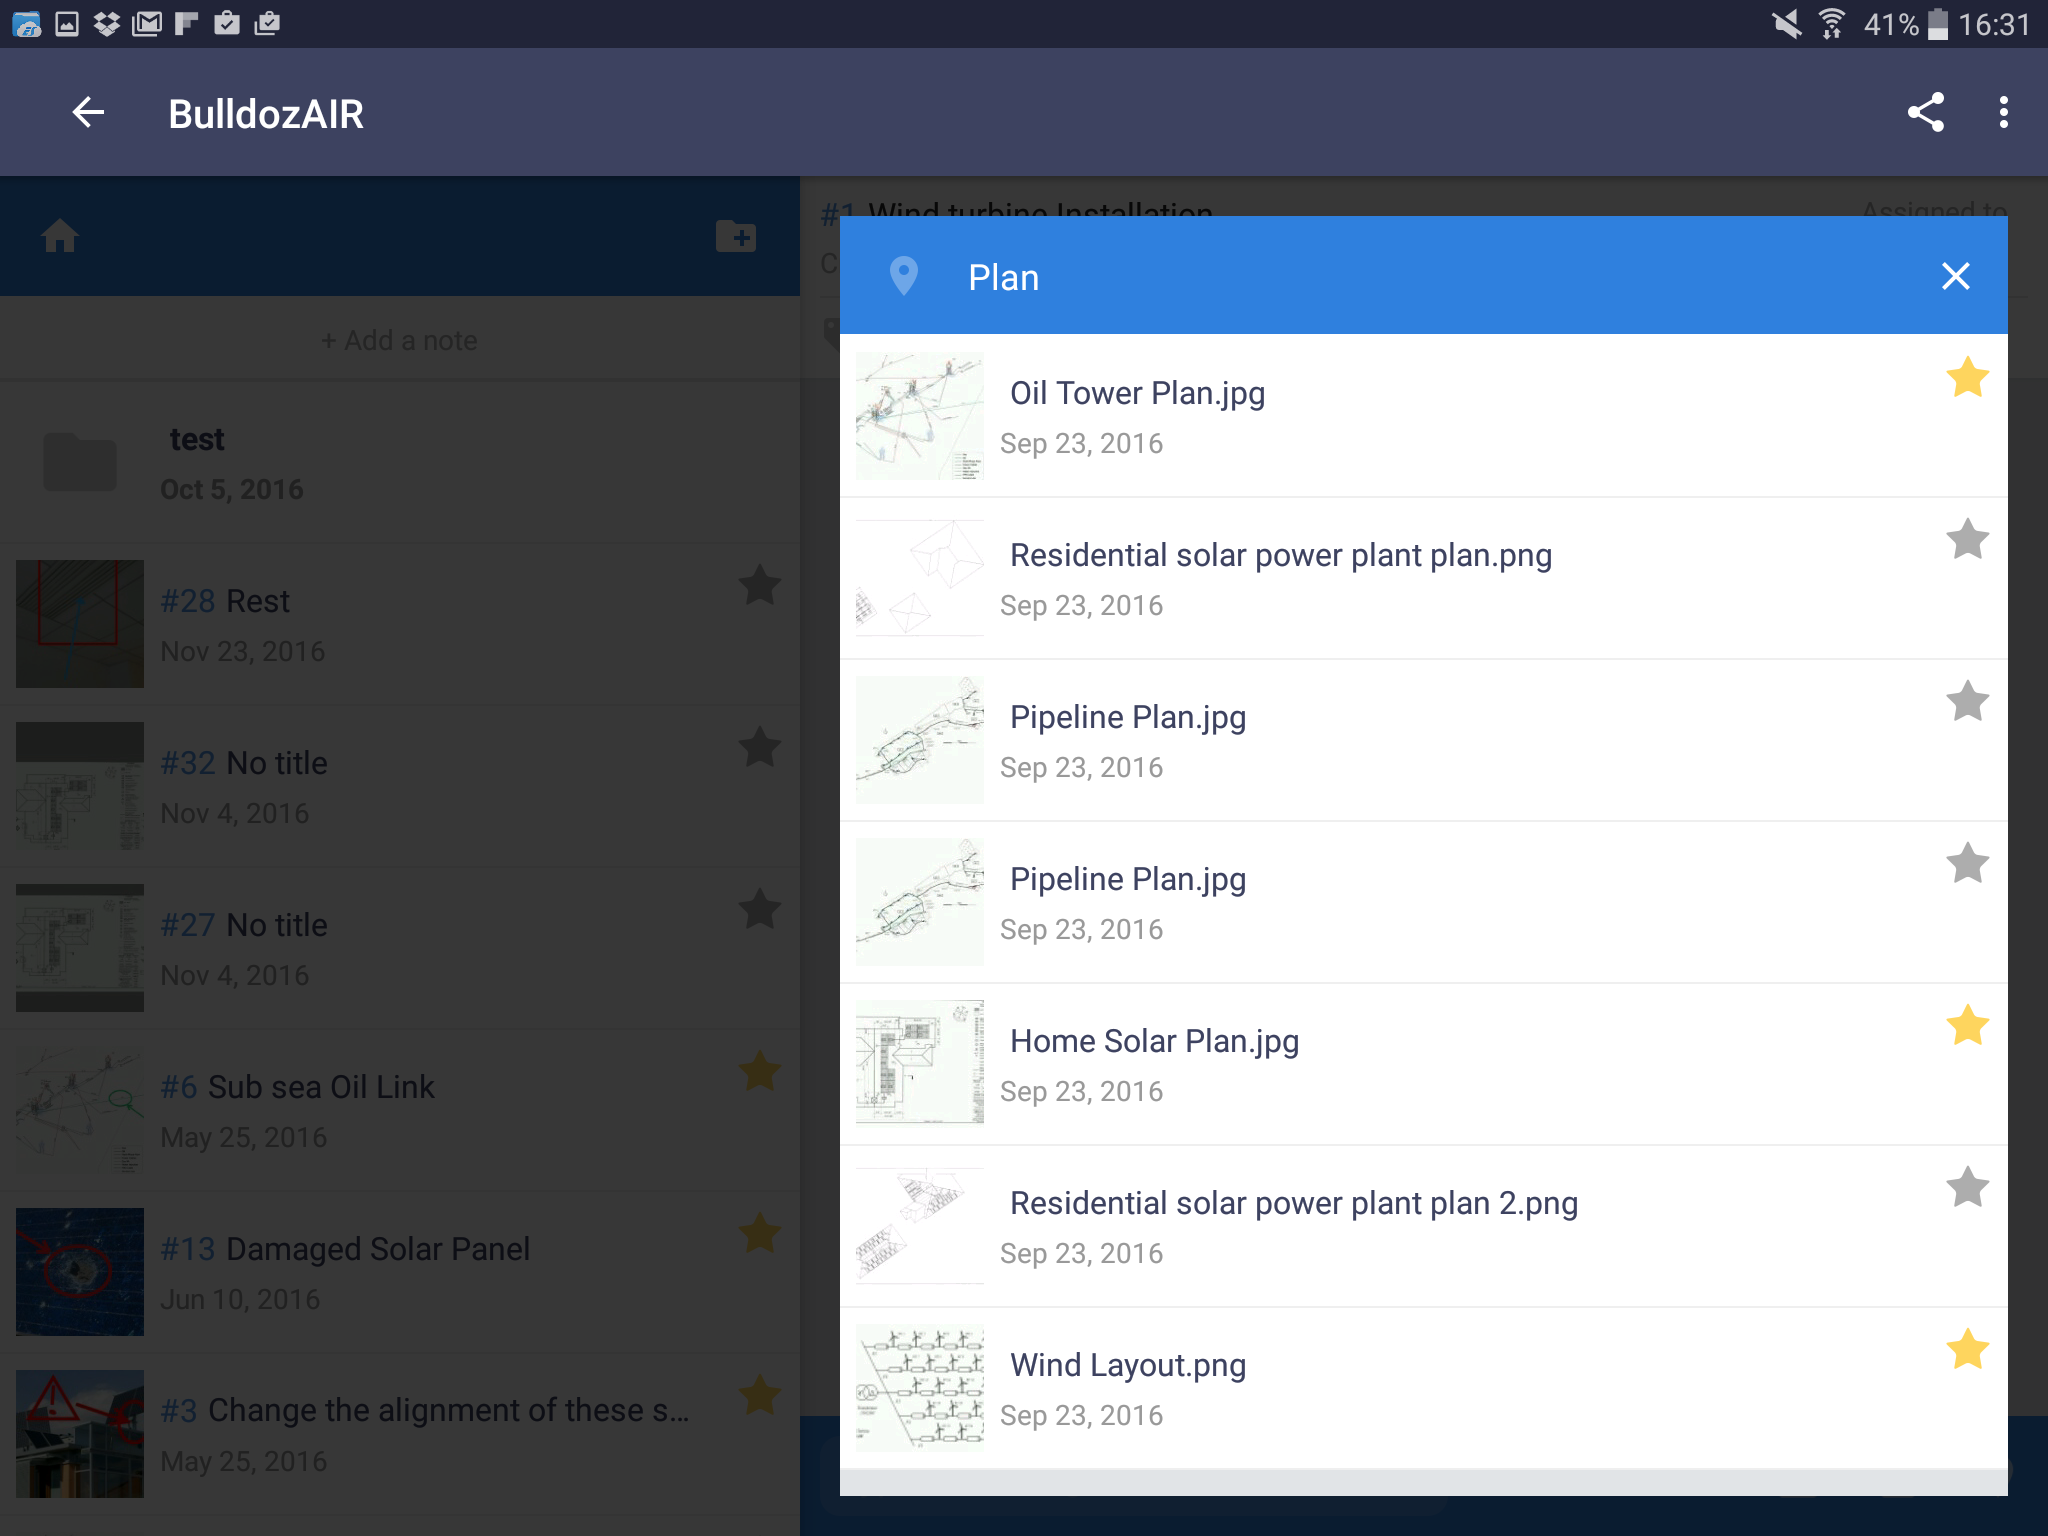
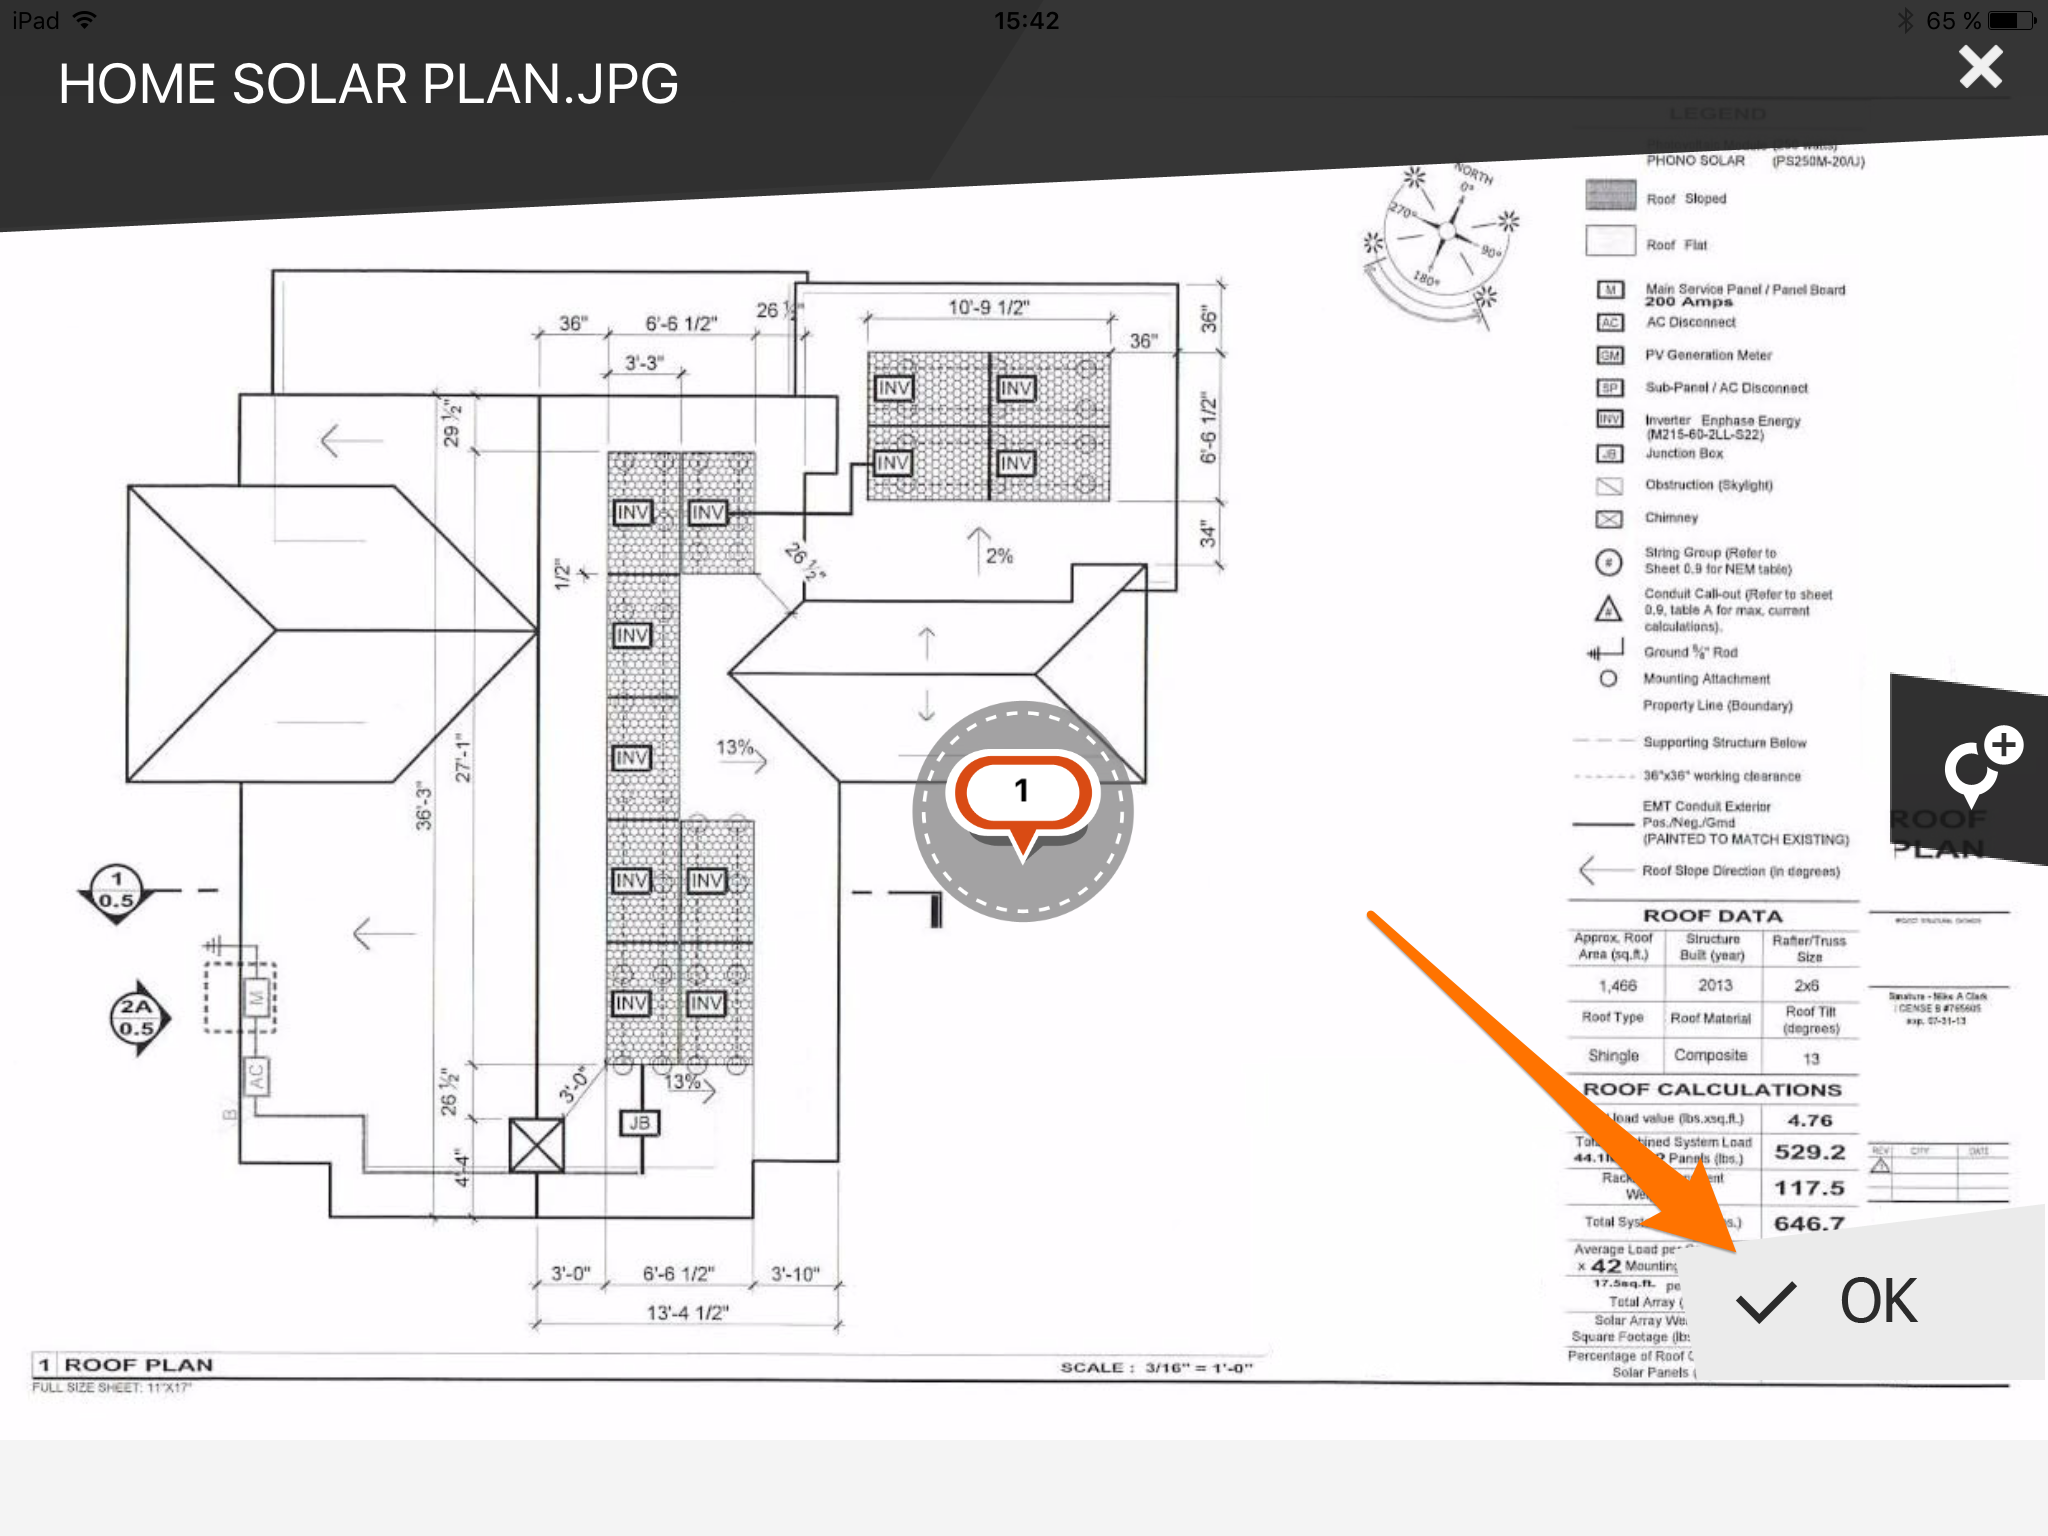
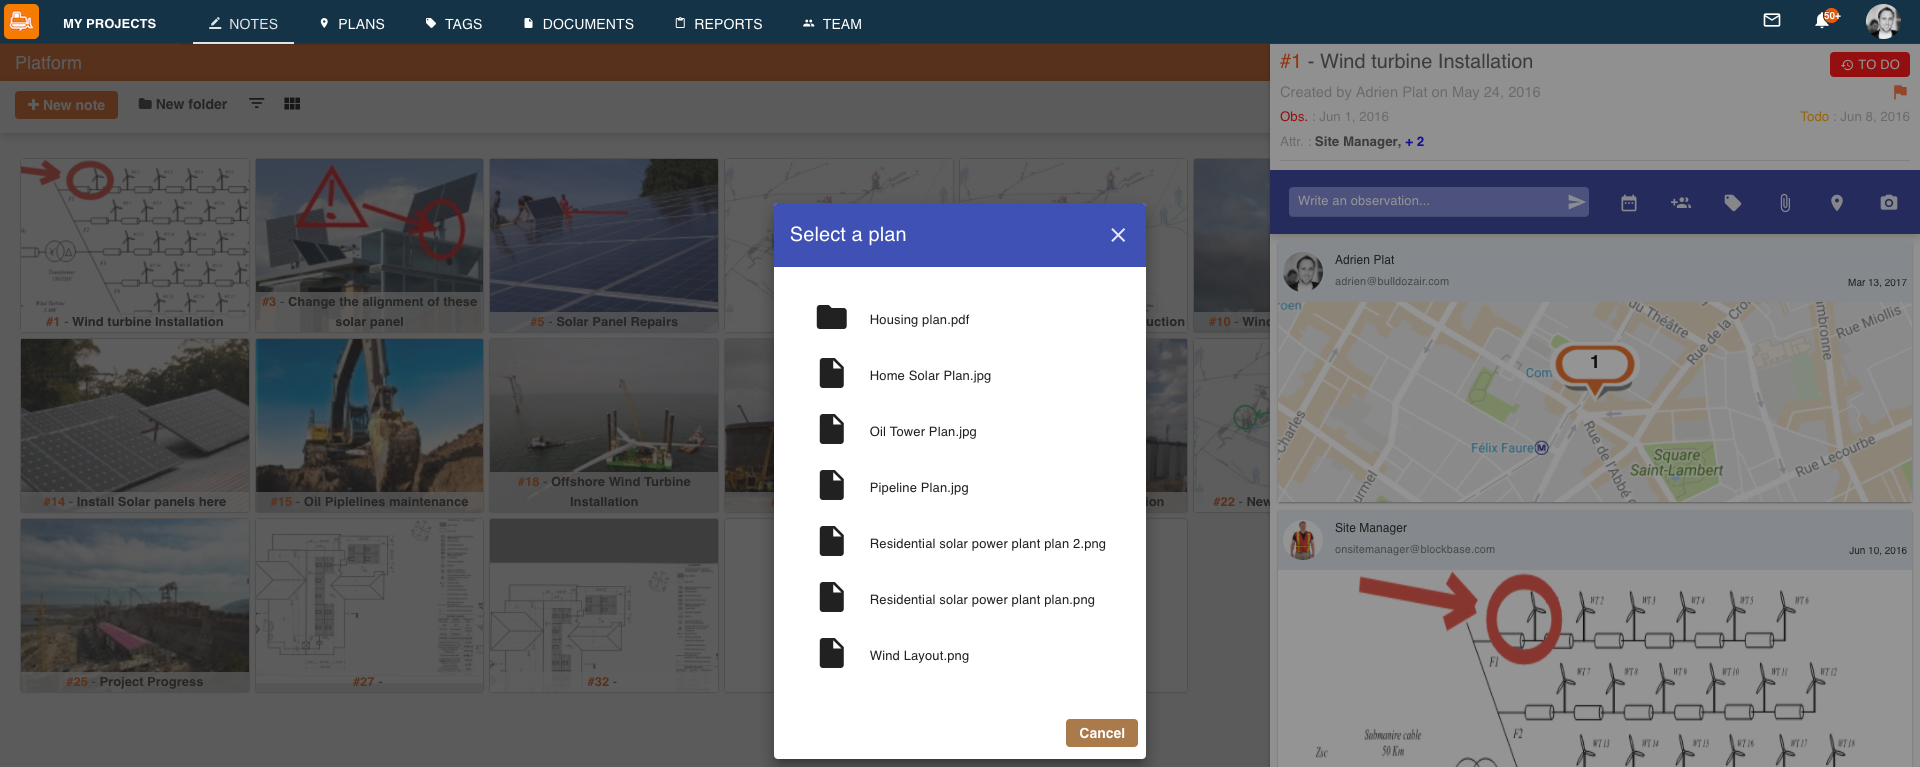
- If you chose “Add a position from a plan”, your plans will be displayed. Select the plan where you wish to place your note
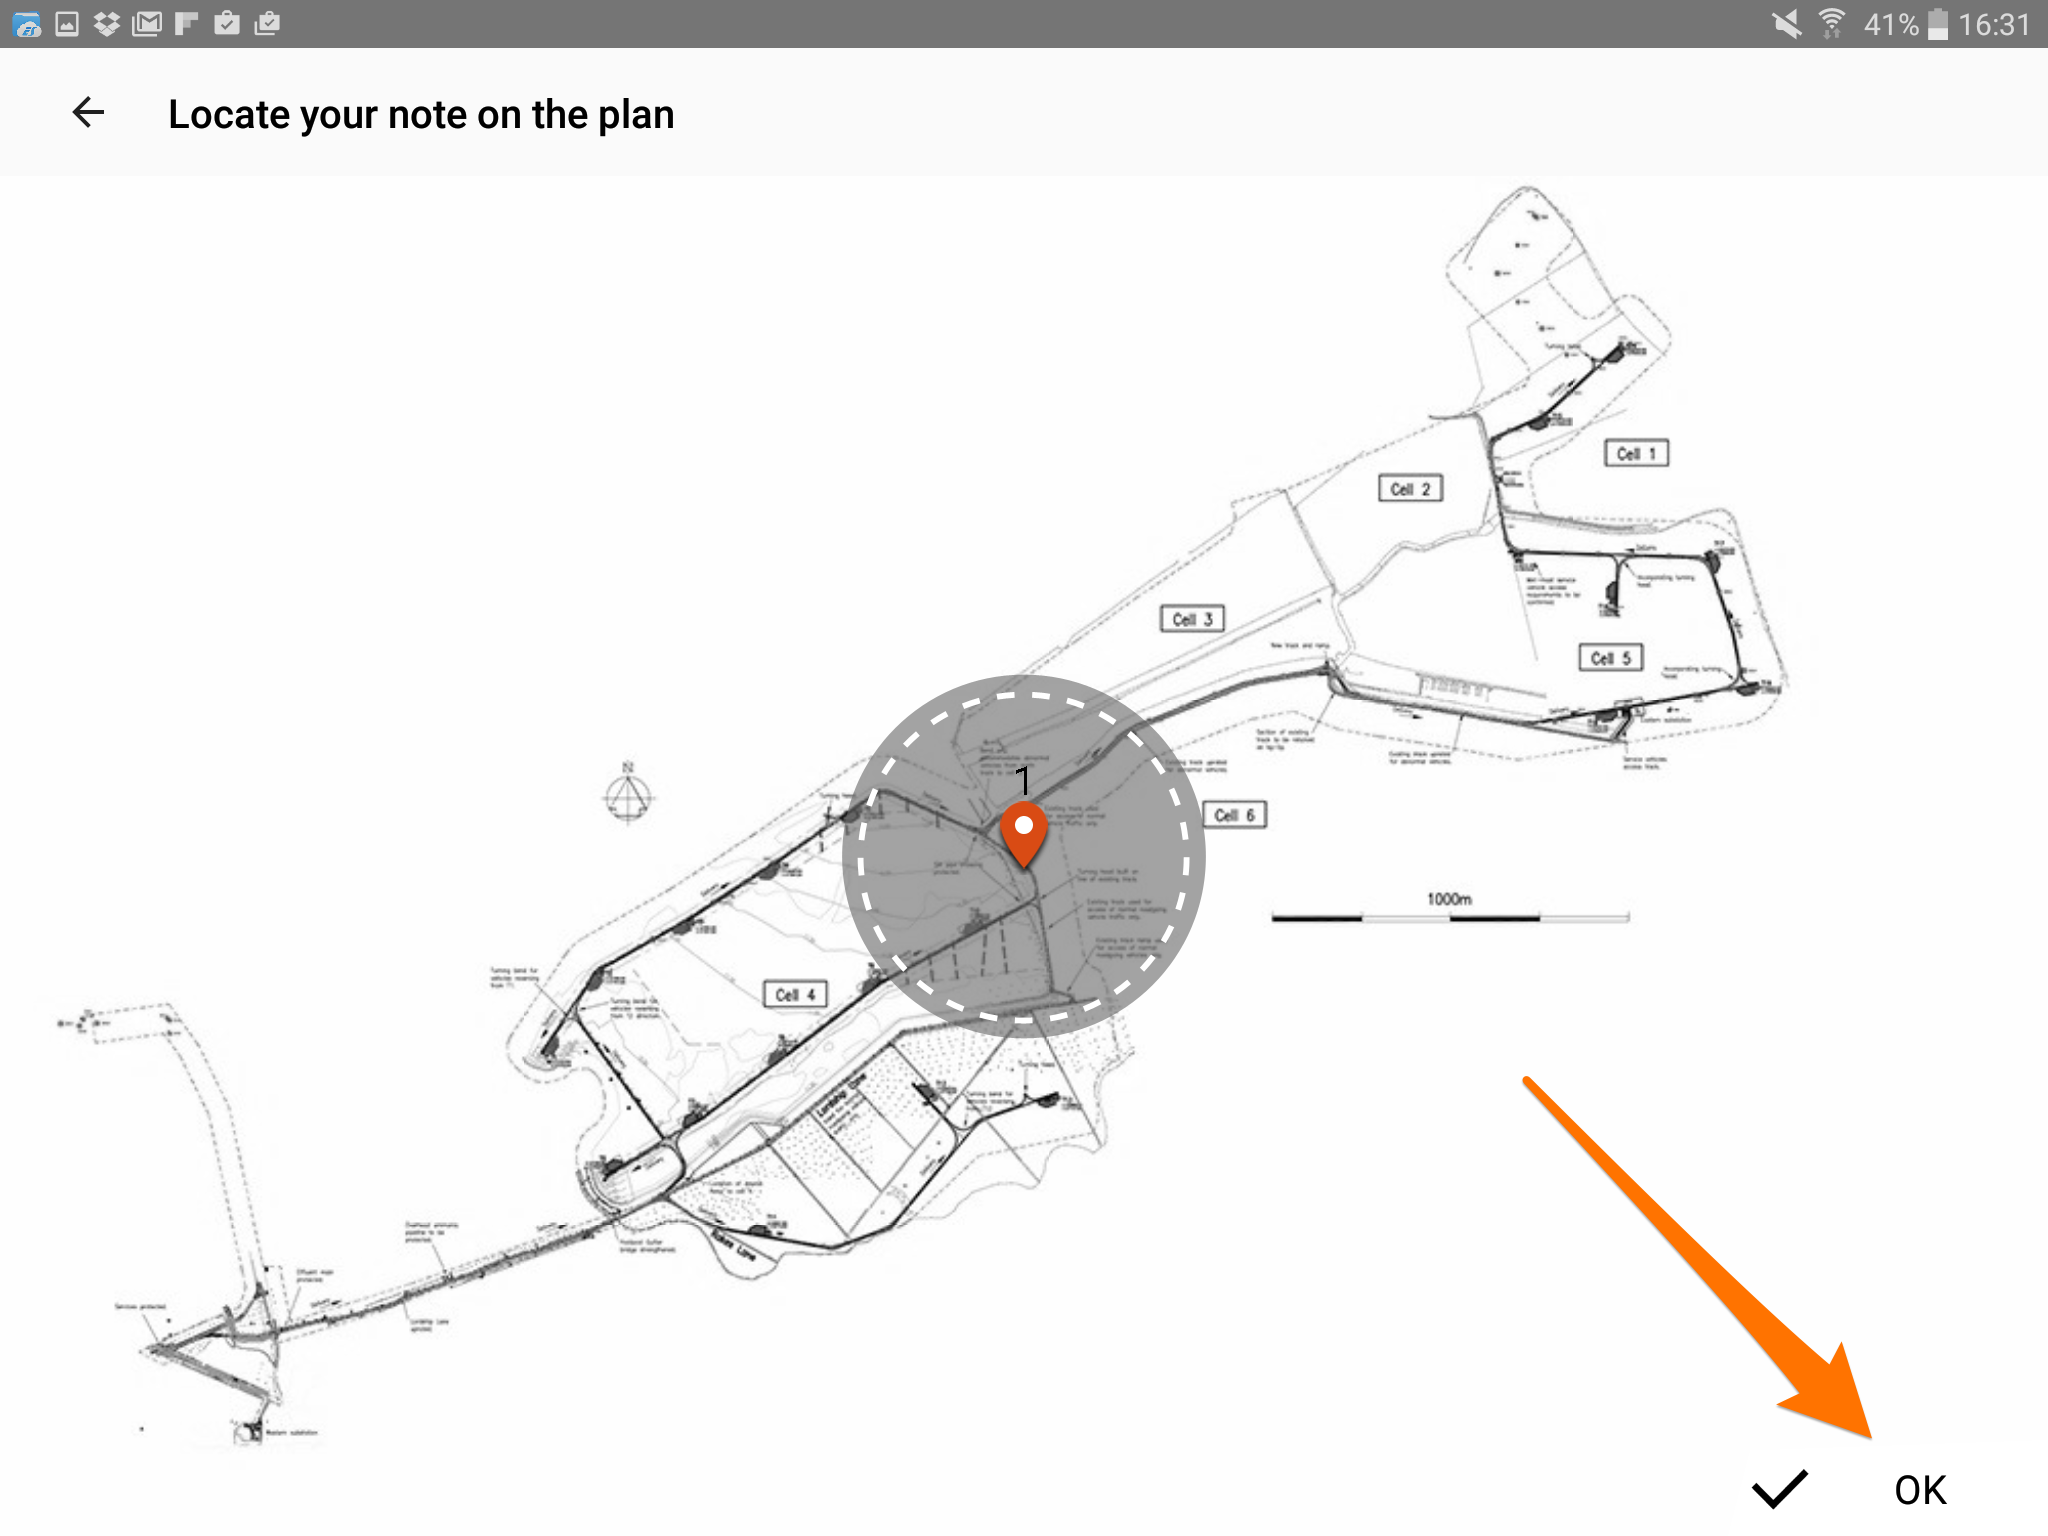
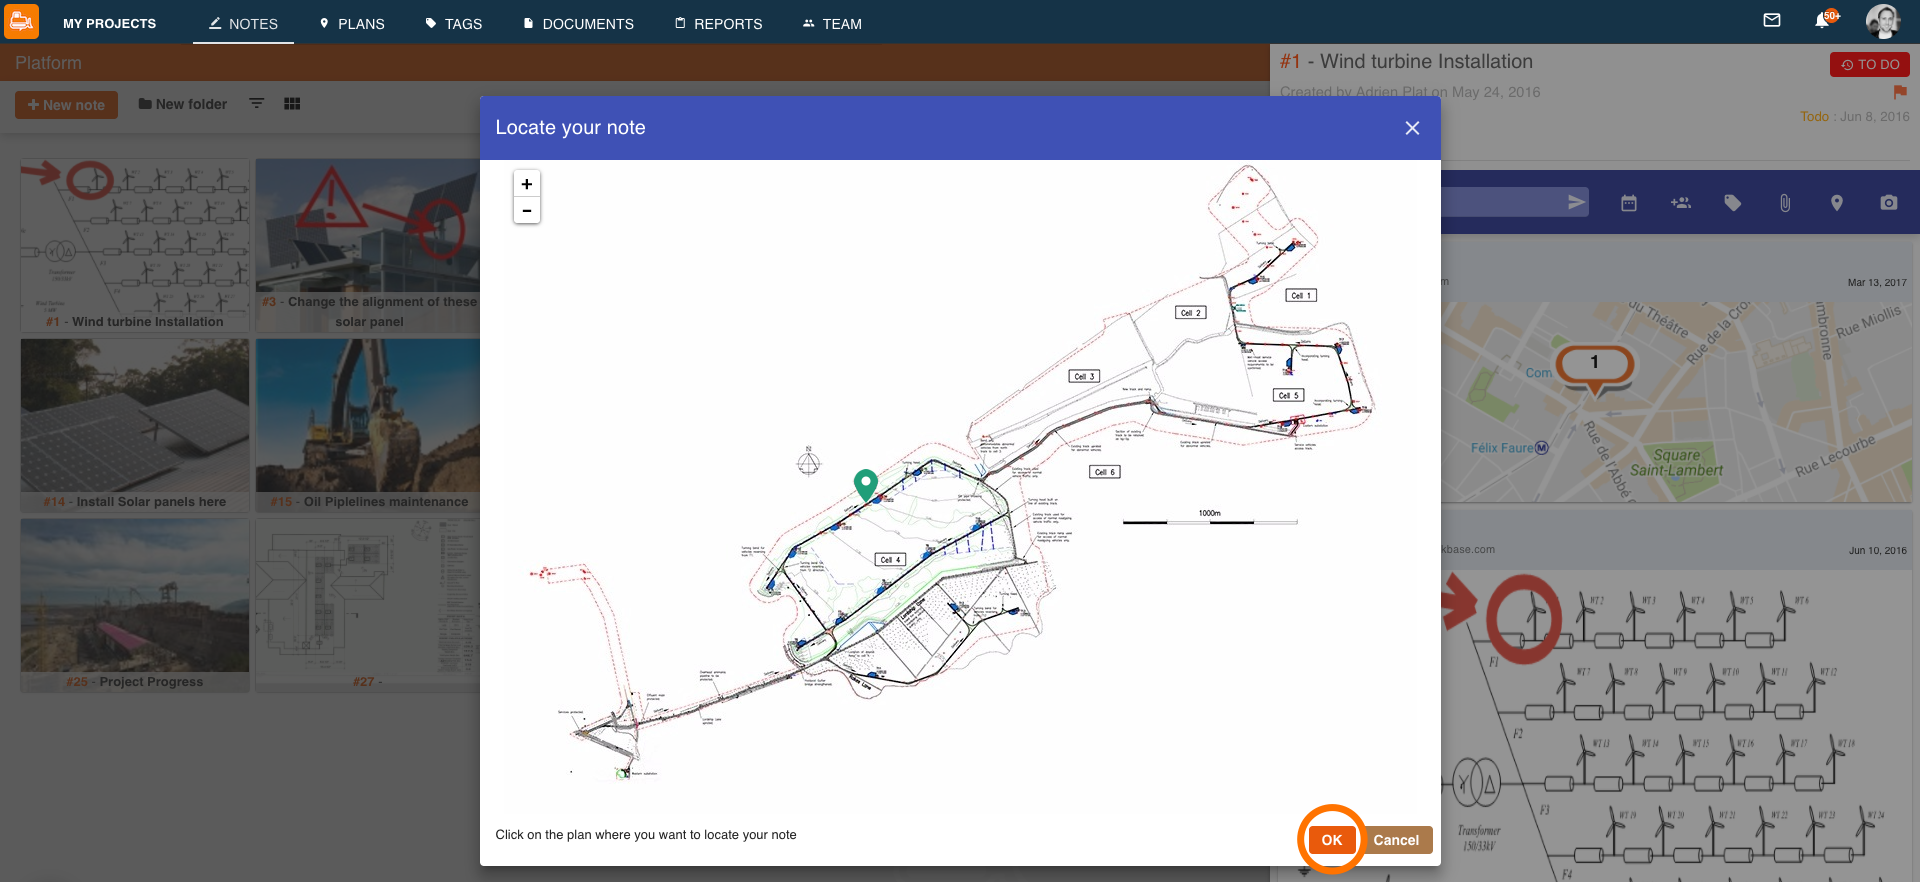
- Place the pin icon on the appropriate area of the plan and tap “OK” to add it
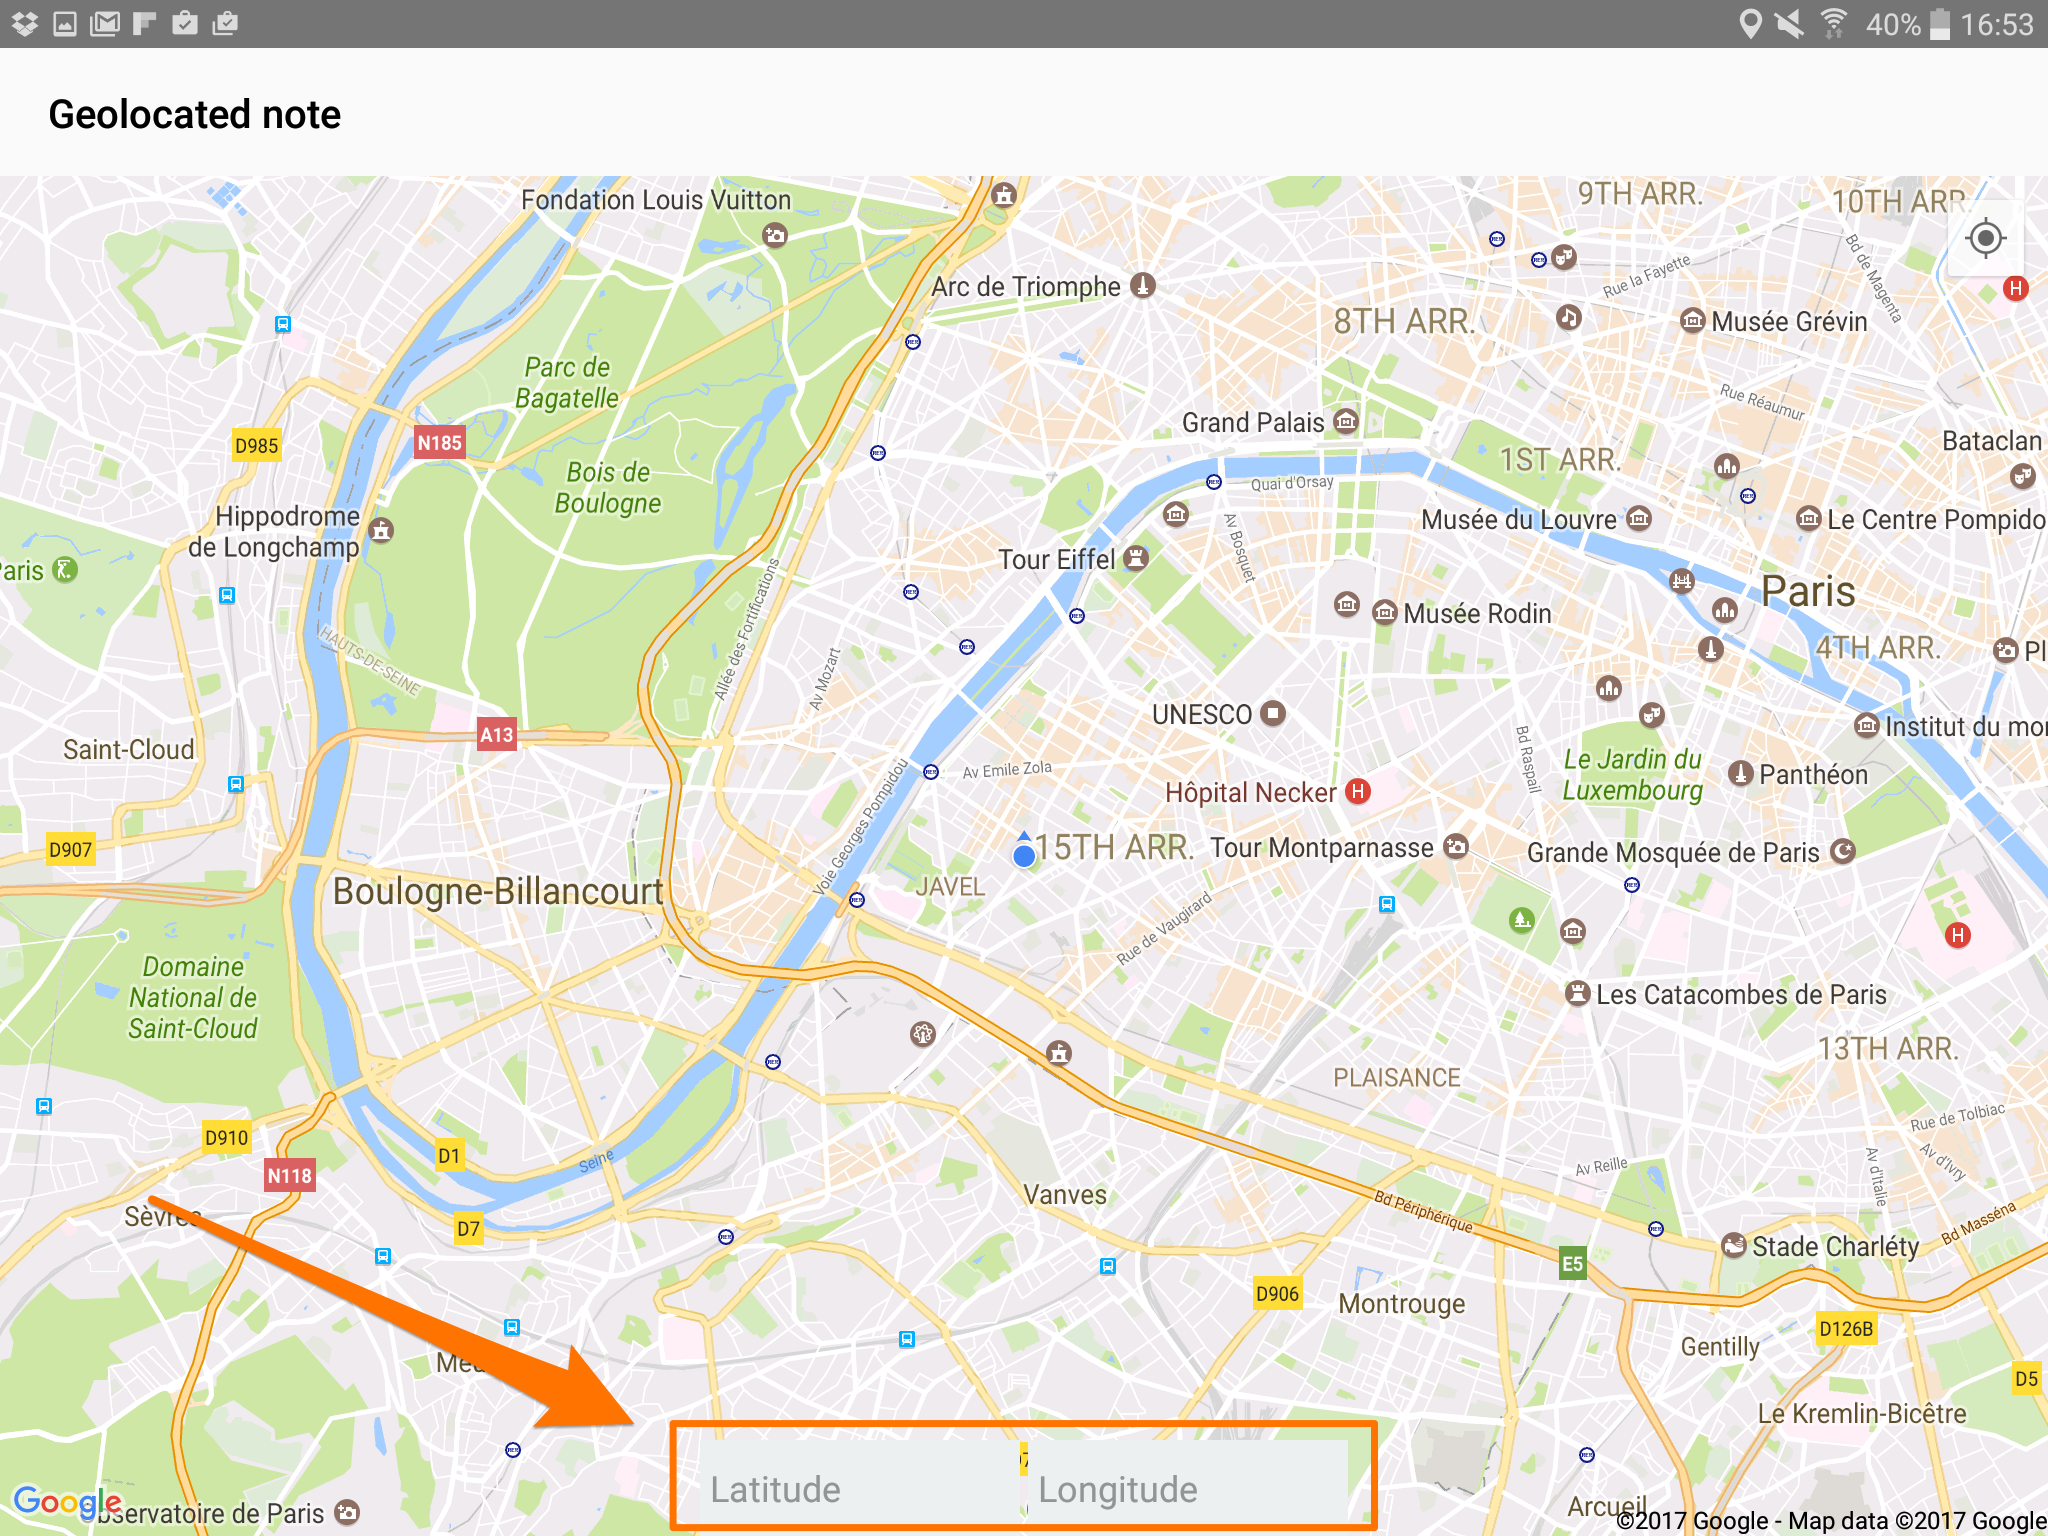
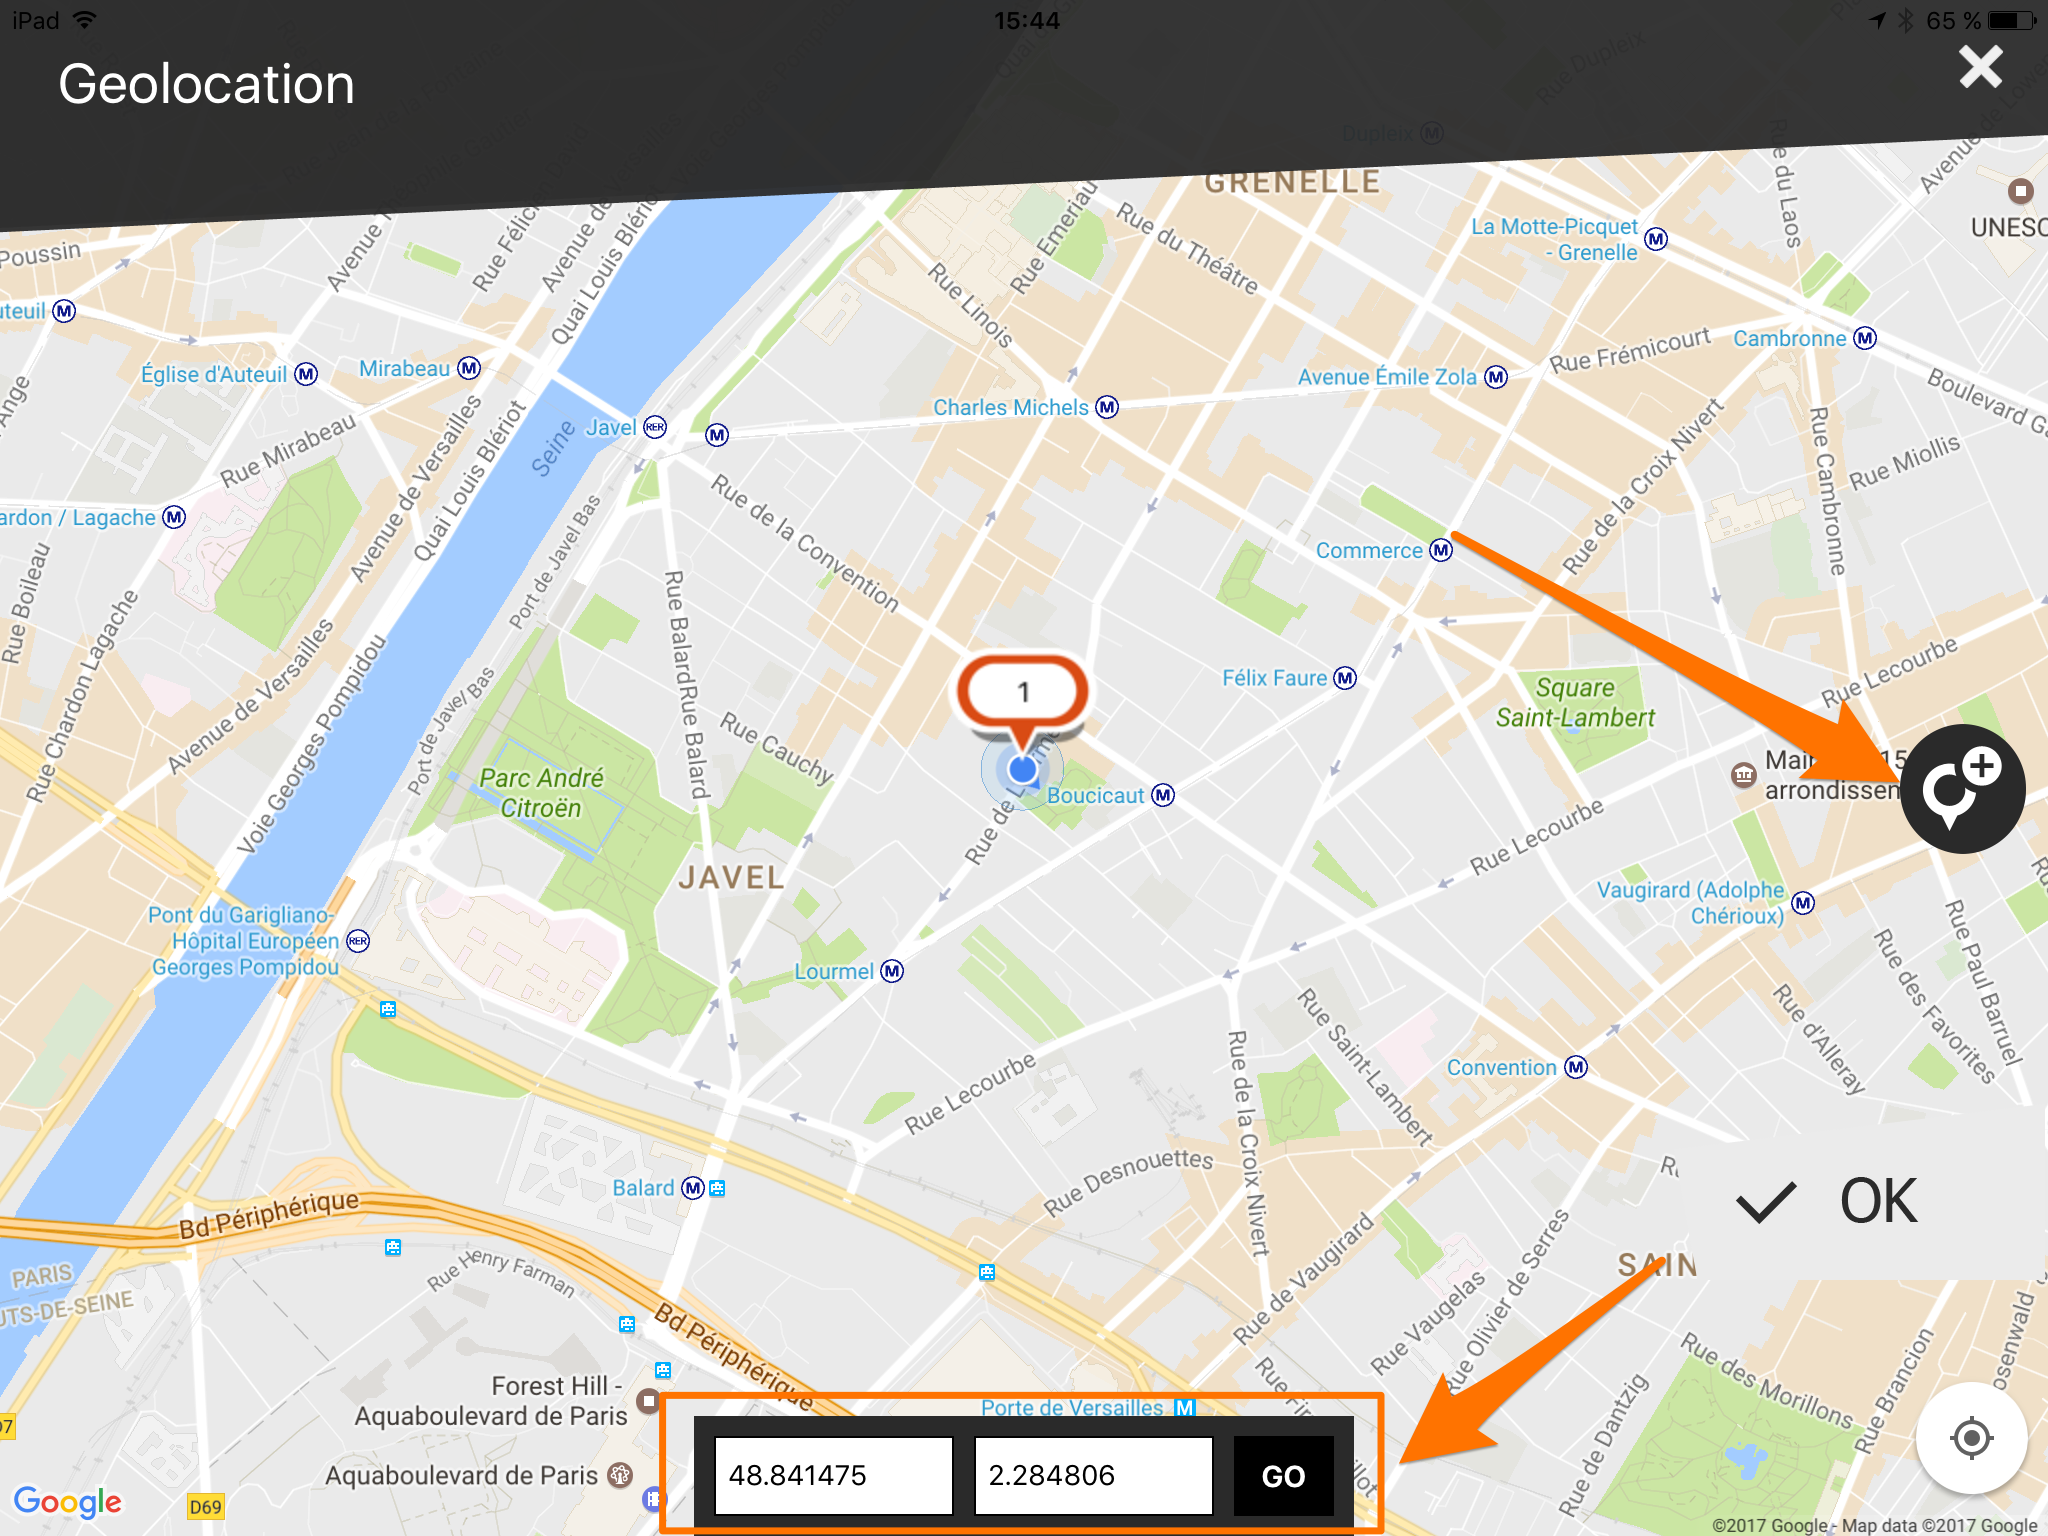
- If you chose “Add a position Geolocated”, you will be redirected to a map. Press the area where you wish to place your pin until the pin appears. You can also manually input the position of the pin by typing the latitude and longitude on the designated areas on the bottom of the screen
- If you chose “Draw on a plan”, select the plan you wish to draw on and edit it as you want
- When you are done editing, simply tap “Validate” on the bottom right corner to add it to your note’s timeline

- Access your note by tapping the note
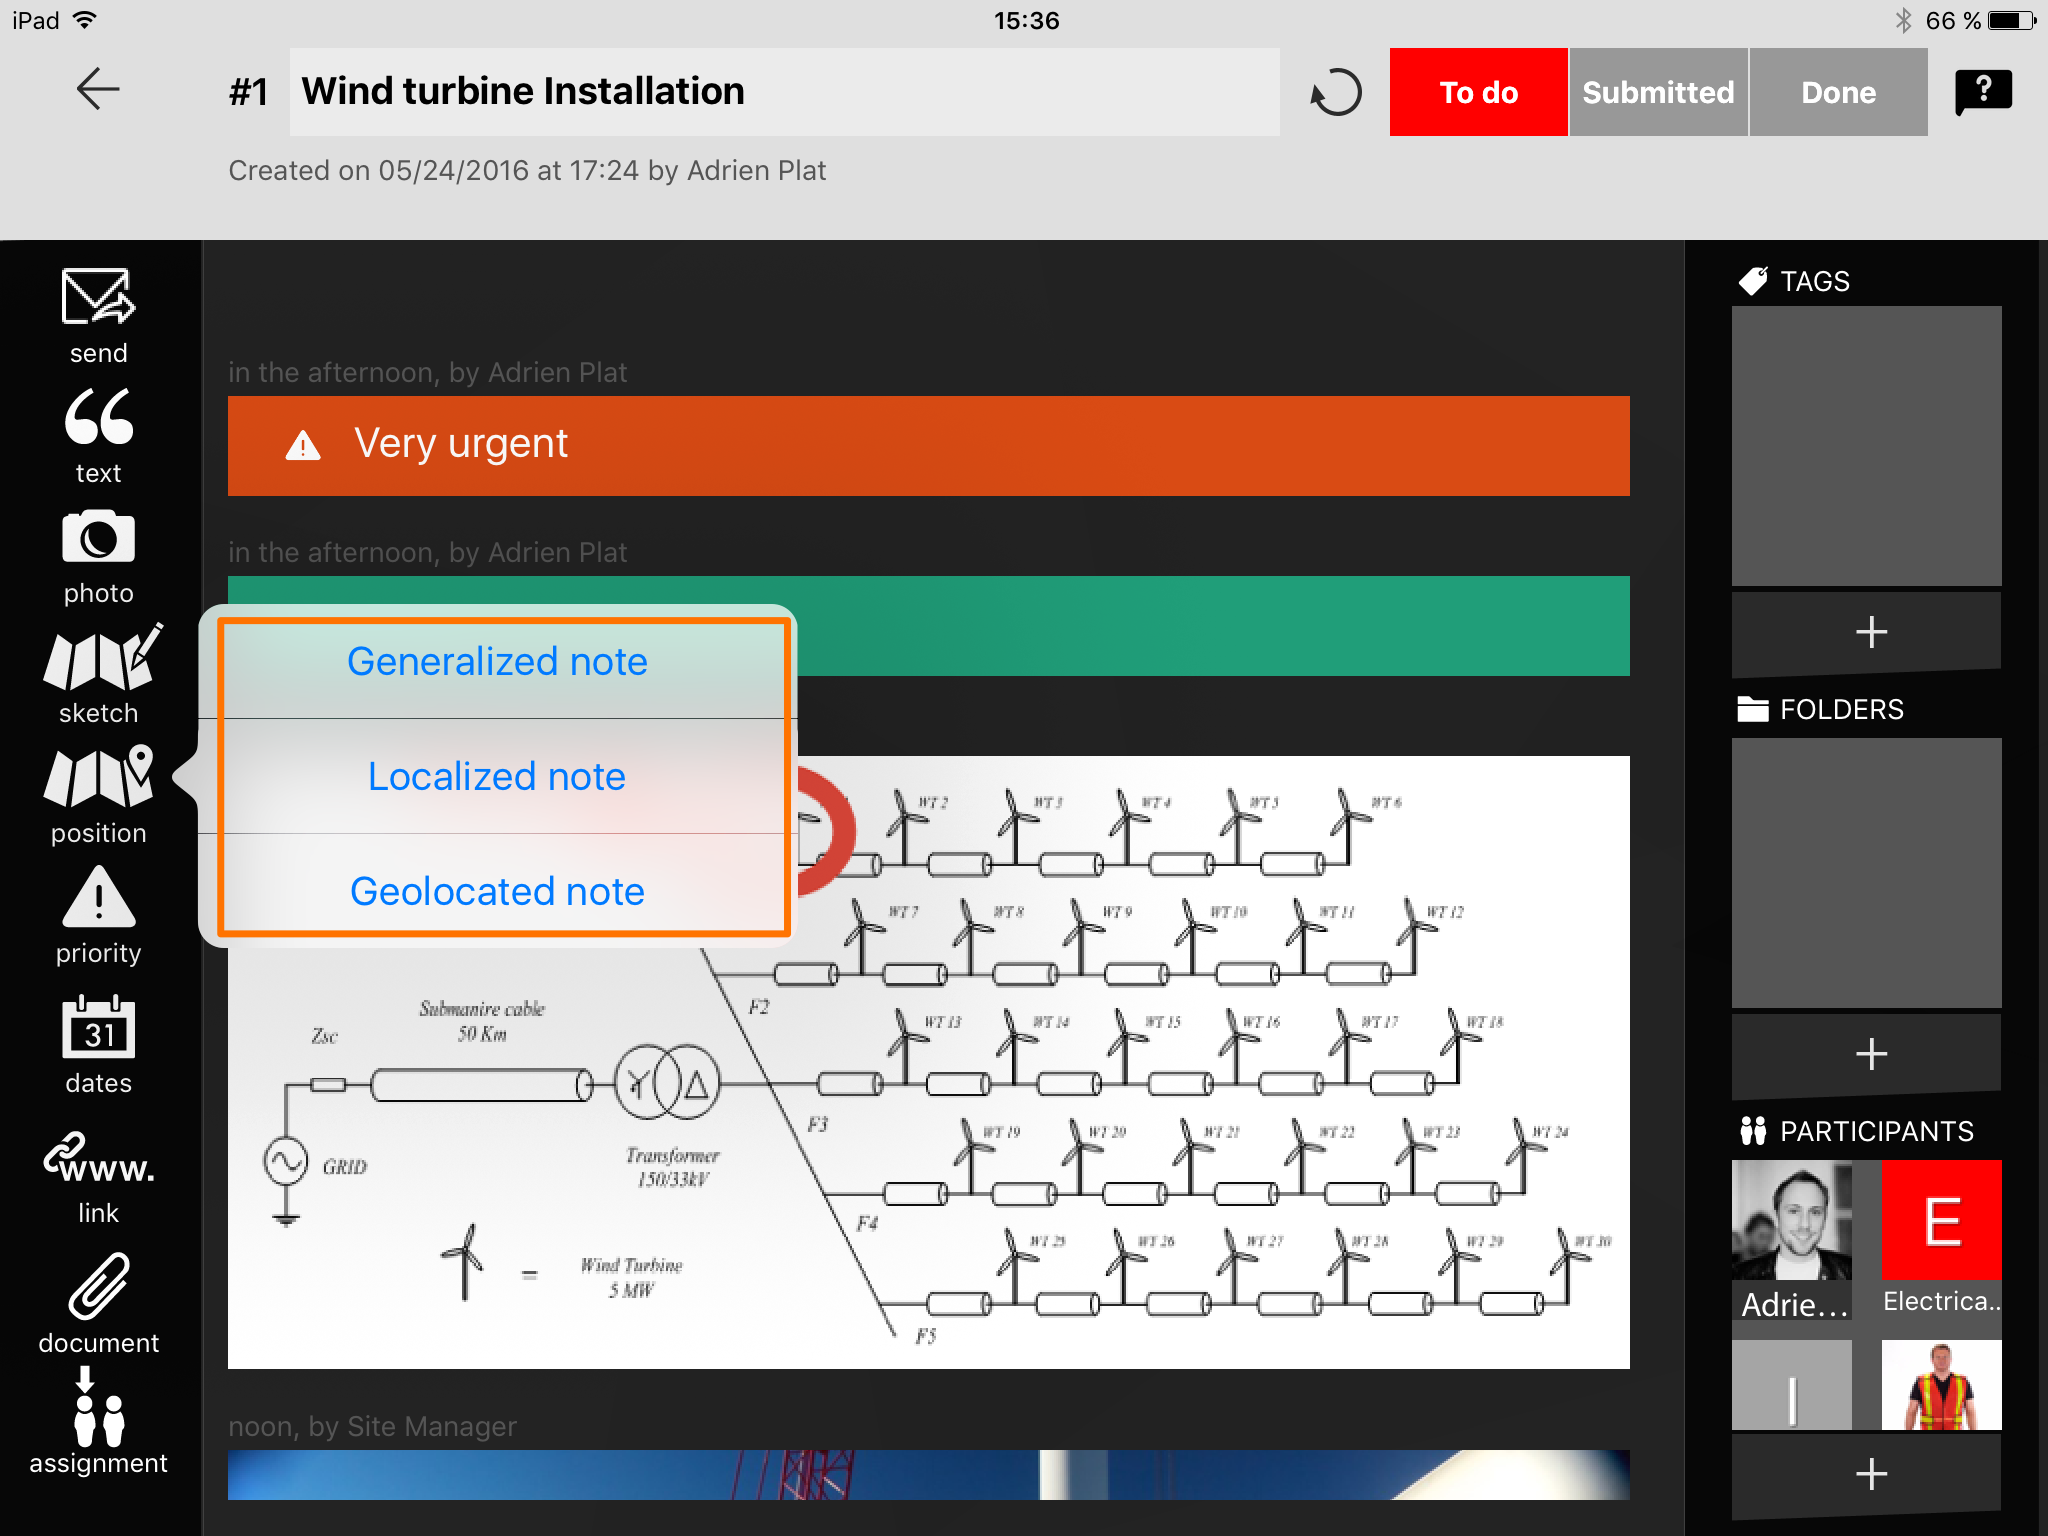
- Tap “position” on the left side of the app
- Select between “Generalized note”, “Localized note” and “Geolocated note”
- Select “Generalized note” if you simply want to add the corresponding plan to your note. Tap your desired plan and then “OK” to finish adding your plan.
- Select “Localized note” to pin your note to a specific area of your plan. Tap your desired plan then select “OK”.
- Tap the black pin+ icon then the area where you wish to pin your note until a pin marker appears and select “OK” to finalize.
- Select “Geolocated note” to place the note where you are located then tap the black pin+ icon on the right side of the app, or select a position on a map then type the desired latitude and longitude and tap “GO” followed by the black pin+ icon to finalize

- Click on the note to open it
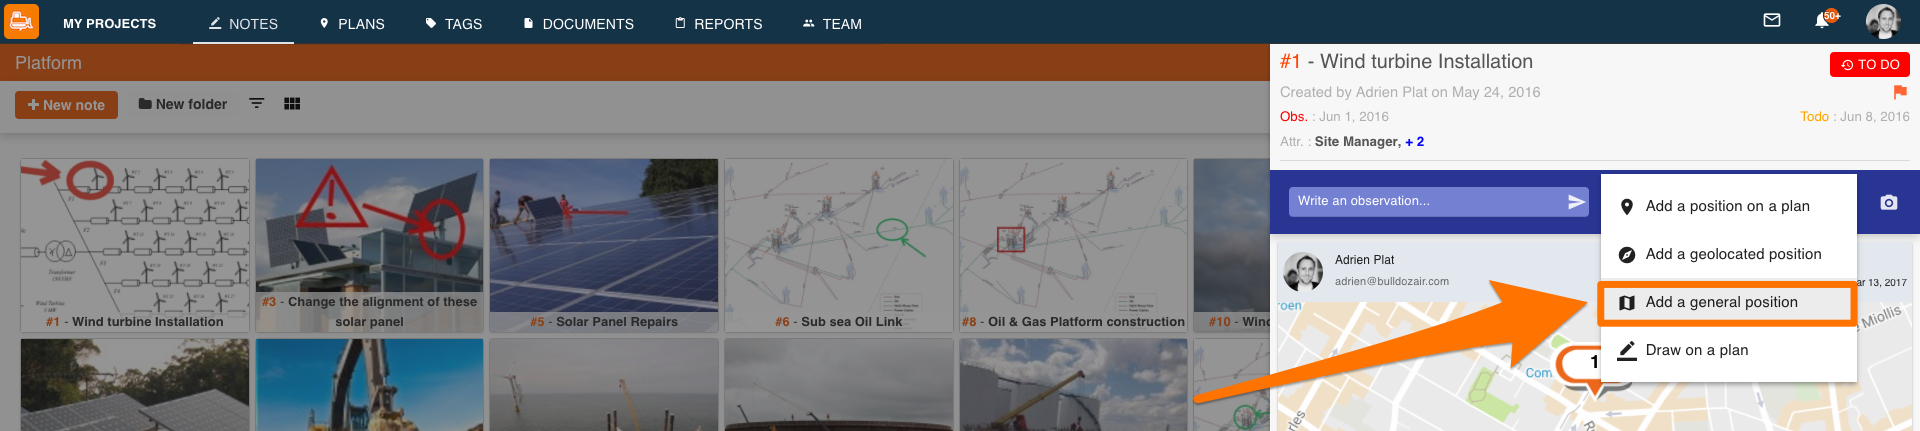
- Select the pin icon, second icon from the right
- Select “Add a position on a plan”
- Select the plan where you want to place your note
- Click on the location where you want to place your note, then select “OK” to place your note
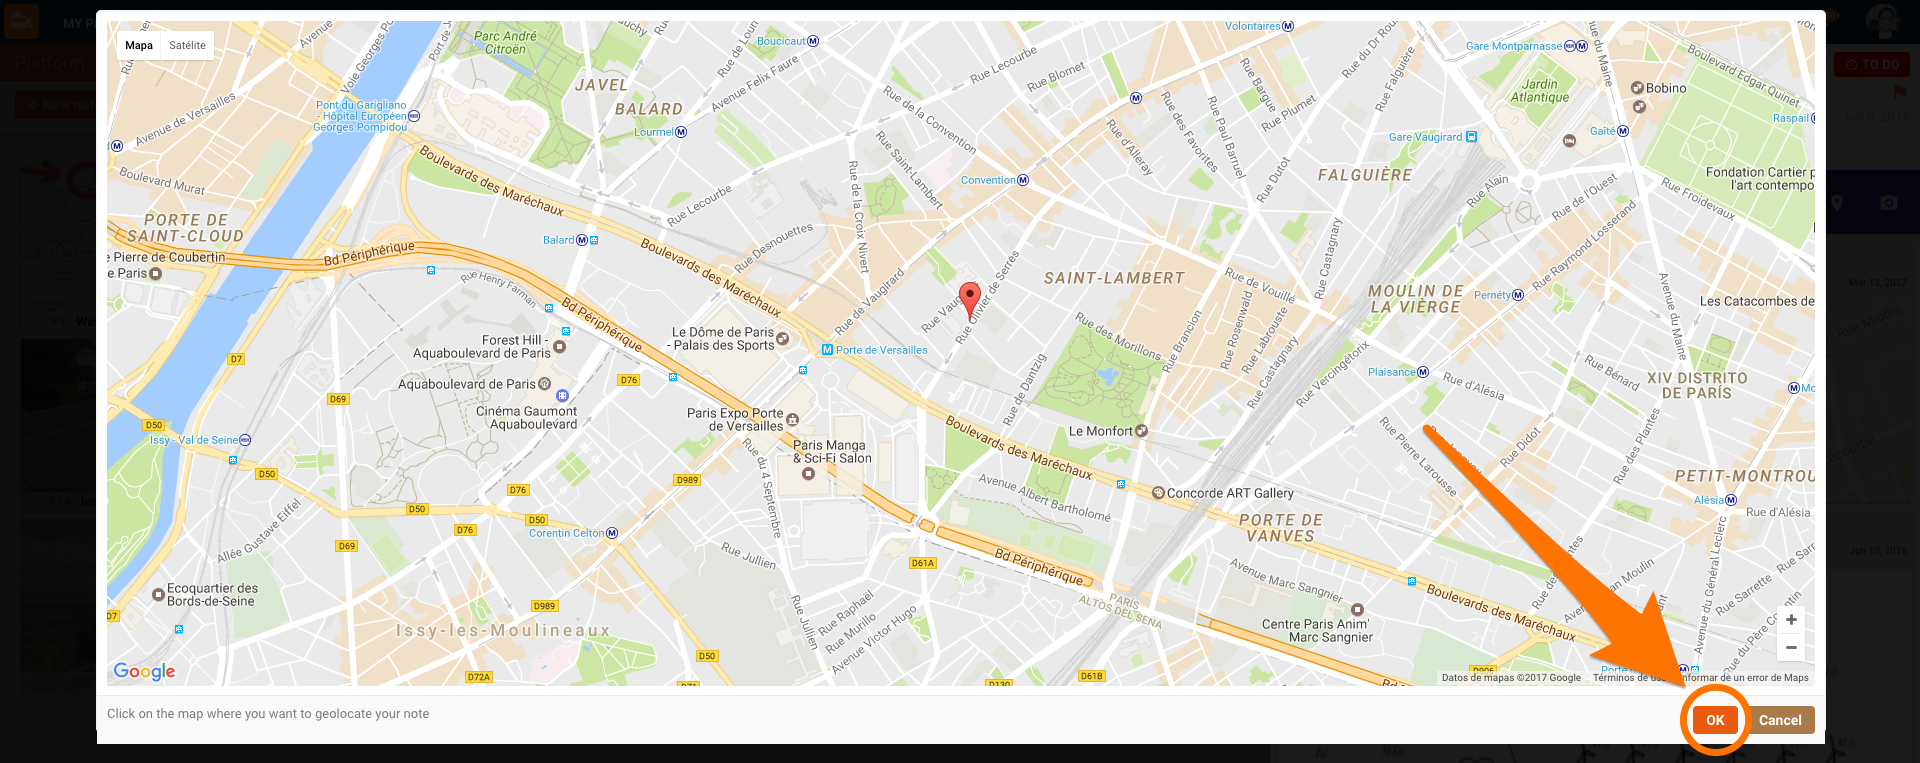
Add a geolocated position on a map
- Select “Add a geolocated position”
- Click on where you want to place your note to add a pin, then select “OK” to place your note
- Select “Add a general position”
- Select the plan to add the position to your timeline
- Select “Draw on a plan”
- Select your plan
- Use the design tools on top to draw on your plan
- Select the checkmark icon on the upper right corner to add it to your timeline
Add a position on a plan

Add your note to a plan with no specific placement

Add a plan with annotations


Share updates by adding new or modified plans to your notes. Always know the location of each task and understand exactly where the progress is being made by positioning your notes on your site’s plans to never lose track of anything again!